Introduction: Pinky - Cheap Computer for Remote Learning
PROJECT SUMMARY: Semi-portable (still needs wall power) cheap computer that's ideal for kids to use for remote learning at home. Its based on the Raspberry Pi computer and a specific small monitor by HP. It can easily be moved around your home to suit the needs of your family and then moved out of the way (like off the kitchen table) when not needed.
This project is an entry in the Anything Goes Contest. Please vote if you like it.
So this is one of those projects that just comes out of nowhere. This was entirely unplanned and unneeded, but a few things all fell into place with the right timing and thus "Pinky" was born. Here's the culminating list of things that led to the project:
- Got several rolls of pink PLA filament (3D printing material) super cheap. Nothing against pink (I actually like it), but I just figured I'd use it mostly for prototyping.
- Black Friday deal on a mechanical keyboard that I've always wanted to try, but the best deal was the pink model. (Turns out I do NOT like mechanical keyboards.)
- I had been trying to get Octoprint to work on my 3D printers, but gave up, so I had a Raspberry Pi computer just sitting unused
- My employer provided work from home kits that came with monitors, but in my home office I have a larger monitor. So this monitor was sitting unused as well.
NOTE1: I realize if you purchased these exact items to replicate this project it would not be cheap, and the money could be much better used to simply buy a older used laptop computer. That said, my intention with this Instructable is to show how to piece together a usable computer with items you may already have on hand and how you can 3D print add-on parts to make it portable and tidy when not being used.
NOTE2: I won't go into setting up the computer itself. There are tonnes of resources (primarily raspberrypi.org) and Instructables (there's even a few entered in this same contest) on setting up Raspberry Pi software.
Supplies
- Small Computer Monitor. Shown here is Model Number 1JS09A4#ABB (HP 24" LED WUXGA IPS Z24N G2)
- Raspberry Pi Computer. Shown here is the Model 4 with 8GB RAM and a clear case from Canakit Amazon Link
- Power Cord (This will power the Raspberry Pi directly from the monitor, no AC/DC converter needed)
- Short Micro HDMI To Standard HDMI Cord Amazon Link
- M6 Allen Head Bolts and 1 Locking M6 Nut
- M3 Screws and Nuts
- Keyboard (wired or wireless)
- Mouse (wired or wireless) Amazon Link to one shown here
- Heavy Duty Double Sided Tape (Gorilla or 3M brand)
- IPA (For cleaning surfaces before applying the tape)
- OPTIONAL, USB Camera, and Wired or Bluetooth Speakers
TOOLS:
- 3D printer with standard PLA filament
- Standard shop tools
Step 1: Carry Handle Overview
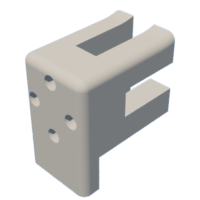
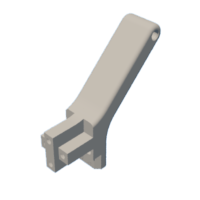
So this monitor has a unique design for the center pedestal. They even sell a small form factor workstation that mounts directly to it (Last Image). I leveraged that in designing a two-piece assembly that clamps the upper portion. The long arm and its angle are designed to balance the weight of the monitor while lifted and also to allow the monitor to meet its full range of motion.
Step 2: Carry Handle Design
All designs were done in Autodesk's Fusion 360 (First Image), sliced in Ultimaker's Cura (Second Image), and printed on Creality printers.
3D prints were done at 0.2mm layers and 50% infill (this is high but you want a high value for the strength).
STL files below.
Step 3: Carry Handle Installation
- Attach the handle to the upper arm part with a bolt and locking nut. Do not over-tighten. The handle should be free to rotate.
- Start the two bolts on the forward facing side of the upper arm part into the rear part, but leave loose (First Image)
- Bring the two parts together to engage the recessed features on the monitor's pedestal (Second Image)
- Install the remaining four bolts from the rear and secure all six bolts (Last Two Images)
NOTE: The front two bolts require an L shaped allen wrench or ball-end driver since the monitor's panel is in the way. Or you can detach the monitor from the base and reattach later.
Step 4: Attaching Computer
The computer is first mated to some simple standoff parts (use the M3 screws and nuts here). This is to allow for proper airflow through the case which has vents both top and bottom. Again these were designed in Fusion 360. Infill for these parts can be low, 5-10% is plenty. Once mounted to the case, use the double sided tape (clean surfaces with IPA first) and secure it to the back panel of the monitor approximately where shown.
NOTE: Think through how the cables will be routed if you're using a different monitor. This placement was primarily oriented for the routing of the USB-C power cable into the side port of this particular monitor. It worked well also to have the USB ports on the computer facing upwards for easy reach to connect peripherals.
STL files below.
Step 5: Cable Routers
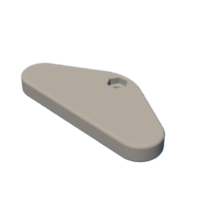
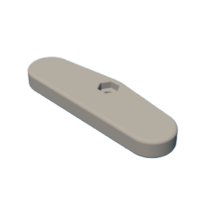
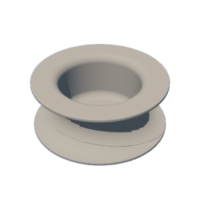
Lastly, the eight cable routers are simple parts, placed as shown, again with the double sided tape, and used as needed to route and secure the various cables and cords.
There is one specially designed part (Second Image) to allow the main plug to be inserted when moving or storing the computer. This keeps it from unraveling.
STL files below.
Step 6: FINISHED
Thanks for taking the time to read through my Instructable. Please send me any questions or comments you might have. I try to answer them all. Stay safe and healthy! Happy Remote Learning!
This project is an entry in the Anything Goes Contest. Please vote if you like it.


