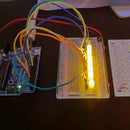
Introduction: Project 4: Potentiometer
Today we are going to see a project of potiontiometer with Arduino. Potiontiometer is actually a device used to control frequencies using voltage division of like Led's and Motors. It's a three terminal resistor. Controllers of ceiling fans in countries like India, Pakistan use potiontiometer for controlling the speed of the fan. We will learn a new thing in programming today which is the "map" which is very important.
Step 1: What You Require?
The requirements for this program are the same as before but with just one new inclusion in it.
- Arduino Uno or Arduino Mega 2560 (They are the beginning boards of Arduino)
- Jumper Wires (Male to Male)
- Led
- Potiontiometer
- Photo Resistor
- Breadboard
- 10 K (more preferable) or 1k resistor
- Cable (To connect board with your Computer for uploading the Program)
- Arduino Program (Downloadable from https://www.arduino.cc/en/Main/Software
Step 2: Build Your Circuit and Know Why Is It Designed So?
In this diagram we attach an LED and an Potiontiometer. In this picture I directly put the shorter rod to the negative powered row. This technique is not so beneficent for this program but if there is some big project you are working on you can save jumper wires by applying this technique. But you have to be very careful not to break the LED.
The Potiontiometer is a three terminal resistor. The middle terminal is connected to Analog Serial, A0. Then the regular GND and 5v power source. The circuit is very easy. The working of the potiontiometer is based on the concept of voltage division.
Step 3: Now for the Software and Understanding It
const int ledPin = 9;
const int potPin = A0;
int value;
void setup(){
pinMode(ledPin, OUTPUT);
pinMode(potPin, INPUT); }
void loop(){
value = analogRead(potPin);
value = map(value, 0, 1023, 0, 255);
analogWrite(ledPin, value);
delay(100); }
Now let's learn the map function.
Re-maps a number from one range to another. That is, a value of fromLow would get mapped to toLow, a value of fromHigh to toHigh, values in-between to values in-between, etc.
You can find a better explanation from Brian Patton a Youtuber focusing on Arduino and tech related stuff. The video link is : https://www.youtube.com/watch?v=SpabOCIOTO4
Step 4: Congratulations!!!
You have successfully made another project on the Arduino. If there are any doubts or questions please feel free to ask. Questions can be asked not only the instructables I posted but also other stuff related to Arduino.


