Introduction: RC Can/Cylinder - Submitted by BayLab for the Instructables Sponsorship Program


A couple years ago, there was a commercial that ran for Chef Boyardee that had a can of soup following a little girl home. You can see it here:
his didn’t really mean anything until I was looking around the m5 Industries website. M5 is a special effects company in San Fransico that specialized in practical effects for movies, shows, and commercials. Most people will know the founder of the company though: Jamie Hyneman, the guy with the mustache on Mythbusters. They had a lot of their work documented (since taken down, since M5 is now defunct because of Mythbusters). But I noticed some pictures of the can from the commercial without the label on it. It was really interesting to me since the design they had come up with was really cool. So I built one.
his didn’t really mean anything until I was looking around the m5 Industries website. M5 is a special effects company in San Fransico that specialized in practical effects for movies, shows, and commercials. Most people will know the founder of the company though: Jamie Hyneman, the guy with the mustache on Mythbusters. They had a lot of their work documented (since taken down, since M5 is now defunct because of Mythbusters). But I noticed some pictures of the can from the commercial without the label on it. It was really interesting to me since the design they had come up with was really cool. So I built one.
Step 1: The Original Design


I found some pictures of the can from the commercial with the label off. Instead of just making a cylinder with 2 independant wheels, it was actually a clear tube with a small platform that held the electronics and motors and rotated the can around itself. To steer, it used a small gyroscope made using a flywheel. The other clues to it's operation were from the patent that Jamie Hyneman filed. I also emailed him and asked him about steering, and he responded, telling me that they used a flywheel.
Step 2: Making the Can


To make the can, I wanted something transparent like the pictures I had seen. I found a company that would send free samples of a foot of their various plastic tubes. I don't think they do this anymore, so you will need to find another source or just buy it. McMaster Carr is a good place to start. I cut up a soup can with tin snips to make the ends. Since the enclosure rotates around the electronics, I used hot glue to attach a gear to one end of the can and punched a hole in some cardboard to make the worlds cheapest bearing. Yes, I promise this actually worked. If you want to make a better version, 3D printing those parts would work great.
Step 3: Electronics


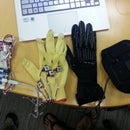
I wanted to make this remote controlled, so I ripped out the guts from an RC car and taped it to a small piece of plexiglass I dremeled. The battery was held on with a rubber band and the axle that the entire thing rotated on was also taped to the plexiglass. The axle was actually part of paint roller that I destroyed. Yes, the motor held on with duct tape. Shut up, it worked.
Step 4: Putting It All Together


Here's what the final product looked like when all assembled.
Step 5: Demo
Proof that it worked:
I really like the concept of how this thing moves around, and I think it would be really neat for other projects as well, especially when built with parts costing more than about $3 total.
I really like the concept of how this thing moves around, and I think it would be really neat for other projects as well, especially when built with parts costing more than about $3 total.