Introduction: RFduino Compass
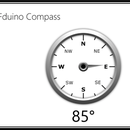
The RFduino compass is a fully functional stand-alone compass which also transmits the current heading via Bluetooth low energy technology to phones, tablets, personal computers or any other equipped device. The RFduino compass is known as a Bluetooth Smart device.
Step 1: Material Needed
While other combinations of materials may be used, the ones used for this project and shown here are:
- RFD22102 RFduino DIP BLE & ARM CPU
- RFD22121 USB Shield
- RFD22128 CR2032 Coin Battery Shield (Optional)
- LSM303 (such as Adafruit ID: 1120)
- OLED Display (such as Adafruit ID:938)
- Mini-Breadboard
- Solderless Breadboard Wires
Step 2: Setting Up the Software
- Install the Arduino and RFduino software following the instructions found here: http://www.arduino.cc/en/Main/Software and here: http://www.arduino.cc/en/Main/Software
- Download the Compass sketch and supporting libraries from https://github.com/RFduino/RFduinoApps
- Use the Arduino IDE to install the sketch on the RFduino.
Step 3: Preparing the Hardware
- Place the battery shield, OLED display and LSM303 on the mini-breadboard.
- Place the RFduino DIP BLE board into the battery shield.
- Using jumper wires, connect the components. Connect the OLED display and LSM303 ground and VCC terminals to the corresponding 3.3V and ground headers on the battery shield. Connect the SCL lines of the OLED display and LSM303 to GPIO5 on the RFduino as well as the SDA lines to GPIO6.
Step 4: Using the Compass
Turn on the compass using the toggle switch on the battery shield. Keeping the compass level, it can be pointed in any direction and that direction will be shown on the OLED display. Using the associated Windows 8.1 application, a command to calibrate the compass can be sent to initiate a calibration. To calibrate the compass, while keeping the compass level, slowly spin the compass in complete circles multiple times. The display will count down from 10 such that you know how much time remains during the calibration operation. Placing the compass on a turntable, as shown, makes the spinning much easier during calibration.
A more complex sketch can be developed which takes into account the orientation of the compass such that it doesn’t need to be kept level. More complex calibration routines can also be developed to provide better accuracy from the LSM303.


