Introduction: RIG CELL LITE INTRO: Digital I/O


The digital inputs and outputs (digital I/O) on the RIG CELL LITE will allow you to connect it to sensors, actuators, and other ICs. Learning how to use them will allow you to use the RIG CELL LITE to do some really useful things, such as reading switch inputs, lighting indicators, and controlling relay outputs.
Digital signals
Unlike analog signals, which may take on any value within a range of values, digital signals have two distinct values: HIGH (1) or LOW (0). You use digital signals in situations, where the input or output will have one of those two values. For example, one way that you might use a digital signal is to turn an LED on or off.
for this instructables, we will try implement a button as the input, and a LED as the output.
Parts Needed
You will need the following parts:
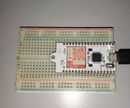
- 1x Breadboard
- 1x Rig Cell Lite
- 1x LED
- 5x Jumper Wires
- 2x 220 ohm resistors
- 1x push button
Step 1: SETTING UP THE CIRCUIT (HARDWARE)

Simple connection on the breadboard, we could attach the LED to an output pin of the Arduino.
- Attach the jumper wire from the RIG CELL LITE pin connector D8 to the positive polarity pin of the LED as shown.attach another jumper wire from the RIG CELL LITE pin GND to the negative polarity pin of the LED. the circuitit will not do anything until you have uploaded the code to the board, which is done at a later stage.
Step 2: THE DIGITAL I/O (CODE)

We will use the arduino IDE software to burn the coding in, based on our previous example on setting up the environment for the coding writing. https://www.instructables.com/id/RIG-CELL-LITE-INT... here are the link for the arduino IDE software set up.
I've attached the code here.
- All that you have to do is open it with the arduino sketch program.
- connect your rig cell lite with the computer.
- make sure your rig cell lite is detected by your computer
- set your board to arduino nano in the board manager option.
- click upload on the ide software.
Attachments

Step 3: RESULTS :D
After complete upload the digital_IO.ino code on the RIG CELL LITE, try push the button. if everything in order, as soon as you push the push button, you will see the led will light up. as you remove your finger from pushing the button, the led will turn off.
If it isn’t, make sure you have assembled the circuit correctly and verified and uploaded the code to your board, or see the troubleshooting section.

Participated in the
First Time Author Contest 2018

Participated in the
Epilog Challenge 9


