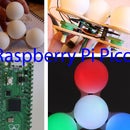
Introduction: Raspberry Pi PICO LCD (not I2C)
If you have purchased the book (Get started with MicroPython on Raspberry Pi Pico) you will note that there really isn't much information on driving LCD's In fact the book only focuses on the sparkfun I2C LCD. So in this instructable I would like to look at connecting and driving a standard LCD using the Pico.
Supplies
Raspberry Pi Pico running MicroPython.
Standard LCD for example 20 * 4 or 16 * 2
Wire to connect up.
proto board
Step 1: Binary, Ones and Zero's.
There are only 10 types of people in the world – those who understand binary, and those who don’t.
So lets look at the LCD. Most simple LCD's are driven by a Hitachi HD44780 LCD controller and have the following connections.
- Ground
- VCC +3.3 to +5V (typical)
- Contrast adjustment (VO) This is an analogue input.
- Register Select (RS). RS=0: Command, RS=1: Data
- Read/Write (R/W). R/W=0: Write, R/W=1: Read, Not used connected to ground.
- Clock (Enable). Falling edge triggered
- Bit 0 (Not used in 4-bit operation)
- Bit 1 (Not used in 4-bit operation)
- Bit 2 (Not used in 4-bit operation)
- Bit 3 (Not used in 4-bit operation)
- Bit 4
- Bit 5
- Bit 6
- Bit 7
- Backlight Anode (+) (If applicable)
- Backlight Cathode (-) (If applicable)
So that might look like a lot of connections but you only ned 4 data bits and the E and RS pins. Not forgetting power.
Step 2: Lets Start on an Arduino.
So this might seem like a strange step but the Arduino IDE so so simple to use and the libraries make programming a cinch.
#include <Time.h>
#include

const int rs = 3, en = 2, d4 = 4, d5 = 5, d6 = 6, d7 = 7;
LiquidCrystal lcd(rs, en, d4, d5, d6, d7);

void setup()
{
  lcd.begin(20, 4);
  lcd.print("Hello");
}

void loop() {
}
However the library in this case doesn't help me understand what is happening in the background, so I decided to write my own program. (once I had proved the LCD worked) The wiki page was really useful for this bit. It explains that the LCD needs to be initialised as it could be in one of three states on start up and at this point its worth saying that the Register Select (RS) is the pin which is used to tell the LCD whether the data is a command or character.
So to start with you need to clear the RS pin (set to zero) Then you turn on/off the 4 data lines to the required code then you clock the data in using the Enable Pin. The data you need to send is as follows.
- 0b0011 (D7-D4) Function Set with 8 bit interface.
- 0b0011 (D7-D4) Function Set with 8 bit interface.
- 0b0011 (D7-D4) Function Set with 8 bit interface.
- 0b0010 (D7-D4) Function Set with 4 bit interface.
Once you have sent those 4 commands you can then send 8 bit binary numbers which need to be sent in two 4 bits nibbles. Certain delays should be maintained as per the wiki page but that's not to hard to achieve. I wrote a function to pulse the Enable pin and a function to send 4 bits to the LCD and then another to send 8 bits to the LCD (in two nibbles)
#include <Time.h>

const int e = 2, rs = 3, d4 = 4, d5 = 5, d6 = 6, d7 = 7;
int BinNum;

void setup()
{
  pinMode(e, OUTPUT);
  pinMode(rs, OUTPUT);
  pinMode(d4, OUTPUT);
  pinMode(d5, OUTPUT);
  pinMode(d6, OUTPUT);
  pinMode(d7, OUTPUT);
  setUpLCD();
  digitalWrite(rs, HIGH);
  delay(5);
  send2LCD8(0b01001000);//H
  send2LCD8(0b01100101);//e
  send2LCD8(0b01101100);//l
  send2LCD8(0b01101100);//l
  send2LCD8(0b01101111);//o
}

void loop(){
}

void setUpLCD()
{
  digitalWrite(rs, LOW);
  delay(5);
  send2LCD4(0b0011);//send 8bit operation command
  send2LCD4(0b0011);//send 8bit operation command
  send2LCD4(0b0011);//send 8bit operation command
  send2LCD4(0b0010);//send 4bit operation command
  send2LCD8(0b00101000);//Functin set, 8 bit
  send2LCD8(0b00001100);//Display ON, Cursor OFF, Cursor NOT Blinking
  send2LCD8(0b00000110);//Entry mode, incremental,
  send2LCD8(0b00000001);//clear screen
}
void pulseE()
{
  digitalWrite(e, HIGH);
  delay(2);
  digitalWrite(e, LOW);
  delay(5);
}
void send2LCD8(int BinNum)
{
  digitalWrite(d4, (BinNum & 0b00010000) >> 4);
  digitalWrite(d5, (BinNum & 0b00100000) >> 5);
  digitalWrite(d6, (BinNum & 0b01000000) >> 6);
  digitalWrite(d7, (BinNum & 0b10000000) >> 7);
  pulseE();
  digitalWrite(d4, (BinNum & 0b00000001) >> 0);
  digitalWrite(d5, (BinNum & 0b00000010) >> 1);
  digitalWrite(d6, (BinNum & 0b00000100) >> 2);
  digitalWrite(d7, (BinNum & 0b00001000) >> 3);
  pulseE();
}
void send2LCD4(int BinNum)
{
  digitalWrite(d4, (BinNum & 0b00000001) >> 0);
  digitalWrite(d5, (BinNum & 0b00000010) >> 1);
  digitalWrite(d6, (BinNum & 0b00000100) >> 2);
  digitalWrite(d7, (BinNum & 0b00001000) >> 3);
  pulseE();
}
Step 3: Arduino Program With All the Bits!
So before I moved onto the Pico I added a few more bits to the Arduino program. If you look at the Wiki page you will see there are quite a few commands, so I added a few more functions to test them. These included clearing the screen, returning home, and moving the cursor left or right. And lastly I made a function with allowed you to define a line and position you wanted the text to start on.
void whichLinePos(int number, int pos)
{
  int b = 0;
  if (number == 1){
    b = 0;
  }
  if (number == 2){
    b = 40;
  }
  if (number == 3){
    b = 20;
  }
  if (number == 4){
    b = 60;
  }
  returnHome();
  for (int x = 0; x < b+(pos-1); x++)
  {
    moveCursorR();
  }
}

void returnHome()
{
  digitalWrite(rs, LOW);
  delay(5);
  send2LCD8(0b00000010);
  digitalWrite(rs, HIGH);
  delay(5);
}
void clearScreen()
{
  digitalWrite(rs, LOW);
  delay(5);
  send2LCD8(0b00000001);
  digitalWrite(rs, HIGH);
  delay(5);
}
void cursorOff()
{
  digitalWrite(rs, LOW);
  delay(5);
  send2LCD8(0b00001100);
  digitalWrite(rs, HIGH);
  delay(5);
}
void moveCursorR()
{
  digitalWrite(rs, LOW);
  delay(5);
  send2LCD8(0b00010100);
  digitalWrite(rs, HIGH);
  delay(5);
}
void moveCursorL()
{
  digitalWrite(rs, LOW);
  delay(5);
  send2LCD8(0b00010000);
  digitalWrite(rs, HIGH);
  delay(5);
}
Step 4: MicroPython on the Pico
So now I had a good understanding of the commands for the LCD it was time to translate the program over to MicroPython. Luckily there are lots of similarities so it wasn't that hard to do and very quickly I had written the whole program. BUT did it work? Initially nothing happened and I thought this was due to the 3.3 Voltage logic levels coming from the Pico, so I quickly added logic level converters on all the pins, the LCD had to be powered by 5 Volts. However this didn't work and the LCD still did nothing.
After a quick coffee I had a look at the code again and realised I had made an error! when I send the binary number to the send2LCD4 function it uses an "&" to isolate the required bit then file rotates the required bit to place it at the LSB then it sets the required pin either high or low depending on the value. I had used the word "and" (is statement one and statements two correct) and not the "&" (bitwise and). Anyway once corrected the LCD jumped into life!
I then wondered if I needed the logic level converters? so I removed them and gave it another go and yes the LCD still works on 3.3V logic levels. (the LCD still needed 5Volts power)
Anyway the below program is the simple Hello World! LCD program.
import machine
import utime

rs = machine.Pin(0,machine.Pin.OUT)
e = machine.Pin(1,machine.Pin.OUT)
d4 = machine.Pin(2,machine.Pin.OUT)
d5 = machine.Pin(3,machine.Pin.OUT)
d6 = machine.Pin(4,machine.Pin.OUT)
d7 = machine.Pin(5,machine.Pin.OUT)

def pulseE():
    e.value(1)
    utime.sleep_us(40)
    e.value(0)
    utime.sleep_us(40)
def send2LCD4(BinNum):
    d4.value((BinNum & 0b00000001) >>0)
    d5.value((BinNum & 0b00000010) >>1)
    d6.value((BinNum & 0b00000100) >>2)
    d7.value((BinNum & 0b00001000) >>3)
    pulseE()
def send2LCD8(BinNum):
    d4.value((BinNum & 0b00010000) >>4)
    d5.value((BinNum & 0b00100000) >>5)
    d6.value((BinNum & 0b01000000) >>6)
    d7.value((BinNum & 0b10000000) >>7)
    pulseE()
    d4.value((BinNum & 0b00000001) >>0)
    d5.value((BinNum & 0b00000010) >>1)
    d6.value((BinNum & 0b00000100) >>2)
    d7.value((BinNum & 0b00001000) >>3)
    pulseE()
def setUpLCD():
    rs.value(0)
    send2LCD4(0b0011)#8 bit
    send2LCD4(0b0011)#8 bit
    send2LCD4(0b0011)#8 bit
    send2LCD4(0b0010)#4 bit
    send2LCD8(0b00101000)#4 bit,2 lines?,5*8 bots
    send2LCD8(0b00001100)#lcd on, blink off, cursor off.
    send2LCD8(0b00000110)#increment cursor, no display shift
    send2LCD8(0b00000001)#clear screen
    utime.sleep_ms(2)#clear screen needs a long delay

setUpLCD()
rs.value(1)
for x in 'Hello World!':
    send2LCD8(ord(x))
Step 5: Full Program With Functions
The full program is below and gives a good indication what is possible. However you do need to be careful and some command will effect other options. For example
Display on/off control also has the configuration for cursor on/off, and blink of cursor position character.
I have slowed the display down so you can see the text writing to the screen.
- Cursor of blink off, text writing left to right (normal).
- Cursor of blink off, text writing right to left (backwards).
- Mistake corrected with cursor and blink on.
- Cursor of blink off, text writing left to right (normal).
- Cursor of blink off, text writing left to right (normal).
- Screen text moves one character right.
- Screen text moves one character left.
- Screen blanks.
- Screen returns.
- Clear screen and start again.
import machine
import utime

rs = machine.Pin(0,machine.Pin.OUT)
e = machine.Pin(1,machine.Pin.OUT)
d4 = machine.Pin(2,machine.Pin.OUT)
d5 = machine.Pin(3,machine.Pin.OUT)
d6 = machine.Pin(4,machine.Pin.OUT)
d7 = machine.Pin(5,machine.Pin.OUT)

def pulseE():
    e.value(1)
    delayShort()
    e.value(0)
    delayShort()

def delayShort():
    utime.sleep_us(40)

def delay():
    utime.sleep_ms(2)

def delayBig():
    utime.sleep(0.3)

def send2LCD4(BinNum):
    d4.value((BinNum & 0b00000001) >>0)
    d5.value((BinNum & 0b00000010) >>1)
    d6.value((BinNum & 0b00000100) >>2)
    d7.value((BinNum & 0b00001000) >>3)
    pulseE()

def send2LCD8(BinNum):
    d4.value((BinNum & 0b00010000) >>4)
    d5.value((BinNum & 0b00100000) >>5)
    d6.value((BinNum & 0b01000000) >>6)
    d7.value((BinNum & 0b10000000) >>7)
    pulseE()
    d4.value((BinNum & 0b00000001) >>0)
    d5.value((BinNum & 0b00000010) >>1)
    d6.value((BinNum & 0b00000100) >>2)
    d7.value((BinNum & 0b00001000) >>3)
    pulseE()

def whichLinePos(line, pos):
    b = 0
    if (line == 1):
        b = 0
    if (line == 2):
        b = 40
    if (line == 3):
        b = 20
    if (line == 4):
        b = 60
    cursorHome()
    for x in range(0,b+pos):
        moveCursorR()

def clearDisplay():#blanks the LCD, needs a long delay.
    rs.value(0)
    send2LCD8(0b00000001)
    rs.value(1)
    delay()
def cursorHome():#returns the cursor to home, needs a long delay.
    rs.value(0)
    send2LCD8(0b00000010)
    rs.value(1)
    delay()
def cursorMoveForward():
    rs.value(0)
    send2LCD8(0b00000110)
    rs.value(1)
def cursorMoveBack():
    rs.value(0)
    send2LCD8(0b00000100)
    rs.value(1)
def moveCursorR():#write text from left to right
    rs.value(0)
    send2LCD8(0b00010100)
    rs.value(1)
def moveCursorL():#write text from right to left (backwards)
    rs.value(0)
    send2LCD8(0b00010000)
    rs.value(1)
def cursorOff():
    rs.value(0)
    send2LCD8(0b00001100)
    rs.value(1)
def cursorOn():
    rs.value(0)
    send2LCD8(0b00001110)
    rs.value(1)
def blinkOn():
    rs.value(0)
    send2LCD8(0b00001111)
    rs.value(1)
def blinkOff():
    rs.value(0)
    send2LCD8(0b00001100)
    rs.value(1)
def displayShiftR():#move all caractors one space right
    rs.value(0)
    send2LCD8(0b00011100)
    rs.value(1)
def displayShiftL():#move all caractors one space left
    rs.value(0)
    send2LCD8(0b00011000)
    rs.value(1)
def displayOff():
    rs.value(0)
    send2LCD8(0b00001000)
    rs.value(1)
def displayOn():
    rs.value(0)
    send2LCD8(0b00001100)
    rs.value(1)

def setUpLCD():
    rs.value(0)
    send2LCD4(0b0011)
    send2LCD4(0b0011)
    send2LCD4(0b0011)
    send2LCD4(0b0010)
    send2LCD8(0b00101000)
    send2LCD8(0b00001100)
    send2LCD8(0b00000110)
    send2LCD8(0b00000001)
    rs.value(1)

setUpLCD()
while True:
    whichLinePos(1,3)
    for x in 'Instructables':
        send2LCD8(ord(x))
        delayBig()
    whichLinePos(2,18)
    moveCursorL()
    cursorMoveBack()
    for x in 'a no LCD a gnisU':
        send2LCD8(ord(x))
        delayBig()
    whichLinePos(3,1)
    moveCursorR()
    cursorMoveForward()
    whichLinePos(2,9)
    cursorOn()
    blinkOn()
    for x in ' LCD':
        send2LCD8(ord(x))
        delayBig()
        delayBig()
    blinkOff()

    whichLinePos(3,1)
    for x in 'Raspberry Pi PICO!':
        send2LCD8(ord(x))
        delayBig()
    whichLinePos(4,5)
    for x in '(NOT I2C!)':
        send2LCD8(ord(x))
    utime.sleep(2)
    displayShiftR()
    utime.sleep(2)
    displayShiftL()
    utime.sleep(2)
    displayOff()
    utime.sleep(2)
    displayOn()
    utime.sleep(2)
    clearDisplay()

Participated in the
Microcontroller Contest


