Introduction: Rotating Christmas Tree and Programmable Lights With Arduino


Rotating Christmas tree and programmable lights with Arduino
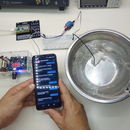
The project will see, how to make a rotating Christmas tree with arduino, a cooler, a perforated experimental board, LED lights and some other electronic elements.
Step 1: Project Circuit

Step 2: Electronic Components

13 Resistors of 1 Kohm 1/4 W
Resistors are used in circuits to limit the current value or to set the voltage value, according to Ohm’s Law. Unlike other electronic components, resistors have no defined polarity.
Step 3: An LM7805 Regulator

The LM7805 is a fixed voltage regulator. It is an integrated linear regulation circuit. This controller has 3 pins of connection, input, ground and output. The operation of a control source is to reduce or regulate a voltage at the input, in this particular case it will reduce 9 volts to 5 volts.
Step 4: An Arduino Mini Pro

The Arduino Pro mini is a board based on the ATmega328P. It has 20 digital input/output pins (of which 6 can be used as PWM outputs), 6 analog inputs, a 16 MHz quartz crystal, a programming connector, and a reset button. It contains everything you need to start using the micro-controller. Simply plug in a power supply to get started.
Step 5: A 9-volt Battery Connector

9 volt wired battery connector, ideal for powering any device that requires 9v, is mainly used on connecting tablets (Protoboard) or to power any prototype electronic circuits, since as output cables do not have any specific connector so you can use it wherever you need to power.
Step 6: A 12-volt Cooler (serves That of an Old Pc Source)

Fan cooler is that small fan that usually comes installed in your computer’s enclosure; it has as its main task to ventilate the air that is inside the computer, for the sole purpose of regulating its temperature.
Step 7: A 9-volt Battery (better If It’s Reclassible)

The 9V battery has two terminals at one of its separate ends half an inch (12.7 mm) from center to center. The smaller male round terminal is positive and the larger female terminal, hexagonal or octagonal in shape, is negative.
Step 8: A Plinth for the Arduino Mini Pro

The socket is the device for connecting integrated circuits in printed circuits, without welding. This avoids over-temperatureing integrated or other devices, which can damage them; it also allows the replacement of the component without going through a process of desoldering and welding.
Step 9: 13 LEDs of Different Colors

An LED (an acronym for the English light-emitting diode) is a light-emitting diode. Inside there is a semiconductor that, when traversed by a continuous voltage, emits light, known as electroluminescence.
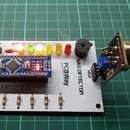
Step 10: A 10 X 15 Cm Perforated Experimental Plate

A perforated experimental board is a material for prototyping electronic circuits (also called PCB DOT). It is a thin, rigid blade with pre-drilled holes at standard intervals along a grid
Step 11: Source Code
Download from http://rogerbit.com/wprb/2020/12/rotating-christmas-tree-and-programmable-lights-with-arduino/
I hope you like this little and simple Christmas project, congratulations