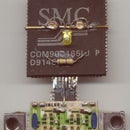
Introduction: Salvage Surface Mount Components
I shall tell you how I rescue components from old circuit boards and store them for reuse. A board from an old (relatively new, that is) hard disk drive shall be shown for an example. The photo (taken using my scanner) shows one such board, after I removed the IDE connector.
Step 1: Desoldering
I have a movie showing my process. I am attacking a tantalum capacitor in the video, but the same process works for all other components too.
First bend a piece of thick copper (or other solderable metal) wire to fit around the component, and contact all its solder pads. Solder it in place. This is done to make thermal contact.
Then heat the wire at a central place with your soldering iron, and lift the component away with tweezers. Or push it away using a wooden toothpick. Only don't be too enthusiastic with the push or it will fly across the room and be lost forever in the crud that covers the (in my case anyway) floor.
These are best stored inside foam cutouts in a suitcase. Miniature, of course.
Step 2: Tantalum Capacitors
These are the electrolytic capacitors usually found on surface mounted boards. They have to be connected the right way round. The positive terminal is marked with a band. If there are two numbers on it, one is the rated voltage and the other is the capacitance.
I'm sorry, I do not have further info on identifying them other than checking them in a multimeter which has a capacitance range.
They usually look like little bricks with metal strips issuing from their ends, folded over the bottom.
On the left of the picture are ceramic capacitors - MLCs - short for Multi Layer Ceramic - usually they are this brown colour, though I have seen black and white, and the ends look as if dipped in metal. There are usually no markings at all, so measurement is the only way to classify them.
Step 3: Ceramic Capacitors
Ceramic Capacitors look like bricks dipped in metal at the ends. The usual colour is brown.
Ferrite beads (or inductors) look almost exactly the same, exept that these have continuity and are magnetic. And black.
The photo shows a bunch of ceramic capacitors, and a few inductors (lower left).
If you aren't confused already, there is more to come.
Step 4: Resistors
In contrast to capacitors, resistors are easy. They are usually white on the underside, black on top and have the value printed on them. The last digit is the number of zeroes. The first two or three digits are the figures before the zeroes. In ohms.
560 means fifty six ohms. 561 would be five hundred and sixty ohms. 564 would be five hundred and sixty Kilohms, or, more concisely, point five six Meg.
These are also seen as arrays, pictured here are 33 ohm arrays I soldered together because I did not find any use for them.
When kept loose in a box, they tend to obey Murphy's law and all of them will be hiding white side up. And the one you want will be the one you turn up last.
Because when you find the one you want you stop looking.
Step 5: Storing Resistors
So the easiest method of storing chip resistors is this one, which I have developed after much experimentation.
And countless times fighting against the urge to flush the lot down the toilet and forget about it and do something worthwhile, like watering the plants.
And saying hello to the wife and kids.
Take a piece of transparent plastic, arrange the little buggers face down on it and, suddenly, while they are least expecting it, place a piece of sticky tape over them. This holds them immobile and you can look over them leisurely, identify the one you want, then peel back the tape and lift off that one with tweezers. The others will remain stuck to the tape.
Step 6: Diodes, Transistors and ICs
Diodes and transistors generally come packed in the SOT package. This is the "small outline transistor" package, with three leads.
So a device with three leads sitting on the board might be a diode. It might be a transistor. Or it might be an integrated circuit, like a three terminal voltage regulator.
A bit of probing with the multimeter (hold the thing down with a croc clip) will usually tell you whether it is a diode, or npn or pnp transistor. Small canisters could be used for storing them.
A thing with many legs is usually an integrated circuit. Or a resistor array.
I find that using a vintage IC involves poring over data sheets, finding components, and much design work, and that the end result is some gizmo which does some ancient job poorly, which is why that board ended up in the junk. The effort is just not worth it. But I do keep the ones I remove, because they might come handy one day - to build into a sculpture perhaps.
So - start desoldering, and have fun.


