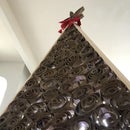
Introduction: Salvaged Cardboard Christmas Tree
I made my Christmas Tree this year from cardboard boxes I salvaged.
Here's the finished product, lit up with string LED lights and a plastic star I've had forever.
EDIT: If you like this, please consider voting for me in the Leftovers Contest! Thanks!
EDIT: I added a gallery of my previous years' trees here:
Step 1: Get Your Cardboard, Folks!
I needed good, clean cardboard. Couldn't just go to the back of a Walmart. That stuff is small, thin, and usually covered in food, fluids, and motor oil.
I needed clean cardboard, with good edge crush strength. It also needed to have large panels so that I didn't have to do too much taping. Taping is boring. So I had to think about where to look for cardboard boxes. It occurred to me that a furniture store would have large, sturdy boxes.
This time of year they'd have lots for the seasonal sales. Huge furniture stores usually recycle or sell all their cardboard and won't just toss it. A smaller store may not have such a sophisticated waste setup so look for one. The folks at the Alley just let be back up to their cardboard dumpster.
Step 2: Reference Lines Taped Down
Finished tree is 6'W x 8'H.
I wanted to do as little cutting, taping, and tying as necessary. So after cutting the pattern out, I will fold apart the tree and stack the layers on top of one another. I needed an easy visual reference at 1/2 the width. So, I just taped a 3x8 rectangle on the floor.
Step 3: Cutting and Taping
I cut all the boxes so they'd lay flat.
Then I taped them edge to edge until they completely covered the reference. I did this over and over until I had 10 layers.
Step 4:
Once I had 10 layers I cut them to match the reference rectangle using a jigsaw with a down cut blade installed.
I drilled holes with a 3/8' bit in one edge, and used a screwdriver to line up the wholes so I could tie them together with zip ties.
Step 5:
My tree pattern is diagonally symmetrical so that when I separated them I could stack the 10 layers on top of each other, creating 20 layers total.
I used the jigsaw for this cut too since it's easy to plunge cut cardboard.
Once done cutting, I tied the entire stack together on one edge like a book.
Step 6: Stand It Up and Paint It
I drug it outside, stood it up, fanned out all the layers in a circle.
I had one can of forest green spray paint and one of metallic silver. Not much. So I basically just misted the outer areas of each layer so it would sorta kinda look like an evergreen tree with some light snow on the tips.
Once dry, and all off gassing done, I folded it back up and drug it inside. I unfolded it in the living room and strung it with the lights.
Enjoy

Participated in the
Leftovers Challenge


