Introduction: Sending Temperature Sensor Data to Azure Database
This project uses a Raspberry Pi B+ attached to 2 temperature sensors and sends data to an Azure data source that can be used to create charts.
A bunch of my code for accessing the temperature sensors came from the Adafruit tutorial Adafruit's Raspberry Pi Lesson 11. DS18B20 Temperature Sensing
Step 1: Build the Sensor Device
This project uses 2 DS18B20 1-wire temperature sensors. The sensors can be connected in parallel with only one 4.7K resistor.
The red wire is connected to the 3.3v pin, the blue wire is connected to ground, and the green wire is connected to pin#4 for data. The 4.7K resistor goes from data to 3.3V

Step 2: Read the Sensor
The Python program prints out the temperature in degrees C every 5 seconds
import os
import glob
import time
import thread
import socket
from datetime import datetime

os.system('modprobe w1-gpio')
os.system('modprobe w1-therm')

base_dir = '/sys/bus/w1/devices/'
device1_file = glob.glob(base_dir + '28*')[0] + '/w1_slave'
device2_file = glob.glob(base_dir + '28*')[1] + '/w1_slave'

def read_temp_raw(dfile):
    f = open(dfile, 'r')
    lines = f.readlines()
    f.close()
    return lines

def read_temp(dfile):
    lines = read_temp_raw(dfile)
    while lines[0].strip()[-3:] != 'YES':
        time.sleep(0.2)
        lines = read_temp_raw(dfile)
    equals_pos = lines[1].find('t=')
    if equals_pos != -1:
        temp_string = lines[1][equals_pos+2:]
        temp_c = float(temp_string) / 1000.0
        return temp_c

host = socket.gethostname()
while True:
    try:
	temp1 = read_temp(device1_file)
	temp2 = read_temp(device2_file)
        body = '{ \"DeviceId\": \"' + host + '\" '
	now = datetime.now()
	body += ', \"rowid\": ' + now.strftime('%Y%m%d%H%M%S')
        body += ', \"Time\": \"' + now.strftime('%Y/%m/%d %H:%M:%S') + '\"'
	body += ', \"Temp1\":' + str(temp1)
        body += ', \"Temp2\":' + str(temp2) + '}'
	print body

        time.sleep(5)
    except Exception as e:
        print "Exception - ", repr(e)
The program starts by running the 'modprobe' commands, they are needed to start the interface for reading the one wire protocol sensors.
The next three lines, identify the file where the messages can be read. The function read_temp_raw reads the raw data from the interface. The read_temp function parses the data and returns the temperature value.
The main loop of the program reads the temperature and prints it out every 5 seconds.
You can start an editor window and enter the code by typing
nano sender.py
Once you've entered the code you can run the code using
sudo python sender.py
Step 3: Configure Azure Event Hub
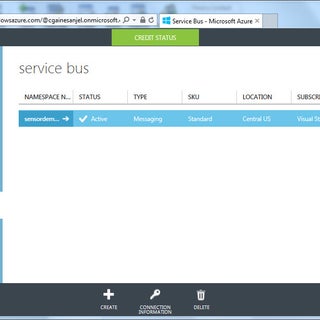
Log into your Azure management portal and create a Service Bus Name Space.
Click the Plus to create a new Service Bus name space. Give the Name Space a name then click the check mark to create.

Within the Service Bus Name Space just created, create an Event Hub. Click the Plus, then Choose Quick Create and give the Event Hub and name then click Create.

In the Event Hub page, click on the configuration tab. Create a policy called Receive Rule with permissions to Manage, Send and Listen. Then policy name and key will be needed later on.

Step 4: Configure the Azure Database
I use an Azure SQL database table here, but you can use other types or data sources like: table store, blob storage, or export directly to PowerBI.
Using SQL Server Management Studio, or some other database management tool to connect to the database and create a table. You can use the following script:
CREATE TABLE [dbo].[SensorDemo1](
	[rowid] [int] NOT NULL,
	[DeviceId] [nchar](30) NULL,
	[Time] [datetime] NULL,
	[Temp1] [float] NULL,
	[Temp2] [float] NULL,
PRIMARY KEY CLUSTERED
(
	[rowid] ASC
)WITH (PAD_INDEX = OFF, STATISTICS_NORECOMPUTE = OFF, IGNORE_DUP_KEY = OFF, ALLOW_ROW_LOCKS = ON, ALLOW_PAGE_LOCKS = ON)
)

GO
Step 5: Configure the Azure Stream Analytics Job
Click New to create a new Stream Analytics job, Give it a name and also specify the New Storage Account name, then click Create.

Open the Stream Analytics Job in the Azure Protal (https://portal.azure.com)
Then add and configure an Input. You'll need to specify the Service Bus Name Space, Event hub name. Also enter the policy and key we specified in the previous step. The Event serialization format should be JSON and Encoding should be UTF-8.

Step 6: Send Sensor Data to Azure
Install libraries for Azure API
Install the Azure API and other prerequisite libraries by executing the following commands within a terminal window on your Pi.
$ sudo apt-get install gcc cmake uuid-dev libssl-dev
$ wget sourceware.org:/pub/libffi/libffi-3.2.1.tar.gz
$ tar -zvxf libffi-3.2.1.tar.gz
$ cd libffi-3.2.1/
$ ./configure
$ sudo make install
$ sudo ldconfig
$ cd ~
$ sudo apt-get install python-pip
$ sudo pip install requests[security]
$ sudo pip install certifi urllib3[secure] pyopenssl ndg-httpsclient pyasn1 azure
$ sudo apt-get install python-openssl
Call the Azure API from Python code
This code has been edited to import the Azure library and a call to the sbs.send_event at the end of each loop.
import os
import glob
import time
import thread
import socket
from datetime import datetime
from azure.servicebus import ServiceBusService

os.system('modprobe w1-gpio')
os.system('modprobe w1-therm')base_dir = '/sys/bus/w1/devices/'
device1_folder = glob.glob(base_dir + '28*')[0]
device2_folder = glob.glob(base_dir + '28*')[1]
device1_file = device1_folder + '/w1_slave'
device2_file = device2_folder + '/w1_slave'
name_space = 'sensordemo-ns'key_name = 'RootManageSharedAccessKey'
key_value = 'nmoamu9fHRphGQodT/J7SBXfmLGYfVsrUDIZXxm+hMc='def read_temp_raw(dfile):
    f = open(dfile, 'r')
    lines = f.readlines()
    f.close()
    return lines

def read_temp(dfile):
    lines = read_temp_raw(dfile)
    while lines[0].strip()[-3:] != 'YES':
        time.sleep(0.2)
        lines = read_temp_raw(dfile)
    equals_pos = lines[1].find('t=')
    if equals_pos != -1:
        temp_string = lines[1][equals_pos+2:]
        temp_c = float(temp_string) / 1000.0
        return temp_c
host = socket.gethostname()

while True:
    try:
        temp1 = read_temp(device1_file)
        temp2 = read_temp(device2_file)
        body = '{\"DeviceId\": \"' + host + '\" '
        now = datetime.now()
        body += ', \"rowid\":' + now.strftime('%Y%m%d%H%M%S')
        body += ', \"Time\":\"' + now.strftime('%Y/%m/%d %H:%M:%S') + '\"'
        body += ', \"Temp1\":' + str(temp1)
        body += ', \"Temp2\":' + str(temp2) + '}'
        print body
        sbs = ServiceBusService(service_namespace=name_space,shared_access_key_name=key_name, shared_access_key_value=key_value)
        hubStatus = sbs.send_event('sensordemohub',body)

        print "Send Status:", repr(hubStatus)
        time.sleep(5)
    except Exception as e:
        print "Exception - ",
repr(e)


