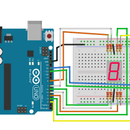
Introduction: Sensors Lab - Temp
In this lab you will be utilizing an LCD screen to display the current humidity and temperature readings for the surrounding area.
Hardware you will need:
- Arduino Uno
- LCD Screen
- Potentiometer
- Temperature/Humidity sensor
- Breadboard
- Wires/Connectors
Libraries Needed:
- LiquidCrystal
- SimpleDHT
The test code provided was taken from the Elegoo code samples. You can either install the necessary libraries through the library manager or download and install the the .zip files located in Libraries.zip on D2L.
Step 1: Connect LCD Screen
The LCD screen will need to be inserted directly into the breadboard. The LCD's screen pins are connected to the Arduino in the following order:
- Ground
- Power
- Pin 12
- Pin 11
- Pin 10
- Pin 9
- Empty
- Empty
- Empty
- Empty
- Pin 8
- Ground
- Pin 7
- Potentiometer (Connect to power and ground)
- Power
- Ground
Step 2: LCD Screen - Test Code
#include < LiquidCrystal.h > //Remove spacing between <  >

// initialize the library with the numbers of the interface pins
LiquidCrystal lcd(7, 8, 9, 10, 11, 12);

void setup() {
  // set up the LCD's number of columns and rows:
  lcd.begin(16, 2);
  // Print a message to the LCD.
  lcd.print("Hello, World!");
}

void loop() {
  // set the cursor to column 0, line 1
  // (note: line 1 is the second row, since counting begins with 0):
  lcd.setCursor(0, 1);
  // print the number of seconds since reset:
  lcd.print(millis() / 1000);
}
Step 3: Add Temperature & Humidity Sensor
Insert the temperature & humidity sensor into the breadboard. You will need to connect it to the Arduino using the following leads:
- Pin 2
- Power (+5v) rail
Ground rail
Step 4: Temperature & Humidity Sensor - Test Code
//www.elegoo.com
//2016.12.9

#include <SimpleDHT.h>

// for DHT11,
//      VCC: 5V or 3V
//      GND: GND
//      DATA: 2
int pinDHT11 = 2;
SimpleDHT11 dht11;

void setup() {
  Serial.begin(9600);
}

void loop() {
  // start working...
  Serial.println("=================================");
  Serial.println("Sample DHT11...");

  // read with raw sample data.
  byte temperature = 0;
  byte humidity = 0;
  byte data[40] = {0};
  if (dht11.read(pinDHT11, &temperature, &humidity, data)) {
    Serial.print("Read DHT11 failed");
    return;
  }

  Serial.print("Sample RAW Bits: ");
  for (int i = 0; i < 40; i++) {
    Serial.print((int)data[i]);
    if (i > 0 && ((i + 1) % 4) == 0) {
      Serial.print(' ');
    }
  }
  Serial.println("");

  Serial.print("Sample OK: ");
  Serial.print((int)temperature); Serial.print(" *C, ");
  Serial.print((int)humidity); Serial.println(" %");

  // DHT11 sampling rate is 1HZ.
  delay(1000);
}
Step 5: Integration Problem
You have been provided code examples for the LCD Screen and Temperature sensor. Your final step for the lab is to integrate these two examples so that your temperature readings will appear on the LCD Screen. You can alter the message so that it can appear on the two available lines for the LCD screen.


