Introduction: Servo Motor Control With STM32F4 ARM MCU
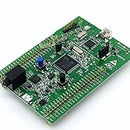
Hello again buddies :) So, in this project we will control a servo motor with STM32F4 ARM MCU. In my case, I will use discovery board, but if you grasp the gist of problem, then you can apply it for every MCU. So. let's get started :)
Step 1: Hardware and Software Requirements
In terms of hardware we will need:
- An MCU which is in my case STM32f4 Discovery board
- A common servo motor, like SG90 or any other
In terms of software we will need:
- STM32CubeMX
- Keil uVision
If you have all of these, jump to the next step :)
Step 2: STM32CubeMX Configuration
As you know, for controlling a servo motor we need PWM signal. The requirements in terms of PWM signal are like that:
- PWM period has to be 20 mS
- On time has to be between 0.5 mS to 2.5 mS. When on time is 0.5 mS, then the servo will turn 0 degrees, 1.5 mS for 90 degrees, and 2.5 mS for 180 degrees.
So, we need to configure PWM and for that purpose we will use Timer1.
- First, select TIM1 from Timers section. This step
- Then, from Mode section
- Then, from Configuration section
- Additionally, from Clock Configuration set APB1 Timer clocks to 16MHz. This step
Now, let's talk a bit about this step:
Our APB1 Timer clock's frequency is 16MHz. So, it means that it is required 16,000,000 ticks to get 1 second. However, we set our prescaler to 160. It means, we divide our frequency by that number and decreased the number of ticks down to 100,000. So, for 1 second we need 100,000 ticks. However, we need 20mS of PWM period as we stated before. So, based on simple math, we need 2000 ticks for 20mS. So, by setting Counter Period to 2000 we determine the period of the PWM signal which is 20mS. Now we need to determine the tick number for getting On times from 0.5mS to 2.5mS. We can get this equation from simple math and it is:
On_Time = (Tick_Number / 100). Keep in mind that this is the on_time that changes the angle of servo motor. So, below image I summarize this step. If you have any question write in the comments and I will answer as quick as possible.
After doing all of these generate code :)
Step 3: Keil UVision Coding
So, let's first determine what we want to do? We want, to write a function that accepts degree and write it to the servo. So, how we will do that? As we have said before, in order to change angle we need to change the on time. Our angles change between [0,180] and our number of ticks which determines on time changes between [50, 250]. So, we need a mapping function that maps given angle to range of number of ticks. For example, for 0 degree 50 ticks, for 180 degree 250 ticks and so on... So let's write our mapping function:
int map(int st1, int fn1, int st2, int fn2, int value)
{
    return (1.0*(value-st1))/((fn1-st1)*1.0) * (fn2-st2)+st2;
}
This is our mapping function. Do you interested how it is derived? Then read that. So, we take our ranges and the value that we want to map.
Now, let's write a function that accepts angle and maps it to the range of ticks:
void servo_write(int angle)
{
	htim1.Instance->CCR1 = map(0,180,50,250,angle);
}
As you can see, this code accepts angle and maps it to the range of number of ticks. An then, the number of ticks is given to the CCR1 register which controls the on time and so, angle.
However, in order to all of these to work we first start the pwm which can be done by just a line of code:
HAL_TIM_PWM_Start(&htim1, TIM_CHANNEL_1);
So, we have a function that accepts angle and write it to the servo. Let's test it and write our sweep function which is very easy:
void servo_sweep(void)
{
		for(int i = 0; i <= 180; i++)
		{
			servo_write(i);
			HAL_Delay(10);
		}
		for(int i = 180; i >= 0; i--)
		{
			servo_write(i);
			HAL_Delay(10);
		}
}
So, it just count up to 180 and then down to 0 and write these values to the servo :) So, let's see the result !
Step 4: The Result :)
So, this is the end. If you have any question please ask. I will be happy in order to answer them. Thank you very much for reading and hope I will see you in the next project :)


