Introduction: Sif's Maze (Game) - Arduino ITTT

My school tasked me with making something interactive with an Arduino. I made a little maze game, which, sadly, didn't turn out so well, but feel free to finish it or add on to it.
This project started as a concept for a TBA about Norse Mythology. You were Lifthrasir, lover of life and had forgotten your name. You either had to find your lover, Lif, or escape the forest you woke up in. Alas, this didn't turn out too well either, so I changed it into a small maze game, still holding on to the Norse Mythology.
Step 1: This Is What You'll Need
The following pieces are needed for this project:
- Arduino Uno
- Jump wires
- Liquid Crystal Display (LCD) (16, 2)
- Pushbutton x2
- Potentiometer
- 10k Ohm Resistor x3
- At least 1kg of soapstone (The more stone you have the easier it will be to fit the hardware inside).
- Wooden plug x4
Step 2: Time, to a R T

You read it right ladies and gentlemen. It's time to A R T. Or rather, carve the soapstone in such a way that the hardware fits inside.
I did this by gouging and grating the stone, but if you have other, more professional tools at home, feel free to use those. Soapstone is very easily cultivated, so you really don't need a MX-30KSUPER drill or something. Standard gouging and grating supplies will work fine.
First off, we need to split the stone in half. Believe it or not, but I did this by taking a saw for soft metals and sawed right through it.
now that we have 2 halves of a stone, we can start carving out a rectangular shape somewhere in the middle of one of the halves. We will use this for the display. I made mine big enough for the WHOLE display to fit in, but you can also shape it in a way only the display itself will be revealed.
PROCEED WITH CAUTION!!
as you might have noticed, there is a huge crack in my display half. It happened while drilling near a slimmer part (We'll get to drilling later). Be very careful while drilling near slimmer parts, as this happens a lot.
Oh yeah, maybe also be careful in general. I'd hate to see someone wounded because of my project.
Now! As for the second half, we'll need a hollowed out rectangle shape. Deep enough to fit the Arduino and pot meter, but not too deep, because you don't want the stone to split.
Time to drill, baby.
Now you want to pick 4 spots around the display hole, and the hollow part of your halves. You will later put the wooden plugs in there to support the upper (Display) half.Drill holes into (Not through) the stone, and put the plugs into the holes.Do the same to the upper (display) half. I suggest you put those holes in the same places.
After you've done that, you should be able to put the stones on top of each other, with space in between!
Step 3: Hardware La Vista, Baby.


Sorry for the terrible Terminator pun, but it's time to assemble the heart of the machine.
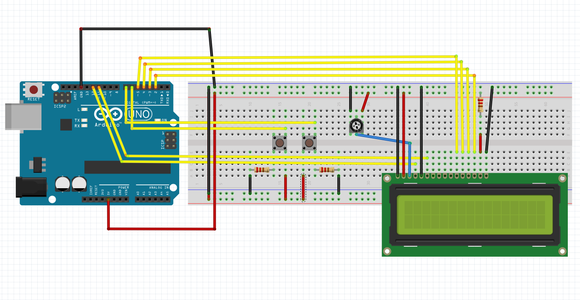
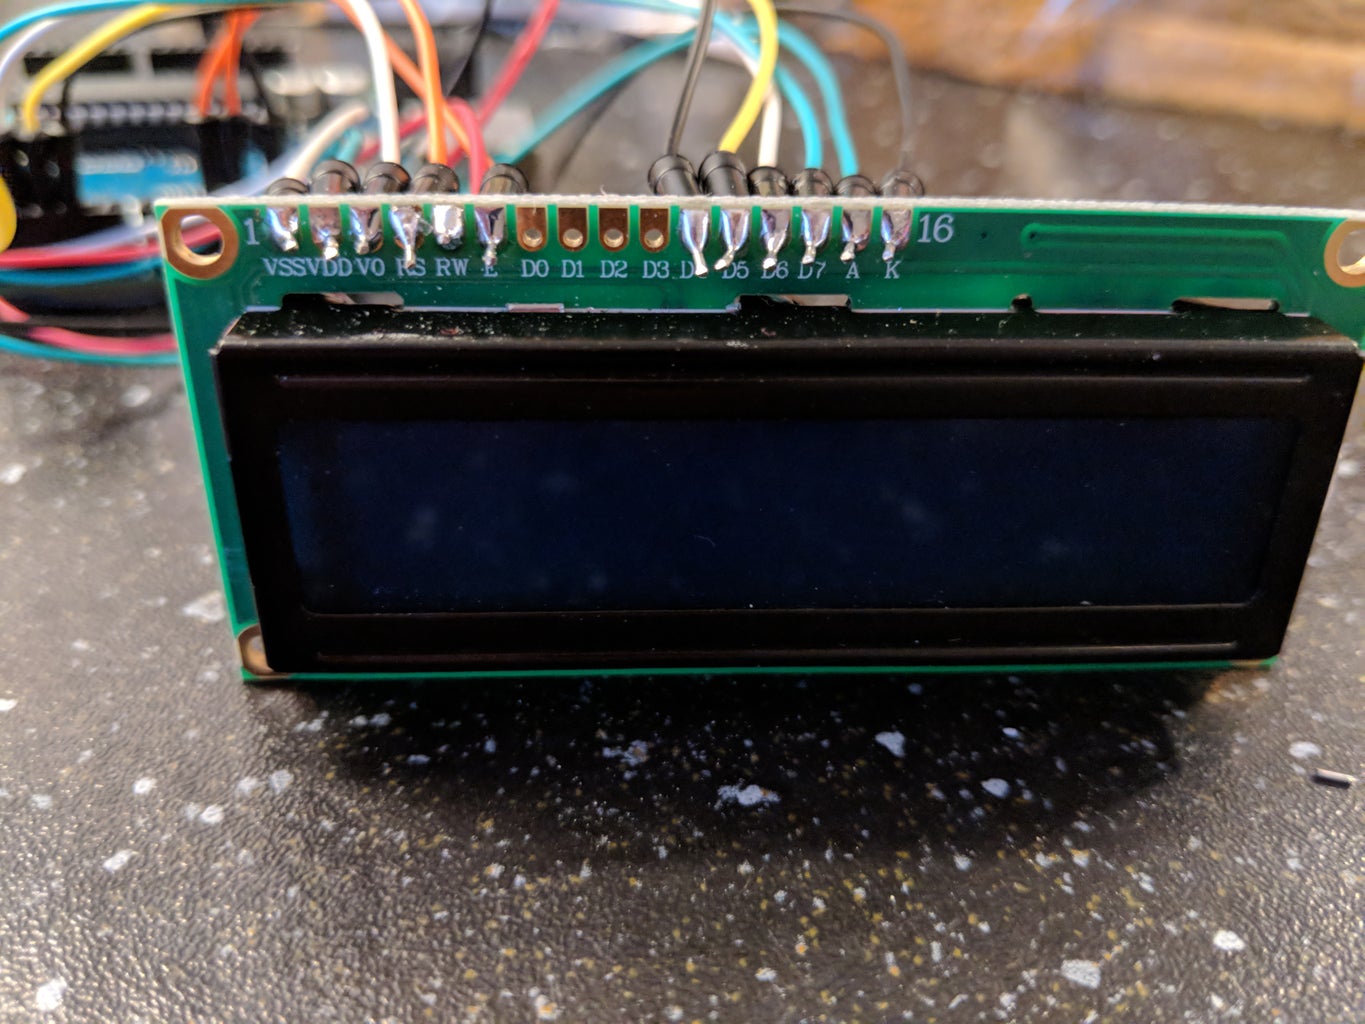
Start of with soldering either pins or jump wires to the LCD screen. I chose to solder the jump wires directly to the screen. This way I would preserve space and everything would fit better. When you're done your screen should look a lot like mine. You can look up how to wire the LCD screen here:
https://www.arduino.cc/en/Tutorial/HelloWorld?from...
You can follow the exact instructions given in this tutorial, because I also used this to connect my screen, so the code will work with these pins.
You can test the screen with the example code provided in the same tutorial after you're done.
Next, I suggest you wire the pot meter to a piece of circuit board. Connect the pot meter and the screen and test out the pot meter by turning it. If the brightness of the LCD changes, you wired it correctly. If not, I suggest you take another look at the tutorial linked above.
If you're done, take your buttons, connect them to the ground and 5V pins on your Arduino. You can connect the buttons to any digital pins. Be sure to check the code if the pins are the same.
After you're done, you can put the hardware into your stone!
Step 4: If (lastStep) {code();}
Bleep bloop. Time to enter the matrix.
You guessed it! It's time to code. Don't worry. This part is actually pretty easy. The only thing I could not get to work was the game over screen. If you manage to get it to work, please do tell me!
You can use my code which I have added as a downloadable file. You can add your own levels by copying and pasting the previous levels, but with different answers (Left and right).
And that's all! I really hope you got something out of this tutorial and maybe even made your own!
If you did I would love to see it!


