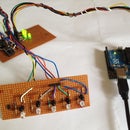
Introduction: Simple Pocket Torch
List of Parts Required :-
9V Battery
LED
Small PCB
Push button Switch
1K Resistor
Rubber Band
Tools :-
Soldering Iron
Solder
Step 1: Connections
The connections are very simple and requires very little soldering.
Step 2: Final Assembly
Tape or stick a small piece of cardboard over the battery surface so that the bottom of the PCB doesn't touch the battery.
Secure the PCB on the battery with a rubber band.
Your pocket torch is now done.
Note:- Another LED be easily soldered by connecting its anode to the cathode of the first LED and its cathode to the -ve of the battery.

Participated in the
Battery Powered Contest

Participated in the
Pocket Sized Electronics


