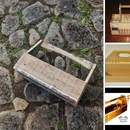
Introduction: Sliding Lid Box
A sliding lid box - its a classic - rewarding to make and useful when you're finished.
This project has contrasting timber strips glued into grooves around the outside, inspired by an instructable from Stumitch
I always enjoy making this project and I hope you have fun with it too!
Attachments
Step 1: Mark Out Your Material
2 @ 300 mm
2 @ 85 mm
Step 2: Saw Material Into 4 Parts
Step 3: Mark Rebate Corner Join
19 mm x 6 mm
The depth of the corner rebate is 6 mm, the same depth as the grooves.
Step 4: Saw Rebate Line
Step 5: Chisel Rebate Waste
Remove small amounts at a time with a chisel.
Use a file if your rebates need a tidy.
Step 6: Sanding Inside
Step 7: Saw Top Off Short End
Save the small section you saw off, this is glued onto the lid later.
Step 8: Assembly
Fit together dry (no glue yet) the four sides and base, this is to make sure it all fits together neatly.
Use a glue dish and a brush to put glue on all the corner joinery, fit together and clamp.
Remember to put your base in!
Step 9: Fit the Sliding Lid
Check the fit of your lid, you may need to make some small adjustments to get the lid to slide in easily.
Once the lid fits well take the small section removed in step 7 and sand it up before gluing and clamping it in place.
Step 10: Cut and Fit Contrasting Strips
Cut your contrasting strips to the required size.
Use a dish of glue and a glue brush to glue the grooves then put strips in place.
The long strips may need to be clamped in place at the ends
Step 11: Finishing
To remove excess contrasting strip material you may like to use a plane.
Here I have used a sanding board with 80 grit paper on it, then worked my way through to the finer grit paper stopping at 400.
I then applied tung oil to this project and gave it a final polish.
Project complete


