

Introduction: Small Panel Gluing Jig for $25


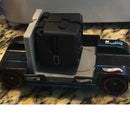
If you're looking for a solution for scrap wood, this might be it. I built this jig to glue up my sleigh bed scraps. Why waste good wood? The big-boy panel jigs run $179 (for the one pictured below). I've seen other jigs for around $50 utilizing more or less the same principle, but this is cheaper, and therefore better! What to do with the small panels after you're finished? Why, build a miniature pirate chest, of course!.
It's ugly, but it works great!
Step 1: Gather Materials

Home Depot/Lowes carry laminated Particleboard (3/4"). The size of the jig will vary as desired. Check the Cull box in the back! Make sure you get laminated (glossy) and not primed. The glue will stick to primed material.
1/4" - 20 X 2" screws (24 required)
1/4" - 20 Cross Dowels McMaster Carr (www.mcmaster.com part 90835A210) sells these cheaper than Lowes {$1.30ea} (Home Depot doesn't have them). Ace Hardware had them for $0.60ea if you need immediate gratification. Make sure they are at least 16mm in length, you will need enough to grip the jig on both sides of the screw that goes through the middle.
10mm drill bit
Drill Press (or steady hand)
Step 2: Cut and Drill Boards

Rip/Saw the board to the desired length (9" X 12-1/4"). They don't need to be perfect (only the holes need to line up). Again, my jig was designed around the end product using the $2 or cull boards I had. It can be as large as you want.
Drilling the jig will require a bit of precision. I cheated and used a CNC, but there simple ways get the same results without spending a boatload on a machine. Here are two options.
The simplest:
After you have the boards cut, stack them (5 high - 4 panels plus top). Clamp them together with C clamps or a vice. Mark your holes across the lined up edge at 5" intervals roughly 1" from the edge. Drill through all of the boards at once as squarely as possible.
Mark the remaining holes using the same edge measured for the first set. Drill through the second set of holes the same way as the first. If your holes are inaccurate, the board will still work, but cannot be flipped or rotated as they can be if the are all perfectly spaced.
The slightly more complex:
You could of course build a jig to build the jig. Using a piece of hardboard or scrap you can mark the pattern, drill and use it as a template of each piece and the required holes.
Step 3: Assemble/Use


The assembly is pretty simple. A cross dowel goes in each hole with a screw in each cross dowel. The top of one cross dowel fits into the bottom of the one above.
When gluing the panels, spread the glue lightly but evenly across the surfaces. It will work equally well with standard wood glue or polyurethane (gorilla) glue. If you notice the the panels stick to the jig, get a little Pledge(furniture polish) or wax between gluing sessions. I only noticed this with the polyurethane. Wood glue seems to chip right off.
Before you set the next layer of the jig onto the last, make sure the screws are hand tight. When you press the next level down, it will keep the panel from lifting up so it can be tightened properly. Keep stacking the panels up one after the next until all four panels are set in place. Set the top in place and press down. Tighten all of the screws with a screwdriver or drill until everything is tight.


