Introduction: Solar Powered Bluetooth Headphone (Version 2)
I converted an old wired headphone to a Bluetooth headphone which takes power from solar. I published the first version of the headphone in January 2017. Recently, I made some update to it and going to publish here again. Now, it will be more easy to build. Here is the video of the headphone.
Step 1: Shopping List
1. Wired Headphone (an old wired headphone will be ok)
2. RN-52 Bluetooth Audio Module (sparkfun.com) or SparkFun Audio Bluetooth Breakout -RN-52 (sparkfun.com)
3. 2V 1W Thin-film Flexible Solar Panel ( seeedstudio.com)
4. SparkFun Power Cell - LiPo Charger + 3.3V regulator ( sparkfun.com)
5. Lithium Ion Battery - 400mAh (sparkfun.com)
6. Pololu 5V Step-Up Voltage Regulator NCP1402 ( pololu.com)
7. Two LED (one red, one green) + 2, 470ohm Resistor
8. Five Tactile button switch
9. One SPDT switch (small)
10. Perfboard (small) & Some jumper wire (IDE cable from old HDD will be nice)
Tools Required
1. Soldering Iron (gearbest.com)
2. Cutter (gearbest.com)
3. Hot Glue Gun (gearbest.com)
Step 2: Modification of Wired Headphone
I hope you are ready with your old headphone with a long wire. Let me show the way how you can prepare the headphone to convert it in Bluetooth headphone. First, cut the cable and separated it from the headphone. Through the cable away because we no longer required the cable. Uncover the ped from the headphone and unscrew all the screw to open the speaker. Position and the number of the screw may be different for your case. After removing the cover connect two jumper wires to both of the speakers. I soldered HDD ribbon cable to both of the speakers to connect to the Bluetooth module because HDD cables are highly conductive and thin enough for my job. Now, attach the cover again and connect all the screws. Remove the top cover from right headphone to make a room for the circuit board and Bluetooth module.
Step 3: Wiring Bluetooth Audio Module
RN-52 - Bluetooth Audio Module: This RN-52 Bluetooth from Roving Network is an audio module that provides a highly integrated solution for delivering high-quality stereo audio in a small form factor with little difficulty. This module is perfect for a project involving hands-free audio for your car, remote controlling your media center, or streaming 2-channel audio.
The RN-52 is a Class 2 Bluetooth device, meaning that the range of the on board antenna is about 10m. Thus, you should be able to stream audio to the module from about 32 ft in open air. If you are streaming through walls or windows, that range will diminish.
The RN-52 is different than other Bluetooth modules in that it can stream audio. It does this via an onboard Digital Signal Processing (DSP) chip. When streaming audio to the RN-52, the DSP converts the radio waves sent from the transmitter device (phone, computer, etc.) into electrical signals that can then be sent to the amplifier and then to your audio output (speakers/headphones). When streaming audio from the module, it converts the electrical signals from the audio input device (mic/line-in) to radio waves for the receiver device (stereo, computer, phone).
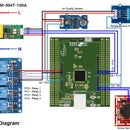
The Bluetooth module has 4 pins for speaker connection, 5 pins for connecting control button, 2 pins for connecting status LEDs, one for power enable and one for power supply. There are several ground pads in the module. So, solder 4 jumpers to speaker pads, 2 with led pads, 5 with button pads, 1 with power_en pad and one with VCC pad. Connect ground pads as your convenience. Follow the schematic and the photos attached to this step.
By using HDD IDE cable as connecting wire you can get an excellent result.
Step 4: Making the Control Circuit
In this stage, we will make the control circuit for our Bluetooth headphone. The control circuit is for controlling volume and the track. I used five tactile buttons for control purpose. Two for controlling the volume (one for volume up, one for volume down), One button is to play or pause the track, two for changing the tracks (one for previous track, one for next track). One pin of all the buttons are connected to the ground and other pins are connected to the respective pad of the audio module (as shown in the schematic). I also attached one tactile button switch to the power enable pin of the audio module. Long pressing of the button will enable the Bluetooth module. To observe the status of Bluetooth module (either it is turned on or off, it is connected to a device or not) I attached two LEDs (one green, one red) to the control circuit. When Bluetooth module is enabled but not connected to a device two LEDs blink simultaneously. After connected to a device only red led blinks two times every two seconds. One thing you should note carefully that, you must connect the LEDs to the Bluetooth module through 470 ohm resistors. Otherwise, you may burn the LEDs. Using small valued resistor may reduce your battery life.
For adjusting the control circuit with the headphone correctly you should cut the perfboard according to the size of you headphone. I cut one side of the perfboard in a way that I can easily attach the Bluetooth audio module with the circuit board.
Step 5: Connecting Control Circuit to Bluetooth Audio Module
I hope you already made the control circuit and soldered all the required pad with jumper wires. Now, it is the right time to connect both (the control circuit & audio module). I first connect five buttons wire of the audio module to the respective five buttons of the control circuit. Then I soldered led wires of the Bluetooth module to the led cathode pins of the control circuit. After that, I connected power-wire to the power enable button of the control circuit. At last, I connected all the ground to the ground pin of the ground of the control circuit. Connecting all the ground is not mandatory but connect at least two ground pad to the ground of the circuit. I also bring out two wires from the control circuit to connect the power supply. I will show the power connection in the next stage.
After completing all the connection to the power circuit it is the time to connect the speakers to the Bluetooth audio module. First, connect the right speaker of the headphone to the RP+ & RP- pin of the Bluetooth audio module. Then, connect left speaker of the headphone to the LP+ & LP- pin of the Bluetooth module.
Step 6: Attaching Control Circuit to the Headphone
If you already made the control circuit next job is to fix the control circuit and audio module with the headphone. I already remove the top cover from the right headphone and made a room for the control l circuit. Now, I will attach the circuit to the headphone. To make the work easy first add some hot glue to the headphone. Then gently place the control circuit and audio module in the glue and slightly push down the circuit. Wait a minute to cold the joint. Then, add some extra hot glue to the surrounding's of the circuit board to tightly fix the board with the headphone.
Step 7: Wiring Solar Panel
For my project, I used 2V 1W Thin-film Flexible Solar Panel. This waterproof thin-film flexible solar panel is built on an ultra-thin backsheet. It can be installed in a curve of up to 30 degrees. In addition to its unique flexibility. It packaging with durable, high light transmittance ETFE film and fast curing EVA film.
The solar panel produces 2V output which is not enough to charge a Li-ion battery. Most of the Li-ion battery charger circuits are designed to charge from a 5V source. So, it is better to step up the voltage from 2V to 5V using boost converter. The panel produce 1W power which is enough for the Bluetooth headphone.
For increasing voltage level I used NCP1402 5V Step-Up Voltage Regulator from Pololu. This compact step-up (or boost) regulator generates 5 V from voltages as low as 0.8 V and delivers up to 200 mA, making it perfect for providing 5V output from our 2V solar panel.
I attached a photo of the output voltage measurement from the output of the boost converter. My low price multimeter has some error and it always gives a reading about 0.2V lower than the actual value. So the actual output is about 5.1V.
Step 8: Connecting Charger Module
Li-ion batteries are very sensitive to the voltage. We can not provide 5V directly to a Li-ion battery to charge. A charge controller circuit is mandatory to safely charge the battery without damaging or reducing the battery life. For charging the battery I used SparkFun Power Cell - LiPo Charger/Booster.
The PowerCell board is a single cell LiPo boost converter (to 3.3V and 5V) and micro-USB charger in one. The board comes with a JST connector for a single cell LiPo battery, a micro-USB connector for the 5V charge input, and selectable 3.3V and 5V output pins (labeled ‘out’). There are also two charge pins broken out (labeled ‘charge’), so you can use another 5V power source to charge the batteries, if you don’t have a micro-USB cable.
It is also broken out with the power-save and enable pins, so you have the full control of the switching regulator. Keep in mind, if you keep your battery connected to the Powercell, it is recommended that you disable the switching regulator (pull EN low) in order to prevent the battery from discharging and reaching the under voltage cutoff on the battery itself. There is also an under-voltage lockout on the Powercell board which is tied to a solder jumper so that you can disable it if you like.
The boost converter is based on the TPS61200 from TI and has solder jumper selectable 5V and 3.3V output, and an under voltage protection of 2.6V (which can be disabled via solder jumper on the back of the PCB).
The 3.3V output is very important for our audio module. The nominal output voltage of a Li-ion battery is about 4.2V when fully charged and the level can damage our audio module because it can tolerate 3V to 3.6V safely. So, we should not directly connect a Li-ion battery with the RN-52 Audio module. A 3.3V regulator is required. For this region, I have chosen this module.
Before connecting this module to the solar panel and battery we need some modification.
The board comes with 5V enabled (center pad and 5V connected). As we want to use 3.3V, we should clear the solder blob over the 5V pad and move it to the 3.3V pad (center pad and 3.3V connected). The safest way to do this is with some solder wick, or just turn your soldering iron down to a lower temp and move the solder blob with the iron's tip.
There are two operating modes of this charging module.
1. Charge Mode: If you want to charge your battery or just let you system standby, with no power draw from the battery, you must pull the EN pin to GND (by default it is pulled high, ON). The EN pin turns the regulator portion of the circuit ON and OFF. Even if you have only your battery connected, you should still connect EN to GND.
2. Power Mode: When you need to power your circuit, you can leave EN floating (no connection) or pull it to VCC. If you want to have USB charging as well, that is fine, it won't hurt anything.
We want to take the advantage of both two modes and for the purpose, I connected EN pin and GND pin with a SPDT switch.This way, you can turn everything OFF and ON.
When:
EN is high (VCC, default), Powercell is ON
EN is low (GND), Powercell is OFF
After connecting the switch with the charger module now it is the right time to connect the charger module to the boost converter output. Connect 5V out pin of the boost converter to the 5V in pin of the charger module. Also, connect GND pin of the boost converter to the GND pin of the charger circuit. Follow the photos attached with this step for clear understanding.
Step 9: Attaching Solar Panel to the Headphone
In this step, we will attach the solar panel and the charger circuit with the headphone. First, place the headphone to the bottom side of the solar panel and add some hot glue to the right side of the panel. Give some time to make it hard without moving the headphone or solar panel. Repeat the step for the left side. Then, add some glue to the middle of the headphone and the panel. The advantage of using hot glue is that you can easily remove the glue without damaging anything.
Step 10: Attaching Boost Converter & Charger Module
After attaching solar panel with the headphone now we will attach the charging circuit and boost converter to the headphone. Using the hot glue
1. Place and attach the boost converter at the bottom side of the panel
2. Attach the charge controller circuit to the right side of the headphone
3. Add some glue at every connecting point to make the connection strong
Try to keep the connecting wires long so that you can easily adjust the size of the headphone. I attached some photo how I attached all the things.
Step 11: Attaching Switch & Battery
Now,
1. Attach the power on/off switch in an easily accessible location
2. Attach the battery in a convenient location and connect the battery connector with the charger circuit.
3. Solder 3.3V output of the charger circuit to the power supply wires of the control circuit and add some glue to prevents from short circuit.
After connecting all, turn on the power switch and press the power-enable button for a second. If you found two LEDs blinking then CONGRATULATION! You successfully made it. The description of the two status LEDs is given below.
| LED0 (Green) | LED1 (Red) | Description |
| Flashing | Flashing | The RN52 module is discoverable. |
| Flashing | Off | The module is connectable. |
| Off | Flashing | The module is connected. |
Step 12: Some Calculations
RN-52
Typical working current of RN-52 module: 30mA
Operating voltage of RN-52 module: 3.3V
Energy required to run 1 hour =3.3V * 30mA * 1H = 99mWh
Battery capacity = 400mAh = 400 * 3.7 = 1480mWh
So, battery backup time for the headphone = 1480 / 99 = 15 Hours (Approximate)
Solar Panel
Output voltage of the solar panel = 2V
Output power of the solar panel = 1W
Typical energy output from the solar panel/hour = 1000mWh
Time required to fully charge the battery (taking 70% efficiency) = 1480 / 1000 * 0.7 = 2 Hours (Approximate)
So, 2 hours of charge from the solar can run the headphone more than 10 hours.
If you use the headphone in the outdoor location it will never be required to charge it without solar.
Thank you for reading this instructable from first to last. Happy making.

Runner Up in the
Audio Contest 2017

Participated in the
Bluetooth Challenge

Participated in the
Solar Contest 2017

Participated in the
Fix It Contest


