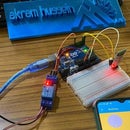
Introduction: Solar Tracker Dual Axis
The solar tracker dual-axis project represents a significant advancement in the field of solar energy harvesting and conversion. Solar energy is a clean and abundant source of power, but to maximize its efficiency, solar panels must be oriented to face the sun as directly as possible. Traditional fixed solar panels are limited in their ability to do this, as the sun's position changes throughout the day and across seasons.
The dual-axis solar tracker is a groundbreaking solution to this challenge. It's designed to automatically adjust the orientation of solar panels in two dimensions, both horizontally and vertically, to follow the sun's path. This dynamic tracking enables the panels to maintain an optimal angle with the sun, resulting in a substantial increase in energy output compared to fixed installations.
In this project, we delve into the design, construction, and programming of a dual-axis solar tracker system. We explore the benefits it offers, such as increased energy generation, reduced energy costs, and a smaller environmental footprint. By harnessing the power of this technology, we take a significant step toward a more sustainable and efficient future, making the most of the abundant energy resource that is solar power.
Supplies
- Arduino Board: This will serve as the central control unit for your solar tracker.
- 2 Light-Dependent Resistors (LDRs): These will be used to detect the sun's position. You'll need two for each axis (horizontal and vertical).
- 2 Servo Motors: You'll use these to adjust the orientation of the solar panels both horizontally and vertically.
- Wiring and Connectors: Use these to connect all the components, including LDRs, servo motors, and Arduino.
Step 1: Setup Overview
- LDR Placement: Mount two LDRs on one axis (for example, horizontal) and the other two on the other axis (vertical). Ensure they have a clear line of sight to the sun.
- Servo Motor Mounting: Attach one servo motor to the horizontal axis and the other to the vertical axis, connecting them mechanically to your solar panels to enable movement.
- Wiring: Connect the LDRs to analog input pins on your Arduino. Wire the servo motors to suitable digital pins. Ensure the servo motors and LDRs have proper power and ground connections.
- Arduino Code: Write code for your Arduino to read data from the LDRs and adjust the servo motors to keep the panels oriented toward the sun. The Arduino will use the data from the LDRs to determine the sun's position and make the necessary adjustments.
- Testing and Calibration: Test the tracker in sunlight to ensure it tracks the sun accurately. You may need to calibrate the system to fine-tune its performance.
Step 2: Light Sensing
- Light-dependent resistors (LDRs) are analog sensors that change their resistance based on the amount of light they receive. In bright light, their resistance decreases, and in darkness, it increases.
1. Connection to Arduino:
- Connect the LDRs to analog input pins on your Arduino board. Each LDR should be connected to a separate analog input.
int horizontalLDRPin = A0;
int verticalLDRPin = A1;
2. Analog to Digital Conversion:
- In the Arduino code, use analogRead() to read the analog voltage values from the LDRs. These values typically range from 0 (dark) to 1023 (bright).
 int horizontalLDRValue = analogRead(horizontalLDRPin);
  int verticalLDRValue = analogRead(verticalLDRPin);
3. Data Processing:
- Process the LDR values as needed. You can normalize or scale the readings to fit the servo motor control range.
and I repeat these steps with Vertical LDR and the code will be:
 int horizontalAngle = map(horizontalLDRValue, 0, 1023, 0, 180);
  int verticalAngle = map(verticalLDRValue, 0, 1023, 0, 180);
Step 3: Servo Motor Control
- Use the Servo library in your Arduino code to control the servo motors.
#include <Servo.h>
Servo horizontalServo;
Servo verticalServo;
- Map the processed LDR values to the servo's angle range. For example, if you want the servo to move from 0 to 180 degrees, map the LDR values to that range using the map() function.
 horizontalServo.write(horizontalAngle);
  verticalServo.write(verticalAngle);
- Set the servo positions based on the mapped values using servo.write().
horizontalServo.write(horizontalAngle);
  verticalServo.write(verticalAngle);
Step 4: Conclusion
In conclusion, reading values from LDRs and sending them to servo motors is a fundamental process for real-time adjustments based on changing light conditions. It involves connecting LDRs to an Arduino, converting analog readings to servo angles, and enabling precise control. Calibration and fine-tuning are essential for accurate tracking, making this system invaluable for applications like solar tracking, where panel orientation must adapt to maximize energy generation.
Step 5: Result
In the attached results, you'll find a comprehensive record of the LDR-to-servo system in action, showcasing its effectiveness in real-time light tracking and its potential applications


