Introduction: SoundBox
Hi everyone, happy to be back!
Enjoy something loud! The Sound Box Project is a Bluetooth speaker made completely from scratch using a custom PCB and 3D printed parts.
The goal was to put together a powerful Bluetooth sound system for my desk to replace the sound speaker project I had previously made.
https://www.instructables.com/3D-Printed-BOOMBOX/
Here, we are using a 12V 5.2A battery source in conjunction with two powerful 15W speakers and a ZK-TB21 audio module.
In addition, we have incorporated a custom RGB LED driver that powers the background illumination on the back side of the sound system using a Raspberry Pi Pico for aesthetic purposes.
The Soundbox has five sound control knobs which control frequency, tremble, volume and bass.
This Instructables is about the whole build process of this project, so let's get started with the build.
Supplies
Following are the materials used in this build:
- Custom PCB
- ZK-TM21 Audio Module
- 3D-printed parts
- Raspberry Pi Pico
- AMS1117 Voltage regulator
- 10uF 1206 Capacitor
- 1uF 1206 Capacitor
- WS2812B 5050 RGB LEDs
- 100nF Capacitor 0603 Package
- DC Barrel Jack
- Rocker Switch
- JST Connector
- 12V 5.2Ah Battery Pack
- M2 Screws
- 15W 8Ohms Speakers
Step 1: DESIGN
Here is the simple design I came up with. The entire body is designed in the shape of a cube, and the front has a speaker grill created of splines.
Control knobs for the Audio Module were positioned on the top face, and an RGB LED diffuser that lights up the background is located on the rear side of the speaker.
Additionally, there are two rocker switches on the bottom side that control the power supply for the speakers and the RGB light. A DC Jack is located on the back of the device to charge the battery.
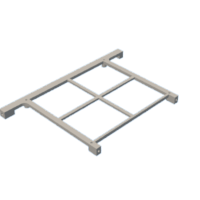
Regarding the internals, we put the two speakers we used on the interior of the front face of the project.
The speaker grill was modeled to fit on the front face using four M3 screws situated at each corner.
We have created a holder element that is first secured to the mounting holes on the audio module, and then the entire assembly is fixed within the base to keep it in place.
After exporting each component into an STL file, they were all 3D printed using white PLA and golden yellow PLA with a 0.2mm layer height and a 1mm nozzle.
Attachments
Step 2: PCB Design
The PCB design of this project's RGB board was super simple, as it only contains an array of WS2812B RGB LEDs connected in parallel with an Raspberry Pi Pico.
The schematic was made in a total three sections, which were the AMS1117 and battery sections, the Raspberry Pi Pico Setup, and the WS2812B LED array.
We needed to add an AMS1117 voltage regulator configuration in order for the Raspberry Pi Pico and LEDs to function because we were utilizing a 12V Li-ion battery as our power source. This arrangement steps down the 12V of the battery to a steady 3.3V.
Two capacitors are connected to the input and output terminals of the AMS1117 in the simplest configuration. A 10 uF 1206 capacitor is attached to the input side, while a 1 uF 1206 capacitor is linked to the output side. Additionally, an M7 diode and a switch have been placed between the input con2 terminal and the ams1117. A DC jack will be added using the CON2 to charge the 12V battery.
Each RGB LED was connected to a 100 nF capacitor for decoupling of the supply line.
Following the creation of the schematic, we create the PCB design and layout the components on the board, based on the PCB model created in Fusion 360.
All of the SMD components, RGB LEDs, and the AMS1117 setup were mounted on the bottom. On the top side of the PCB were Pico along with additional THT components.
Step 3: PCBWAY Service
PCBWAY provided the PCBs for this project; we uploaded the Gerber data to their PCB Quote page and placed an order for white solder masks with black silkscreen.
We received the PCBs in less than a week, which was extremely fast, and the quality was excellent as usual.
I've been using their service for a while now, and it's always excellent.
Check out PCBWAY for great PCB service at a low cost.
Step 4: PCB ASSEMBLY
- Using a solder paste dispensing needle, we first add solder paste to each component pad individually to begin the PCB assembly process. In this instance, we are using standard 37/63 solder paste.
- Next, we pick and place all the SMD components in their places on the PCB using an ESD tweezer.
- With extreme caution, we lifted the complete circuit board and placed it on the SMT hotplate, which increases the PCB's temperature to the point at which the solder paste melts and all of the components are connected to their pads.
- Next, we add all the THT components, which include the header pin, Raspberry Pi Pico, and CON2 JST Connectors, to their locations and then solder their pads using a soldering iron.
THE PCB IS NOW READY!
Step 5: CODE
After finalizing the PCB, we uploaded the below code to the Raspberry Pi Pico for testing.
#define FASTLED_ALLOW_INTERRUPTS 0
#include <FastLED.h>
FASTLED_USING_NAMESPACE

#define DATA_PIN            0
#define NUM_LEDS            7
#define MAX_POWER_MILLIAMPS 600
#define LED_TYPE            WS2812B
#define COLOR_ORDER         GRB

//////////////////////////////////////////////////////////////////////////

CRGB leds[NUM_LEDS];

void setup() {
  delay( 3000); // 3 second delay for boot recovery, and a moment of silence
  FastLED.addLeds<LED_TYPE,DATA_PIN,COLOR_ORDER>(leds, NUM_LEDS)
        .setCorrection( TypicalLEDStrip );
  FastLED.setMaxPowerInVoltsAndMilliamps( 5, MAX_POWER_MILLIAMPS);
}

void loop()
{
  EVERY_N_MILLISECONDS( 20) {
    pacifica_loop();
    FastLED.show();
  }
}

CRGBPalette16 pacifica_palette_1 =
    { 0x000507, 0x000409, 0x00030B, 0x00030D, 0x000210, 0x000212, 0x000114, 0x000117,
      0x000019, 0x00001C, 0x000026, 0x000031, 0x00003B, 0x000046, 0x14554B, 0x28AA50 };
CRGBPalette16 pacifica_palette_2 =
    { 0x000507, 0x000409, 0x00030B, 0x00030D, 0x000210, 0x000212, 0x000114, 0x000117,
      0x000019, 0x00001C, 0x000026, 0x000031, 0x00003B, 0x000046, 0x0C5F52, 0x19BE5F };
CRGBPalette16 pacifica_palette_3 =
    { 0x000208, 0x00030E, 0x000514, 0x00061A, 0x000820, 0x000927, 0x000B2D, 0x000C33,
      0x000E39, 0x001040, 0x001450, 0x001860, 0x001C70, 0x002080, 0x1040BF, 0x2060FF };


void pacifica_loop()
{
  // Increment the four "color index start" counters, one for each wave layer.
  // Each is incremented at a different speed, and the speeds vary over time.
  static uint16_t sCIStart1, sCIStart2, sCIStart3, sCIStart4;
  static uint32_t sLastms = 0;
  uint32_t ms = GET_MILLIS();
  uint32_t deltams = ms - sLastms;
  sLastms = ms;
  uint16_t speedfactor1 = beatsin16(3, 179, 269);
  uint16_t speedfactor2 = beatsin16(4, 179, 269);
  uint32_t deltams1 = (deltams * speedfactor1) / 256;
  uint32_t deltams2 = (deltams * speedfactor2) / 256;
  uint32_t deltams21 = (deltams1 + deltams2) / 2;
  sCIStart1 += (deltams1 * beatsin88(1011,10,13));
  sCIStart2 -= (deltams21 * beatsin88(777,8,11));
  sCIStart3 -= (deltams1 * beatsin88(501,5,7));
  sCIStart4 -= (deltams2 * beatsin88(257,4,6));

  // Clear out the LED array to a dim background blue-green
  fill_solid( leds, NUM_LEDS, CRGB( 2, 6, 10));

  // Render each of four layers, with different scales and speeds, that vary over time
  pacifica_one_layer( pacifica_palette_1, sCIStart1, beatsin16( 3, 11 * 256, 14 * 256), beatsin8( 10, 70, 130), 0-beat16( 301) );
  pacifica_one_layer( pacifica_palette_2, sCIStart2, beatsin16( 4,  6 * 256,  9 * 256), beatsin8( 17, 40,  80), beat16( 401) );
  pacifica_one_layer( pacifica_palette_3, sCIStart3, 6 * 256, beatsin8( 9, 10,38), 0-beat16(503));
  pacifica_one_layer( pacifica_palette_3, sCIStart4, 5 * 256, beatsin8( 8, 10,28), beat16(601));

  // Add brighter 'whitecaps' where the waves lines up more
  pacifica_add_whitecaps();

  // Deepen the blues and greens a bit
  pacifica_deepen_colors();
}

// Add one layer of waves into the led array
void pacifica_one_layer( CRGBPalette16& p, uint16_t cistart, uint16_t wavescale, uint8_t bri, uint16_t ioff)
{
  uint16_t ci = cistart;
  uint16_t waveangle = ioff;
  uint16_t wavescale_half = (wavescale / 2) + 20;
  for( uint16_t i = 0; i < NUM_LEDS; i++) {
    waveangle += 250;
    uint16_t s16 = sin16( waveangle ) + 32768;
    uint16_t cs = scale16( s16 , wavescale_half ) + wavescale_half;
    ci += cs;
    uint16_t sindex16 = sin16( ci) + 32768;
    uint8_t sindex8 = scale16( sindex16, 240);
    CRGB c = ColorFromPalette( p, sindex8, bri, LINEARBLEND);
    leds[i] += c;
  }
}

// Add extra 'white' to areas where the four layers of light have lined up brightly
void pacifica_add_whitecaps()
{
  uint8_t basethreshold = beatsin8( 9, 55, 65);
  uint8_t wave = beat8( 7 );

  for( uint16_t i = 0; i < NUM_LEDS; i++) {
    uint8_t threshold = scale8( sin8( wave), 20) + basethreshold;
    wave += 7;
    uint8_t l = leds[i].getAverageLight();
    if( l > threshold) {
      uint8_t overage = l - threshold;
      uint8_t overage2 = qadd8( overage, overage);
      leds[i] += CRGB( overage, overage2, qadd8( overage2, overage2));
    }
  }
}

// Deepen the blues and greens
void pacifica_deepen_colors()
{
  for( uint16_t i = 0; i < NUM_LEDS; i++) {
    leds[i].blue = scale8( leds[i].blue,  145);
    leds[i].green= scale8( leds[i].green, 200);
    leds[i] |= CRGB( 2, 5, 7);
  }
}
This code is for creating a mesmerizing animation called "Pacifica" using addressable WS2812B LEDs with the FastLED library, which you need to install first before trying this code.
The animation creates a dynamic and visually appealing effect, resembling ocean waves with changing colors and brightness.
Step 6: Audio Module and Sound Hardware
The ZK-TB21 is being used in this project, which is a 2.1-channel audio power amplifier based around the TPA3116D2 power amplifier chip.
TPA3116D2 is a Class D stereo amplifier that can drive speakers up to 100 watts. To drive two 100-watt speakers, the ZK-TB21 utilizes two of these TPA3116D2 chips. one for the left and right speakers, and one for the subwoofer
Also, there's a Bluetooth audio IC on this board, which lets us connect with this board for audio streaming.
Technical Specifications of Module
- Product name: 2.1-channel Bluetooth audio power amplifier module
- Product model: ZK-TB21
- Bluetooth version: 5.0 (unobstructed, 10 meters)
- Input sensitivity: 500 mV
- Input method: AUX + Bluetooth
- Number of channels: 2.1 channels
- Power amplifier chip: TPA3116D2 (with AM interference suppression function)
- Adaptable power supply: DC12~24V / 5A or more (over-voltage, output power setting)
- Adapt to speakers: 20~100 W, 4~8.
- Output power: 50W for left and right channels
- Subwoofer 100W
- Protection mechanisms: overvoltage, under voltage, overvoltage, DC detection, short circuit protection
- Product size: 120mm * 100mm * 20mm
- Product weight: about 256g (including packaging)
As for sound, we are using two 8-Ohm, 15-W speakers paired with the ZK-TB21 Audio Module.
Step 7: Speaker Assembly
First, we assembled the speakers, which was quite easy.
We take the two 15-watt speakers and install them inside the main base.
Eight M2 screws were used to permanently fix the speakers after they were positioned inside the main base in their designated spots.
Step 8: Speaker Grill
Next, we use four M2 screws to add a grill to the front of the main body.
Step 9: Adding the Audio Module Inside Base
As explained earlier in the design process, we have modeled an audio module holder part that is mounted with the audio module so that the entire assembly can be placed inside the speaker body vertically.
- The audio module is positioned atop the holder component, and four M2 screws are used to secure both of them in place.
- Next, we take the whole assembly and slide the audio module into its place.
- At last, we use four M2 screws and secure the audio module holder assembly in its place.
Step 10: Wiring
- As for the wiring process, we connected the positive and negative terminals of both speakers with the audio module's left and right speaker connectors.
- Next, we added a CON2 wire harness with the audio module's input connector; this wire harness will be connected to the RGB LED board's JST connector for powering the audio module.
Step 11: Back Lid Assembly
- Before beginning the Back Lid assembly process, we gather all of the remaining components, which include one DC barrel jack and two rocker switches.
- The JST CON2 Wire Harness was attached to the terminals of both Rocker switches, so connecting them to the RGB LED Board is as simple as putting in the wire harness connector on the PCB connector.
- We place both rocker switch in their place, along with the DC Barrel jack.
- Subsequently, we set the RGB LED board in its designated spot after adding the diffuser, keeping the diffuser between the PCB and lid.
- PCB is then secured using two M2 Screws.
- Next, we add both rocker switch wire harness on the CON2 of the RGB LED PCB.
Step 12: Back Lid Assembly: DC Jack Wiring
- We connect the cathode of a diode to the charging connector of the RGB LED PCB and place it in series with the input terminal of the DC Jack.
- In order to serve as a charging indicator when the charger is plugged in, we additionally add an LED to the input side of the DC barrel connector that is coupled to a 1K resistor.
- By passing a 12V power supply through the DC barrel connector to test the setup, we can see that the RGB board is receiving power and that the indicator LED lights up.
Step 13: Power Source
As for the battery source, we are using a 12V 5.2Ah Li-ion Battery Pack which contains an internal BMS, which means this pack offer over charge and overdischarge cutoff feature.
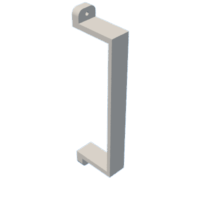
We constructed two battery pack clamps to attach the battery pack within the base. Four M2 screws are used to fasten the clamps to the base body, holding the battery pack in place.
Step 14: Final Assembly
- The last step in assembly is to connect the power wire harness of the Audio Module to the RGB LED Board's audio connector.
- next, we solder the battery terminals to the RGB LED Board's battery terminals, and the wiring process is complete.
- After sliding the lid into position on the back, we fasten the main body to the back lid using six M2 screws.
- Lastly, we install the potentiometer knobs that came with the Audio Module kit on them.
THE ASSEMBLY PROCESS IS NOW COMPLETED!
Step 15: Result
Here's the END RESULT of this simple build, a Loud Boxy Sound System which looks like a cube.
We tested the audio quality by pairing an IPAD with this Sound BOX via Bluetooth and playing a few songs. You can listen to the music for yourself by watching the video below.
An intriguing addition to this speaker was the RGB LED that illuminates the background and plays the Pacifica animation continuously.
Overall this project was a complete success and require no further versions.
I have included all the files, so you may try making one on your own.
Leave a comment if you need any help regarding this project. This is it for today, folks.
Thanks to PCBWAY for supporting this project.
You guys can check them out if you need great PCB and stencil service for less cost and great quality.
And I'll be back with a new project pretty soon!

This is an entry in the
All Things Pi Contest


