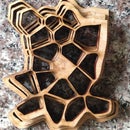
Introduction: Suite of Wooden Coasters
Another chrissy pressy I made for good ol' mumsie was a set of wooden coasters. Originally I wanted to make some kinda cheesy smiley face by cutting holes, but after seeing Wallace and Gromit's A Grand Day Out, I got a little more creative...
I used a 1/4 inch thick wood with a width of 5 inches for this project. I made two different sizes, in sets of four and eight. And the file was produced in Illustrator CC (though I saved it out as a SC6 file). This is important, because Techshop has CS6 installed, and if you try and open a CC file in a pervious version bizarre things occur to vectors.....
made at Techshop!
Step 1: Circles
begin with the usual RGB document, using a stroke of 0.01 px and color 255, 0, 0, 0.
Press the l key to get to the Ellipse tool and draw a the perimeter of the coaster, holding down the Shift key, to constrain the proportions.
Inside this circle, make 5 or so more ellipses, each with a different diameter and position, placed randomly along the right hand side.
Select these interior circles and, holding down the option key, drag one column over to make copies of the row. Make sure you keep the option key down and that you dont do any more moves to them. That way, we can use hotkeys to repeat the task:
Pressing the Command key (⌘) and d duplicates the last move made. Which produces, in this case, a new row of copies. Repeat this in other directions/other distances to make further rows.
Step 2: Now for Some Randomness
Repeats can become boring in no time, so now lets move each circle apart to make a more dispersed, organic look to where the wholes will eventually be cut.
This is where you can spend 5 seconds of 5 minutes honing individual positions. Just to show off, I selected more than one circle and moved them together. I found that I eventually had more circles than I needed, so then just deleted ones that gave the whole a look of variety without being too crowded.
After grouping all these circles (⌘ g), I then resized the whole to fit the dimensions of the piece of wood I wanted to cut. To fill the plank, I duplicated the group, just as before, until I had 8 groups, which produce 8 coasters.
Then its time to cut them up!
Enjoy!!


