Introduction: Surrounding Sounds Feedback Box-SSFBB (made With Teensy)
UPDATE 6/5 2016: Spectrogram on It's way
Idea for this project came semi-accident while playing around with teensy 3.2 It has horsepower to hande much stuff, here real-time audio calculations and smoothly updating FFT, scrolling peak meter (those on 2.2" ILI9341 TFT screens) as well as peak meter and average meter (smoother peak meter so sorta average). Microphone is AGC module from adafruit, adjustable gain of 60/50/40db. Non-AGC module would give more realistic output but this I had in hand, and 20db module too but that needed quite banging to give output (of course amplification could be added for that too).
Someone might notice carbon-fiber-look on enclosure, It's not carbon fiber, just plastic mask to give better look.
There is still improvement for better/realistic low-end response for FFT, but that can be due filtering, but not that big deal, small detail, but I don't mean noise on power supply would be neglible issue.
The reason of using microphone is that this box can be taken anywhere and used as decoration on-the-go (works with battery-pack also, and It'll pick up even birds song!)
There's many ways for this project to be done but I'll describe how I did it.
Step 1: To Start, Stuff Is Needed
Right, list comes as follows;
Teensy+audio adapter (can be bought from PJRC/adafruit/sparkfun)
https://www.adafruit.com/products/2756
https://www.adafruit.com/products/1780
Microphone module:
https://www.adafruit.com/products/1713
Displays:
http://eud.dx.com/product/2-2-inch-spi-serial-240x...
LM3915:
http://www.taydaelectronics.com/lm3915n-lm3915-led...
opamp (mcp6002)
http://uk.farnell.com/microchip/mcp6002-e-p/ic-op-...
LEDs (can be rectancular or round, doesn't matter in the end, I bought rectanculars from TME):
http://www.tme.eu/fi/details/l-113hdt/led-tht-suor...
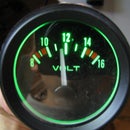
5v-meter:
https://www.sparkfun.com/products/10285
carbon-fiber-plastic:
http://eud.dx.com/product/merdia-cfm001dx12-decora...
And then some small parts, resistors ,capacitors, cable, and tools what you consider to be needed
I did use 3d-printer to make panel for instruments.
Patience helps when trying to make ili9341 displays to work, they can be tricky....
Step 2: Thinking & Building
I tried to place as much notes on pictures as I could, but before all, build circuit and confirm that it works on bread-board.
I did use hot-glue to, well glue stuff :)....
What else?. Oh, be careful with those TFT-screens, they're more fragile than they look.
When making enclosure, measure many times where you place stuff inside,it's hard to undo. This is why Carbon-fiber.plastic is applied lastly, to cover mistakes. And, if you can't cut enought long piece to cover all of the box, here's tip; you can use gray/black stripes to cover joints, and furthermore so plastic is applied from top-bottom you could think how water would want to go over it.
Thanks for reading!
PS: Sorry for small-scale/short 'ible, I'm not good at writing instructions!
Improvements as they arise: Log scale for FFT amplitude & frequency distripution (amplitude can be hard due math as well as nature of "wise" microphone amplifier) and in place of scrolling peak meter; spectrogram. Did already test that it is possible to change colours on-fly, so it should be possible.
Attachments

Participated in the
Sensors Contest 2016


