Introduction: THERMISTOR WITH ARDUINO UNO R3


A thermistor is a type of resistor whose resistance varies significantly with temperature.
Step 1: Components

Step 2: Principle

The resistance of the thermistor varies significantly with ambient temperature. It can detect surrounding temperature changes in real time. Send the temperature data to analog I/O port of SunFounder. Next we only need to convert sensor output to Celsius temperature by simple programming and display it on the serial port
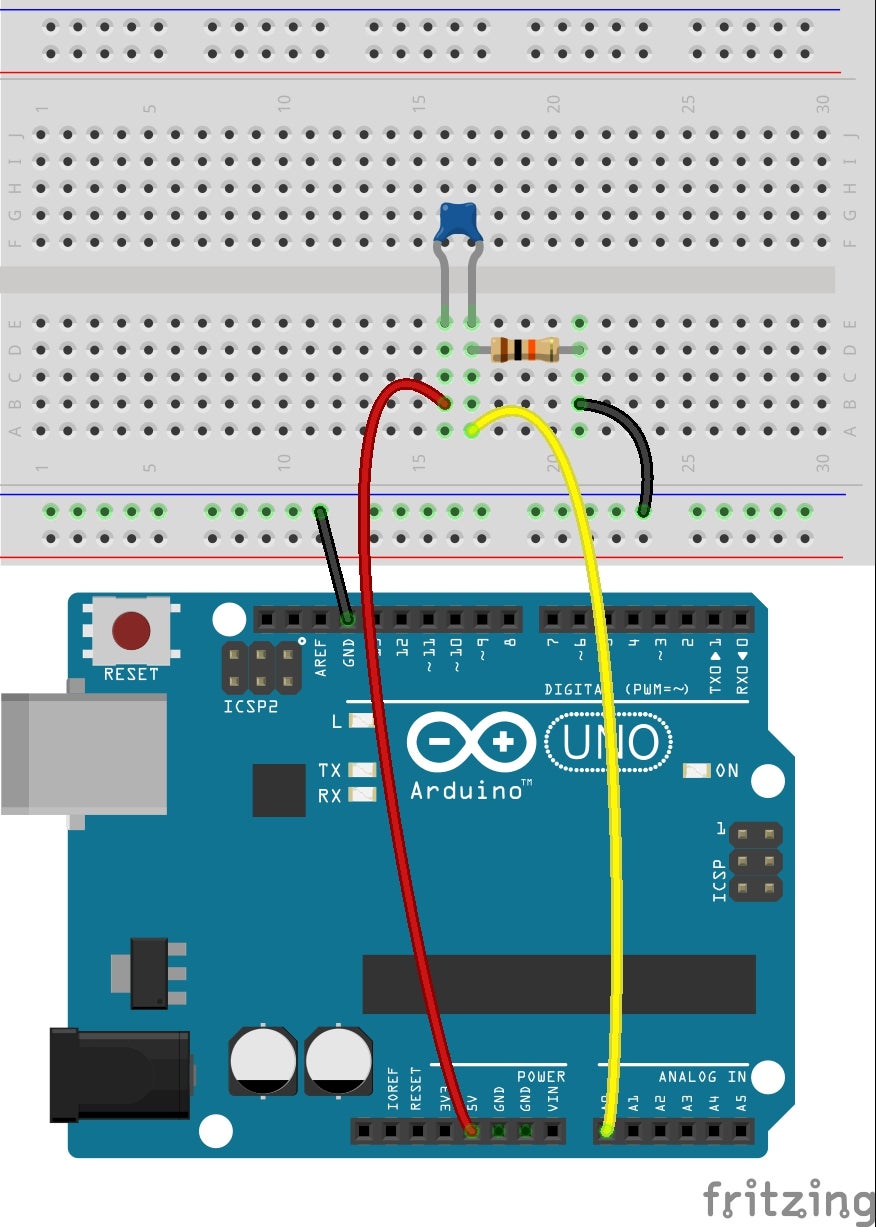
Step 3: Schematic Diagram

Step 4: Procedures
Step 1:
Build the circuit.
Step 2:
Download the code from https://github.com/primerobotics/Arduino
Step 3:
Upload the sketch to the Arduino Uno board
Click the Upload icon to upload the code to the control board.
If "Done uploading" appears at
the bottom of the window, it means the sketch has been successfully uploaded.
Now, you can see current temperature displayed on the serial monitor.
Step 5: Code

/************************************ * name:thermistor * function:you can see current temperature displayed on the serial monitor. **************************************/ //Email: info@primerobotics.in //Website: www.primerobotics.in #define analogPin A0 //the thermistor attach to #define beta 3950 //the beta of the thermistor #define resistance 10 //the value of the pull-down resistor void setup() { Serial.begin(9600); } void loop() { //read thermistor value long a = analogRead(analogPin); //the calculating formula of temperature float tempC = beta /(log((1025.0 * 10 / a - 10) / 10) + beta / 298.0) - 273.0; //float tempF = 1.8*tempC + 32.0;//convert centigrade to Fahrenheit Serial.print("TempC: ");//print" TempC: " Serial.print(tempC);//print Celsius temperature Serial.print(" C");//print the unit Serial.println(); //Serial.print("TempF: "); // Serial.print(tempF); // Serial.print(" F"); delay(200); //wait for 200 milliseconds }


