Introduction: Terminator Graveyard; How To, and How Not to Lost Foam Cast Aluminium
My recent project in 'lost foam' and a few pointers to things that can go well or go wrong.
Step 1: How 'Terminator Graveyard' Started Out.
Having previously had some very effective results using the 'Lost Foam Casting' method I looked for some time on interesting polystyrene (Styrofoam) objects that I might be able to cast up.
For those not familiar with the method an object of polystyrene has a 'sprue' attached which allows the molten aluminium a path to flow into the object to be cast.
The object to be cast is buried in dry sand with the sand level immersing the object and most of the way up the sprue. (I have been using something special called fine calcined flint clay because I have it available but most people use sand)
Aluminium is then melted and poured atop the sprue and it melts the sprue and the object perfectly filling the void.
It is an awesome method because it doesn't require particularly specialist equipment and can give some great results.
Now the part I should not have to say but will anyway; Foundry Furnaces, Molten Aluminium and Casting are incredibly hazardous. This is not a safety guide, do not do such a project without excellent safety equipment and a good understanding of the risks involved and how to mitigate those risks. If you do choose to do so, it is at your own risk. I have included a video of the furnace running to show you just how intense it is.
Step 2: The Polystyrene Prep
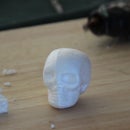
When browsing Trademe (New Zealand's answer to eBay) I stumbled upon a polystyrene mannequin head.
The facial details on the face and the head were stunning and the opportunity just could not be passed up.
When the mannequin arrived it was not small by any means and largely filled up a 20 litre bucket.
Firstly I fashioned sprues out of some 25mm polystyrene sheet and hot glued them to the base of the mannequin.
Next I used some medium fine (180grit) sandpaper to sand off the raised edges of the moulding defects on the polystyrene.
Step 3: Getting the Mould Ready
The next step is to bury the polystyrene mould and part of the sprue in sand.
In the second photo you can see my 'pouring cup' this provides a clear defined reservoir for aluminium to prevent defects from shrinkage and head pressure to ensure the mould fills completely. In most smaller cases this would be a tin can with both ends cut off but because this was larger than most I used a short section of 100mm pipe.
For my projects thus far I have used calcined flint clay (which is fire clay that has been fired, crushed fine and graded) instead of sand, it has worked well for me but most people use silica sand.
The general rule of thumb for casting is the finer the sand then the finer the surface detail you will see (my calcined flint clay is graded to 0.05mm)
Some people do things like coat the polystyrene in plaster of paris or tape at this point to get good surface quality but I have not found it necessary myself. If you did give it such a coating it may prevent sand from collapsing in if you do not do the pour properly.
For this step I have never yet rammed the sand in, it has always flowed in loose like a liquid and filled any voids/ surface details.
Step 4: Melt Some Metal
Now that the mould is prepared it is time to melt some metal.
As mentioned earlier, at the start of this project I did not even have a suitably sized crucible so I made one out of steel cut from an old air compressor pressure tank.
I cut it apart with a grinder and then welded a steel base on.
The final crucible was approximately 200mm in diameter and 300mm high with a volume of 8ish litres of aluminium.
Since I had never worked with such a big 'pot' of aluminium before I made a loop on either side so myself and a helper could put a bar through and lift it together.
Step 5: Pour Some Metal
This is around about the place where we go from how to do lost foam casting to how not to do lost foam casting.
I had fashioned a jig to hold the crucible of aluminium above the mould.
We pulled the crucible of aluminium out, skimmed the dross then set it up on the jig above the mould. Unfortunately I had only guessed heights and things started to go 'bendy'.
The hot crucible of metal touched the side of the bucket (holding/ forming the mould) and set the bucket alight.
Hurriedly I poured the metal down the sprue and then the curve of the pouring on my jig no longer lined up with the sprue interrupting the pour.
I saw the 'sand' slump and new immediately what that meant, I carried on pouring but knew full well that this meant at the very least a partial fail.
Very quickly the mould would accept no more aluminium so the remainder was poured in an ingot tray.
The secret of lost foam casting is a continuous pour. No matter whether fire and smoke comes out (which it will) you must keep pouring. It seems the hydrostatic pressure of the incoming aluminium is sufficient to prevent the sand from caving in. Every time if the pour has been interrupted the results have been poor, if however the pour has been continuous the finish has exceeded expectations with no cave ins.
Step 6: The Finished Product
As mentioned earlier I knew there would be problems with the final cast from the interrupted pour but I carried on anyway.
Another tip is that you can never leave the cast too long before disturbing it. I am always impatient and sometimes this has meant that there is still molten aluminium inside.
Leave the cast for several hours and while it will likely still be hot, it should no longer be molten.
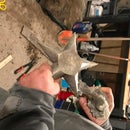
No surprises that there were voids but in some ways I was very happy with it.
A post apocalyptic piece of art maybe; I call it Terminator Graveyard (and just in time for Halloween too ;) )
Better luck next time...

Participated in the
Halloween Decor Contest 2016


