Introduction: Tic Tac Gun
In this instructable I show you how to make a Tic Tac rifle. Several Tic Tac rifles have already been made, this gun distinguishes itself by the way the trigger works.
Supplies
Parts you will need:
- trigger cap (from a used packaging)
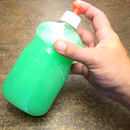
- bottle
- 2 popsicle sticks
- 1 rubber band
- 1 syringe
- At least 1 box of Tic Tac
Tools you will need:
- Glue gun
- Stanley knife
Step 1: Strip the Trigger Cap
Remove the top cap from the trigger cap.
For the trigger mechanism I use a trigger cap. There are different types of trigger caps in circulation. For this project it is important that the spring mechanism on the top moves.
Step 2: Mount Popsicle Stick to the Trigger Cap
Put a little glue on the trigger cap with the glue gun. Place the popsicle stick on top of this, it should stick out at the front.
When the glue is dry you can screw the trigger cap on the bottle.
Step 3: Strip the Syringe
Disassemble the syringe. the rubber inside the syringe must be removed. After this, the syringe can be reassembled.
Cut off the front of the syringe with a Stanley knife.
Step 4: Mount the Syringe
Put a little glue on the popsicle stick with the glue gun. Then glue the outside of the syringe to the popsicle stick.
Step 5: Adjust the Trigger Mechanism
The springy parts of the trigger cap are on the outside. The syringe will be in the middle, which is why the 2 springy parts are connected.
Make a few small pieces of a popsicle stick. The long piece connects the spring parts together, the 2 small pieces are used as a spacer.
Glue the pieces together and then glue them to the trigger cap.
Step 6: Make the Locking Pin
To hold the inside of the syringe when the gun is loaded, a locking pin will be placed on the trigger cap.
Take 2 small pieces from a popsicle stick and glue them one by one on the trigger cap. The first will stand upright, the second diagonally against it to make it stronger.
Step 7: Make a Notch for the Locking Pin
Keep the inner part of the syringe in the fully extended position. Now mark where the notch should be in the syringe at the height of the locking pin.
Cut this part away with the Stanley knife.
Now test whether the trigger part works. If the trigger does not push high enough to release the syringe from the locking pin, you can slightly fill the top of the trigger with a piece of popsicle stick.
Step 8: Mount the Rubber Band
To make it possible to fire the Tic Tac rifle you need to mount a rubber band.
To do this, make 2 notches in the outer part of the syringe and 2 notches in the inner part of the syringe. use your Stanley knife for this.
It is important that the notches in the inner part are higher. This allows the elastics to pull the syringe well behind the locking pin when the gun is being loaded.
Now put the elastic around the syringe and through the notches. The firing mechanism is now ready.
Step 9: Make the Tic Tac Entry
To load the rifle, a feedthrough must be made through which a Tic Tac will fit.
Place the syringe in the loaded position and mark the correct location for the passage. Now use the Stanley knife to cut out the part. Check if a Tic Tac will fit through it and adjust if necessary.
Step 10: Assemble the Tic Tac Box
Hold the Tic Tac box in the desired position. Transfer the hole in the syringe to the Tic Tac box. Cut this out with the Stanley knife.
Now put a little glue on the bottom of the Tic Tac box and glue it on the syringe.
Step 11: Ready!
The Tic Tac gun is ready!
Just fill it with Tic Tac and you can try it out.
Good luck building this Tic Tac Pistol. If you have any questions or comments, please let me know!


