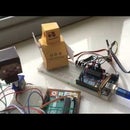
Introduction: Ultrasonic Piano
Note: Above is a video - it may show as a photo only on some mobile devices.
This is an ideal project for a science fair etc. - it's not too difficult to construct, yet makes a playful interactive exhibit.
The idea is to have a lot of proximity sensors - each triggering a different sound sample. No touch needed - no complex light-beams etc - everything is just sitting on the one table.
The distance someone needs be from the table for a note is triggered is customisable.
It has an custom optimized ultrasonic code for sampling multiple detectors at once - it is highly responsive and does not block for seconds like the standard libraries tend to do when objects are far away.
The Edison was used as it makes it possible to connect up PC speakers using a (very cheaply available) USB Sound card - and the sound quality is really very good compared to other development boards we have tried. Also many sounds can be played simultaneously - just like a real piano :)
All images and videos taken with my mobile phone - hope the quality is good enough...
Step 1: Building the Piano - Parts List
Parts List
- Wood plank for base - sized to fit the number of detectors you are using
- 9 Ultrasonic Detectors (or how-ever many you wish to use)
- Intel Edison Board
- Edison Arduino Breakout Kit
- 3 Large Breadboards
- 1 Mini Breadboard
- Wires
- USB Sound card (about $3 on places like Link)
- USB Powered PC Speakers or Portable Mobile Phone amplifier
- Stickers, Paper, Flashing Led lights, etc to decorate as you like.
- Optional push button to switch music instruments samples
The USB Soundcard can be any type - a usb headset works also.
The Speakers can be any amplifier that you can connect the 3.5mm connector from the Soundcard.
Step 2: Construction
Fittings
The base of the piano was a wooden rung upcycled from a bunkbed! It was covered with some some red paper card stock. Sticky backed plastic might be even better.
The Edison microcontroller is placed near the middle and three large breadboards and are attached by pealing back a small amount of the breadboards double-sided sticky tape. The first version of this Ultrasonic Piano had Six Ultra-sconic detectors - this version has Nine - you can have as many as you have spare pins on the Edison.
Wiring
Two or three Ultrasonic detectors are placed on each breadboard. Space them out as far as you can.
Each Ultra-sonic detector is wired as follows:
Pin1 - Each detectors pin marked as VCC are to be connected to the Edisons +5V
Pin2 - This is the Trigger - all the Triggers are connected together and all go to Pin 13
Pin3 - This is the Echo Pin - monitored by Edison to determine if an object is close - each must go to a spare input pin (pins 2 to 10)
Pin4 - Is the Ground Pin - all these are connected together and connected to Edison GND.
An optional Green LED was connected between pin 3 and 4 of each ultrasonic detector - this will emanate a pulse of light that varies in brightness as objects are brought near or far from that detector. This is the pulse the Edison measures to determine the distance to any object near the sensor.
Important Note: Dont forget the resistor, it is recommended - however as the LED is pulsed for short periods of time and not left on, you may get a green led (but not red) to survive for some time with no resistor - but it wont be good for the LED or the microcontroller long term. A 100 to 200 Ohm resistor in series would be prefect.
Decorating
Add stickers and extra led lights as you see fit.
Step 3: Programming the Edison
This project uses a combination of Arduino for monitoring the sensors and the Edison's Linux environment for playing the sounds.
Use FTP to create a folder from the root called Piano - and upload a sample you want each sensor to play - the notes can be be playing a simultaneously - so pick notes from the same instrument - or not - your call...
These free piano samples were used for the sounds:
www.freesound.org/people/pinkyfinger/packs/4409
All the code is programmed using the Arduino IDE
Code can be found here: UltrasonicPiano on GitHub
Code is as follows:
#define HAND_MUST_MOVE_DISTANCE 200    //in uS ping time in we take as something near
#define MAXECHOTIME 1000      // Calculate the maximum distance in uS (no rounding).
#define DEBOUNCEmS 500        // millsec before can play a second note on that key
#define MIN_DISTANCE 2        // below this time in uS means either too close - or nothing near

#define TRIGPIN 13            // All sonics connected to one pin

#define MAX_SENSOR_DELAY 500  // Maximum uS it takes for sensor to start the ping

#define SONAR_NUM     9       // Number of detectors
#define SOUND_BANK_PIN  12    // Button to switch sound banks


//The Pins the sonar is attached to
int sonar[SONAR_NUM]=
{
    2, 3, 4, 5, 6, 7, 8, 9, 10
};

int result[SONAR_NUM];
int previousHits[SONAR_NUM];
long lasttime[SONAR_NUM];
int soundBank = LOW;        //Two sound bank choices - guitar and piano

//9 samples (must be wav unless you have installed the optional mp3 libraries on the edison)
//Some free samples can be got here: www.freesound.org/people/pinkyfinger/packs/4409
//Wav files need be placed into the folders on the edison (use FTP) as indicated below.
//The trailing & is important
char* sounds[]=
{
    "aplay /home/root/piano/00_piano-g.wav &",
    "aplay /home/root/piano/01_piano-a.wav &",
    "aplay /home/root/piano/03_piano-b.wav &",
    "aplay /home/root/piano/05_piano-c.wav &",
    "aplay /home/root/piano/06_piano-d.wav &",
    "aplay /home/root/piano/08_piano-e.wav &",
    "aplay /home/root/piano/09_piano-f.wav &",
    "aplay /home/root/piano/10_piano-f.wav &",
    "aplay /home/root/piano/11_piano-g.wav &"
};

//9 alternative samples
char* sounds2[]=
{
    "aplay /home/root/guitar/1.e.wav &",
    "aplay /home/root/guitar/2.f.wav &",
    "aplay /home/root/guitar/3.g.wav &",
    "aplay /home/root/guitar/4.a.wav &",
    "aplay /home/root/guitar/5.b.wav &",
    "aplay /home/root/guitar/6.d.wav &",
    "aplay /home/root/guitar/7.e2.wav &",
    "aplay /home/root/guitar/8.f2.wav &",
    "aplay /home/root/guitar/9.b.wav &"
};

void setup() {
    Serial.begin(115200);
    Serial.println("Start");

    for(int n=0;n<SONAR_NUM;n++)
    {//Out of time starting
        int ECHOPIN = sonar[n];
        pinMode(ECHOPIN, INPUT_FAST);
    }
    pinMode(TRIGPIN, OUTPUT_FAST);
    pinMode(12,INPUT_PULLUP);
}

void ping()
{
    for(int n=0;n<SONAR_NUM;n++)
        result[n] = 0;  //0 for no result

    digitalWrite(TRIGPIN, LOW);
    delayMicroseconds(2);        // Wait for pin to go low. (try 4 if having problems)
    digitalWrite(TRIGPIN, HIGH); // Send out a ping.
    delayMicroseconds(10);       // Wait for sensor to read it. Sensor specs say to wait 10uS.
    digitalWrite(TRIGPIN,LOW);   // Set trigger pin back to low.

    long timeoutTime;

    // wait for ping to start
#ifdef true
    //Easy way
    delayMicroseconds(500);        //most detectors take about 450uS to 500uS
                                   //SRF06 can take much much longer.
#else
    //use this for the slower sonar detectors
    timeoutTime = micros() + MAXECHOTIME  + MAX_SENSOR_DELAY;

    for(int n=0;n<SONAR_NUM;n++)
    {
        int ECHOPIN = sonar[n];
        // Previous ping hasn't finished, abort.
        if(digitalRead(ECHOPIN) == HIGH)
            result[n] = -1; //"No Reply"
    }

    for(int n=0;n<SONAR_NUM;n++)
    {
        if (result[n]==0)
        {
            int ECHOPIN = sonar[n];
            // Wait for ping to start.
            while(digitalRead(ECHOPIN) == LOW)
                if (micros() > timeoutTime)
                {
                    result[n] = -2; //"Too Long To Start"
                    break;
                }
        }
    }
#endif

    long startTime = micros();
    timeoutTime = startTime + MAXECHOTIME ; // Ping started, set the time-out.

    boolean bExit;
    do
    {
        bExit=true;
        for(int n=0;n<SONAR_NUM;n++)
        {
            if (result[n]==0)
            {
                int ECHOPIN = sonar[n];
                if(digitalRead(ECHOPIN) == LOW)  // ping end echo
                    result[n] =    (int)((micros() - startTime)+.05);
                    // Dont bother calc distance - ping time is enough for us.

                else if (micros() > timeoutTime)
                    result[n] = -3;
                    // record error if we're beyond the set maximum distance.
                bExit=false;
            }
        }
    }while(bExit == false);
}

void loop()
{
    ping();

    //All done - display
    for(int n=0;n<SONAR_NUM;n++)
    {
        float dist = result[n]; //in time

        if (dist <= MIN_DISTANCE)
        {//person is too close or has gone away
            previousHits[n]=dist;  //reset
            continue;
        }

        int previous = previousHits[n];
        if (abs(dist - previous) > HAND_MUST_MOVE_DISTANCE)
        {//New key pressed!
            previousHits[n]=dist;

            long now = millis();
            if ((now - lasttime[n]) > DEBOUNCEmS) //debounce 333mS
            {
                char* sound = soundBank == LOW? sounds[n]:sounds2[n];
                Serial.println(sound);
                system(sound);
            }
            lasttime[n] = now;
        }
    }

    if (digitalRead(12) == LOW)
    {//Switch to second band - have settle time.
        soundBank = !soundBank;
        Serial.print(soundBank);
        delay(1000);//debounce
    }

    delay(20);
}
Step 4: How It Works
The implementation has some good tricks to make it work well.
Basically the idea is when someone puts their hand near a sensor it plays a sampled note.
The code is required to monitor all the sensors in real time and play the notes with as little delay as possible - several notes at a time, in the background - all the time trying to avoid cross talk and debouncing the detectors so they don't trigger multiple times as a hand is moved in front.
Ultrasonic pulses are being continuously sent from the detectors - and the software listens for an echo - if this echo is heard within 1 millisecond - then a object is very close - about 15 to 20 cm - so we play a sampled sound for that detector. Any range up to a couple meters would work - but we wanted it to exclude people walking past far from the table.
To get maximum real-time performance, we cannot use the standard Arduino libraries - as these can only monitor One sensor at a time and tend to locking up for a second or more when an object is far away. No use for a responsive piano.
Also - to reduce the number of wires, as well as to make it more responsive - we use the one trigger to trigger all the senors at once - there was a worry that this might cause some cross-talk between the sensors- but it works well in real life.
To eliminate fully any cross-talk between the sensors - Felt material can be rolled and stuck to create 2 inch long tubes and attached to each of the sensor detectors to make it more directional. See this link for details. We deemed it unnecessary, but you may find it improves separation of the sensors.
This all required us to created our own Ultrasonic library code to time the ping response of all Nine detectors simultaneously - and to filter out spurious values that can happen like unwanted double activation's in a row that can happen.
Step 5: Some Notes on Setting Up the Edison
There are plenty of tutorials for setting up the Edison so we wont cover that here.
But these points are some important things to take note of for this project
To install support for the USB sound card use the information from this link
lets-make-noise-play-audio-edison
By default - we found that the speaker volume was set low to 30%...
So you may need terminal in (using putty or similar) and set the volume using the interactive application
alsamixer
To support MP3 sound samples - you will need install the mpg libraries
opkg install mpg123
Step 6: Have Fun!
(video)
All the best - and have fun with it :)

Participated in the
Intel® IoT Invitational

Participated in the
Make It Glow! Contest


