Introduction: Upgraded RC Toy Car With Ultrasonic Sensor (Arduino)


This is an RC toy car which upgraded as Arduino RC car avoiding objects.
We removed the original board of the RC car and used only the DC motors.
This RC toy car includes two DC motors, one in the front of the car as a steering motor and another DC motor in the back as forwarding/reversing.
We need below materials:
1- RC Toy Car (original board inside the car to be removed), without remote control : 1 Piece
2- Arduino (UNO) : 1 Piece
3- Ultrasonic Sensor : 1 Piece
4- Battery (9V high amper), we used the battery of Drone : 1 Piece
5- DC motor Driver : 1 Piece
6- Wires
7- Glue gun
Step 1: Wiring Parts
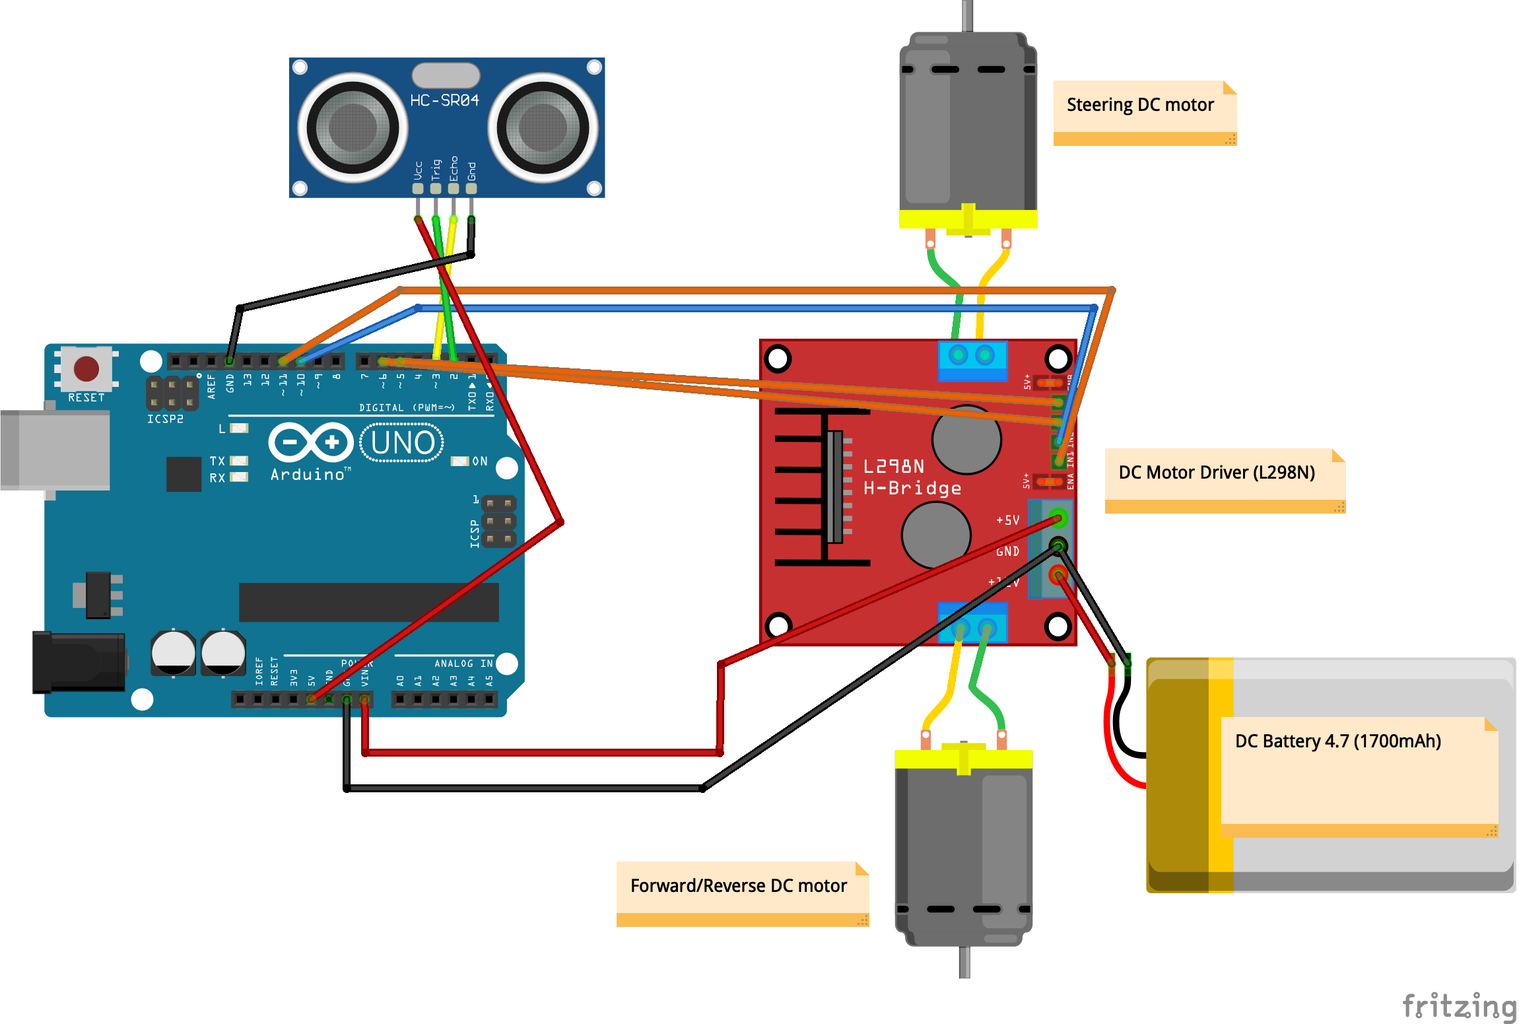
Simply connect each part as shown in the Schematic.
Connecting the ultrasonic sensor to Arduino:
Pin 2 to Trigger pin of the ultrasonic sensor
Pin 3 to Echo pin of the ultrasonic sensor
Connecting DC motors to DC motor Driver:
Pin A1 to Motor 1
Pin A2 to Motor 1
Pin B1 to Motor 2
Pin B2 to Motor 2
Connecting DC motor Driver to Arduino:
Pin 11 to A1
Pin 10 to A2
Pin 6 to B1
Pin 5 to B2
Connect battery to DC motor Driver. Then connect Vout of DC motor driver to Vin of Arduino. Connect GND of battery to Arduino GND.
Step 2: ARDUINO Code
Download simple timer library from below link:
https://github.com/jfturcot/SimpleTimer
Then upload my code to your Arduino IDE.

Step 3: Bill of Material
Assembly List
Battery 1700mAh
HC-SR04 Sensor 1HC-SR04 Ultrasonic Distance Sensorchip LM324
M1DC Motor
M2DC Motor
Arduino Uno (Rev3)
S1H-Bridge with L298