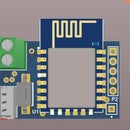
Introduction: Easy Update ESP8266/ESP32 Via Internet (OTA Server for ESP8266)
When you build a device based on any MCU, you will face a lot of bugs after installing the device in the area. By the way, changing firmware is not always easy, sometimes device is installed in of reach place and you should update the firmware remotely.
The problem gets more serious when you made and installed multiple devices and it may be impossible to upgrade new firmware for all devices.
OTA upgrade makes it possible to upgrade the firmware of a lot of devices simultaneously.
To use OTA, you should call a function to get the last firmware from the OTA server. But OTA server is not something easy to reach.
Step 1: A Simple Blinker With OTA Update
Now, I want to write a simple program for ESP8266 using the Arduino framework, It's a LED blinker, I will compile this project with two different blink speeds and then change the firmware via the internet.
The source code should be something like this:
#include "Arduino.h"#include "ESP8266httpUpdate.h"String version = "1.0.0.0";void doUpdate();void setup(){ // put your setup code here, to run once: Serial.begin(115200); WiFi.begin("SohaDevice", "DamkpKCk"); while (WiFi.status() != WL_CONNECTED) { Serial.println("."); delay(150); } Serial.print("Wifi IP:"); Serial.println(WiFi.localIP()); // Setup LED GPIO pinMode(2,OUTPUT);}int updateCheckTimer = 0;void loop(){ // Lets blink digitalWrite(2, 1); delay(100); digitalWrite(2, 0); delay(100); updateCheckTimer++; if(updateCheckTimer > 30) { updateCheckTimer = 0; doUpdate(); }}void doUpdate(){ String url = "http://otadrive.com/DeviceApi/GetEsp8266Update?k=9a03f4fb-98c5-4963-9d39-cc9181f65edd"; url += "&s=" + String(CHIPID); url += "&v=" + version; t_httpUpdate_return ret = ESPhttpUpdate.update(url, version); switch (ret) { case HTTP_UPDATE_FAILED: Serial.println("Update faild!"); break; case HTTP_UPDATE_NO_UPDATES: Serial.println("No new update available"); break; // We can't see this, because of reset chip after update OK case HTTP_UPDATE_OK: Serial.println("Update OK"); break; default: break; }}All you need to know is in doUpdate() function. There is a URL to the otadrive.com server with lets you upgrade and manage devices.
For more info about otadrive.com see the following video.
OTAdrive.com take you a unique key for each product (ex: 9a03f4fb-98c5-4963-9d39-cc9181f65edd), you should replace your own product key before compiling the above program. To get your product key, go to the API section.
After that, you could make several device groups and move devices to separate groups to get more control over device updates. For example, you can upgrade only 10 devices between thousands of devices by grouping them. Each group can have a different version of the firmware.
All done, just add doUpdate() function and go to otadrive.comota update service.


