Introduction: Wooden Ab Wheel
Ab wheels are a gym accessory used for various core exercises. Here's how to make one using scrap wood.
Step 1: Materials and Tools
You will need a wooden rod and a plank of wood (I used an offcut of some 3/4" project board). You'll also need a tool capable of cutting a perfect circle - we used a table saw, but there are all sorts of circle-cutting jigs for other tools. You'll also need a cordless drill and a large bit the same size or slightly smaller than the rod. Wood glue, fasteners, sandpaper, a router if you've got one, and something to give it a finish coat.
Step 2: Design
Ab wheels are simple. They're a thick disk with an axle. Usually they're made out of plastic with a metal axle and rubber tread and grips. They're not expensive, but I like making things, especially out of leftovers from other projects. The rod was 270 mm (11") long and 32 mm in diameter, the disc 180 mm (7") in diameter, and the collars 65 mm (2 1/2") in diameter.
Step 3: Cut Circles
Drill rod-sized holes and cut the wood to size. Note that we made the pieces of wood much closer to round than the polygons shown in the 2nd and 3rd pictures. The circles are cut by lifting the blade a fraction, rotating the work piece, and repeating until it is cut all the way through. The green painted plywood is clamped in place. Make 2 large (180 mm, 7") and 2 small (65 mm, 2 1/2") circles.
Glue the two large circles together. Use the rod to align the parts for clamping but remove it while the glue sets.
Step 4: Adjust Rod Diameter, Roundover Edges
If, like us, you only own one Forstner bit, you might have to adjust the size of the dowel. That's easy if you have a lathe, but we don't. We shaved the dowel down using a a square bit in a router table, as shown. That trick also works on a table saw. You're using the table surface and the ends of the rod to keep the axis of the rod a fixed distance above the table, and the bit (or blade) takes off that fraction you need. You don't want a super-tight fit, because the rod has to rotate freely.
The router was also used to round over all outside edges.
Step 5: Assemble
The two small circles are collars that need to be fixed to the rod either side of the main wheel. We used wood glue and Miller dowels, but screws would work equally well. To lubricate the wheel, we melted some candle wax on the axle and the inside of the collars.
Step 6: Finish
We coated the wheel with some polyurethane for some protection from sweat.
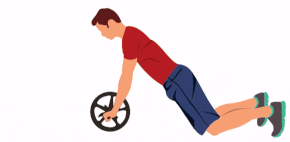
The wheel spins freely and the wooden version functions just like a commercial one. If you've not used one before, go easy - it's harder than it looks. There are lots of workouts out there for the ab wheel, many ridiculously challenging, but the basic movement involves rolling forward and back while in a kneeling push up position.

Interested in other wooden exercise equipment? Check out my plyometric box and wrist rollers, and look out for an incline bench, coming soon.


