

Introduction: 15 Minutes Jeep Liberty Cooling Fan Motor Replacement


In this instructable, I will show you the step to take to replace the motor that is found inside the radiator cooling fan housing, the thing right between the radiator and the engine in the engine compartment.
The installation is specific to a Jeep Liberty 2003 V6 but I am sure the steps in here can apply to a lot of other cooling fans.
I will also cover a few steps to troubleshoot and a few things to watch out for, hover, I will not cover relays and fuses in too much detail.
The cost to do this is just the motor itself, about $140CAD, one reason I did the motor replacement rather than changing the fan which is about $300CAD.
All you need to do this is 10mm socket or wrench and possibly a pair of pliers and a pair of needle nose pliers.
The entire task to replace the motor should not take you more than 15 minutes, the troubleshooting on the other hand could take a lot longer based on your troubleshooting skills.
One note on cost. I did find some sites selling the entire fan assembly for about $80US but they don't ship to Canada and the ones that do, in the end the cost was on par with just buying the motor from PartsSource (Canadian Tire's auto parts division).
Step 1: Troubleshooting

Your engine is overheating, the AC can't keep up and radiator cooling fan is not spinning.
Here are a few steps you need to take to troubleshoot this situation. Don't forge to keep your fingers or any body parts away from anything that could injure your (cuts, burns, etc.) or or clothing that get caught and pull you in the engine bay like a scarf caught by the accessory belt.
Even though the I did this on a 2003 Jeep Liberty, most of the information in here is applicable to other vehicles as well.
Troubleshooting steps
1. Check the cooling fan fuse. In the engine compartment, look for the fuse box on the driver side, open it and look for the diagram. I believe it is a 40A fuse, the second or the 3rd from the left top row. If the fuse is burnt out, replace it with an identical one, if it's not burnt, continue troubleshooting.
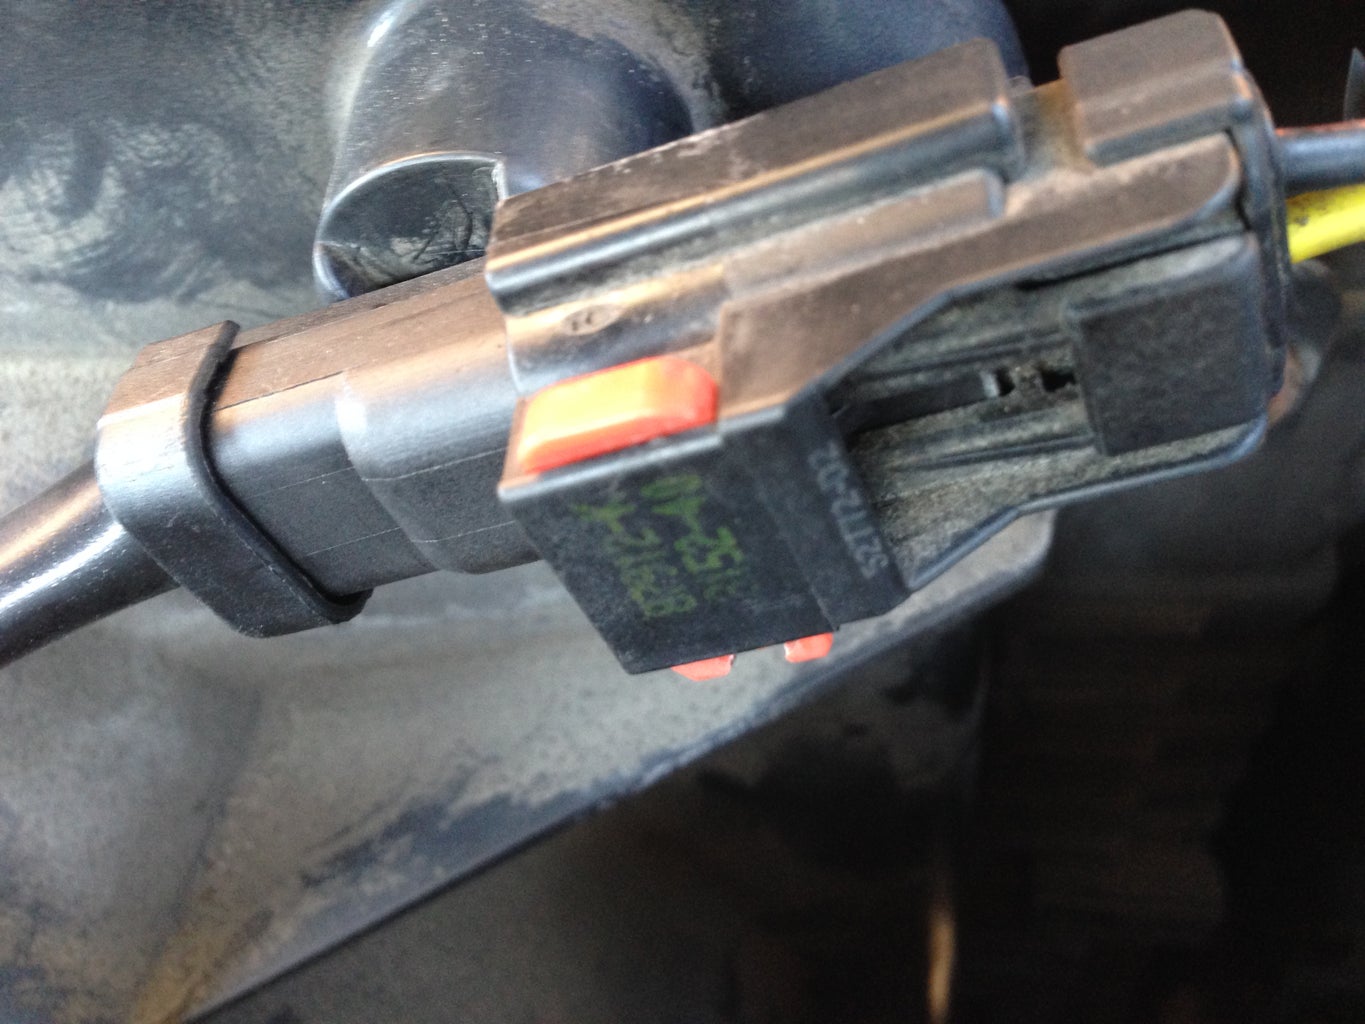
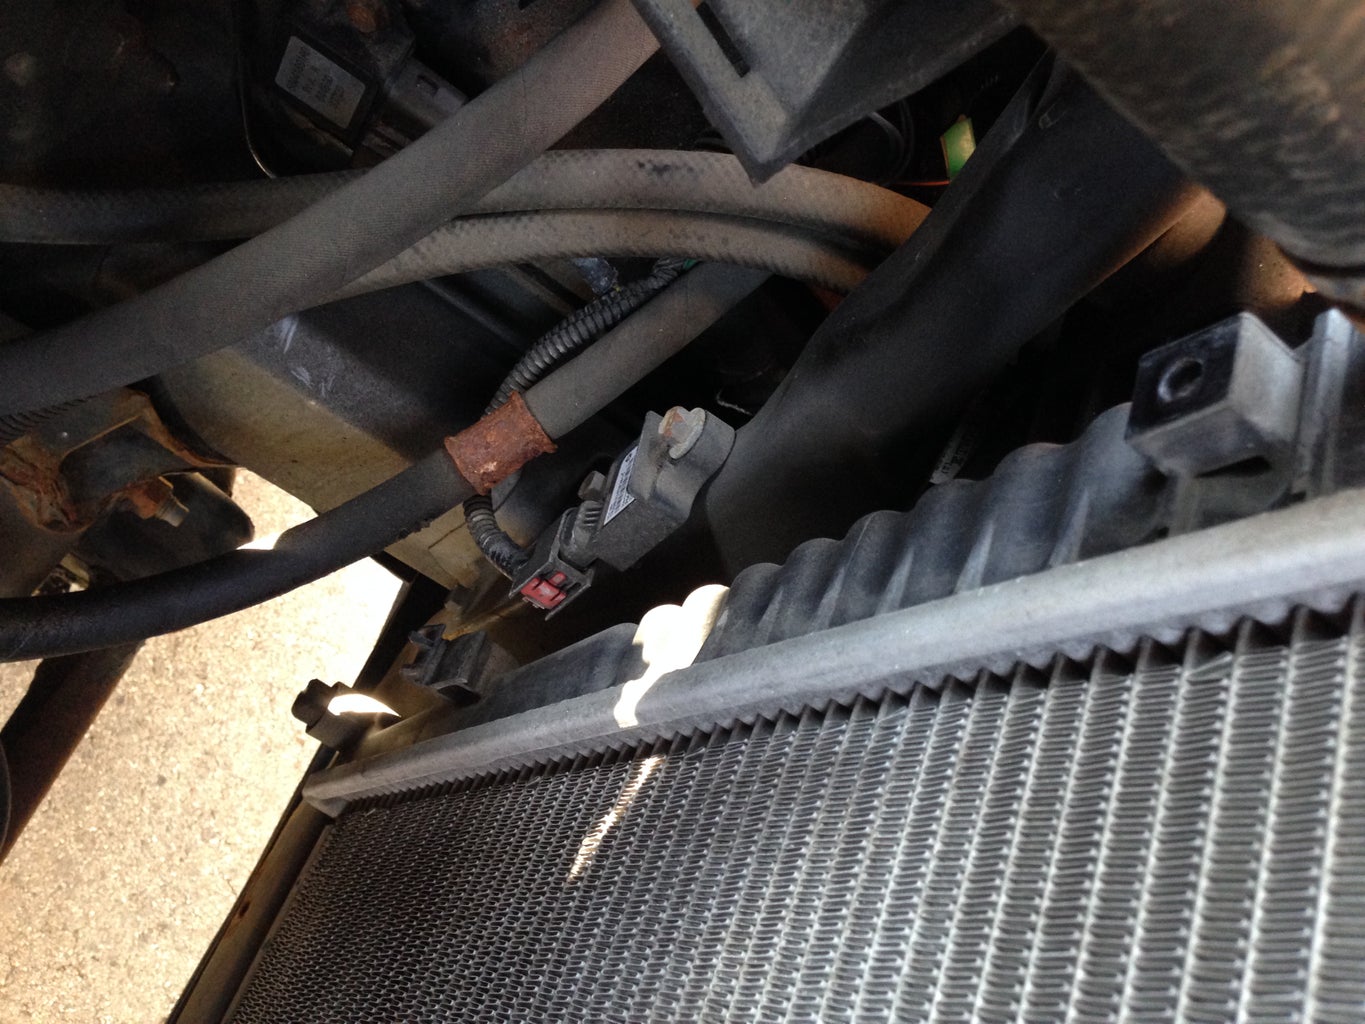
2. On the passenger side, attached to the fan shroud, you will see a connector with a small red tap - see pic above. Pull the tab (or push it from behind) for about 1/4" - about 5mm until the tab cannot travel anymore. On the side of the connector that's the farthest from the fan, you will see another tab, this time around this is really part of the connector and the same color as the connector, push this tab down to disengage the catch and separate the two connectors. Plug them back in, start the engine, put the AC on to tell the computer to turn the fan on. If the fan comes on, it was probably a bad connection if not, continue troubleshooting. Don't forget to turn off the engine.
3. If you have the new motor, just connect it to the connector. Make sure you have somebody holding it and start the engine. If it turns then move on to replacing the old motor. As a side note, this is not a high torque motor and holding in your hand is OK, there will be a bit of a jerk but nothing scary.
4. For this step, you might need some assistance but it can be done by one person. Do some research to see which wire is the ground wire (negative) on your vehicle, usually a black wire indicates it is connected to the ground. Disconnect the fan again. Get two pieces of insulated wire long enough to reach the connector easily, say 14 ga, and strip one end about 1.5-2" and the other about 1/8". Using the two pieces of wire, connect the longer end to the battery posts (+ and -), start with the negative post (-) and then the positive post DO NOT ALLOW THE POSITIVE WIRE TO TOUCH ANY PARTS OF THE VEHICLE. The negative is connected to the ground which is pretty all exposed metal parts of the vehicle, if the positive wire touches the ground (negative) you will have a big, scary and very dangerous short to deal with. Using the shot end of the wires, touch the post inside the connector accordingly, + to +, - to -. If the fan turns, I'd start to suspect the relay which is on the driver inner fender well below the fuse box towards the lower end of the fender well. You'll have to do some more research to see how to troubleshoot the relay or replace it. If the fan doesn't, then you have a dead motor.
The next steps will explain how to replace the motor, if you have the entire cooling fan assembly, follow the steps applicable to replacing the whole thing.
Step 2: Remove the Cooling Fan

Disconnect the fan if not already disconnected.
There are two bolt at the top of the fan shroud. Using a 10mm socket or wrench, remove the two bolts.
Push the fan away from the radiator and then lift it slowly. There are two tabs at the bottom that help secure the fan in place.
You might have to wiggle it a little.
Take the assembly out and put it somewhere you can work on it easily.
Step 3: Remove the Old Motor


On top of the fan, you'll see a big (rusted) C clip. I found that if I put the end of my needle nose pliers in the rectangular cut and hit it with another pair of pliers, the C clip came right off.
Pull off the blades cover and using the 10mm socket or wrench, undo the bolt and remove them.
Pull the old motor out.
Step 4: Install the New Motor


Run the connecting wire through the notch in the shroud.
Bolt the new motor in using the 10mm socket or wrench and the old bolts.
Your new motor most likely came with its own flange, the star looking thing. Make sure you put the flange on the motor shaft and it is engaged properly with the cross pin on the shaft.
Put the blades cover back on.
Use the old C clip and using a similar technique like the one to take it off, put it back in by hitting the needle nose pliers from behind until it snaps in place.
Step 5: Put the Cooling Fan Back In

Slide the cooling fan assembly back in place by aligning the tabs at the bottom. It will not fall right into place, you'll have to use a bit of force, not much though to bend the assembly and force the tabs in place.
The top of the shroud will need to be pushed down a little and forced under the plastic cover above the radiator. Just use common sense to shove it back in.
Bolt the two 10mm bolts enough so they don't come off, they don't need a lot of torque, if they are a little more than snug that's good enough.
Connect the new fan to the electrical system. Don't forget to push down the red tab when done.
Route the wires accordingly and make sure the wire is also routed around the little hook used for wire management to prevent them from coming in contact with the pulleys and belts on the engine.
Start the engine and make sure the AC is on to tell the computer to turn on the fan.
Hopefully by now, everything is working as expected and you can stop worrying about your engine overheating.
If the fan is still not working, I'd take a look at the relay or go to a professional.
One last thing, I've entered this intructable in a contest, don't forget to vote if you think it deserves your vote.

Participated in the
Wheels Contest


