

Introduction: 3D Pen Tutorial, #2 - BASIC Techniques


I have created a 3 part video tutorial series on How to Use a 3D Pen. This is the second part in that series and covers Basic Techniques for 3D Pens.
The videos show many visual examples and little details that are difficult to capture in text. Using this Instructable and following along with the video will help a lot.
Topics Covered Are:
Area Filling
- Simple Structures
- Joining or “Welding”
- Fixing Your Mistakes
- Easiest Surface Finish
The other 2 videos in the series cover GETTING STARTED and ADVANCED 3D Pen techniques and they are linked directly below.
3D Pen GETTING STARTED Tutorial:
3D Pen ADVANCED Techniques Tutorial:
** Finally take care and the proper precautions when using any dangerous equipment that this Instructable requires. **
Step 1: Area Filling

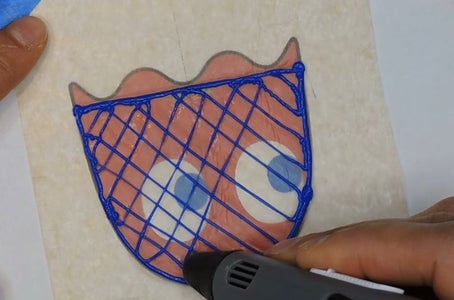
The first technique we are going to talk about is filling in areas. The specific use of your filled in area is very important. For example, if you are just penning an essentially flat object, you may want the filling to be solid.
In this case, you want to use slow and steady hand speed to fill the area fully, with no gaps between lines. Remember, don’t be afraid to turn the paper if you need to.
If instead you’re going to use these flat parts as the underlying structure to assemble a 3D object, which is a technique I talk more about later in this Instructable, then you can get away with a much coarser filling of the area. This saves you time and filament.
You just want to ensure that the piece will have enough strength to hold together. You can do that by filling the area with multiple coarse layers, that go in different directions from each other. Then you can continue to add layers on top of this, if you desire.
Step 2: Simple Structures


Let’s now talk about some different ways you can easily make 3D objects. There are three basic ways you can do this are:
- The first is you can just pen freehand and keep building up the object that way. This is much more difficult and less structured than the other two approaches.
- The second is you can make separate flat pieces and then join them together. I also refer to this as “welding” them together. This is such an important basic technique that I’m going to talk about in its own section.
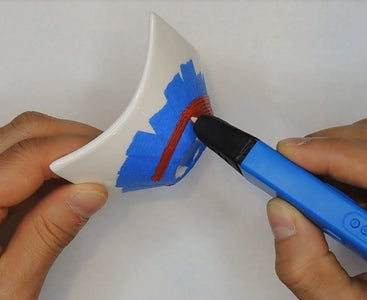
- And the third is you can pen over an existing 3D object, using it to set the basic shape. This is especially valuable to do for curvy objects, like spheres. A trick to making this easier is to cover the object in blue painters tape, to give the filament something to stick too. Make sure this application of tape is as smooth as possible.
Step 3: Joining or “Welding”
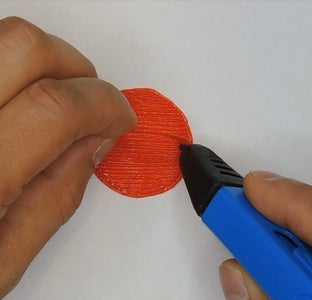
One of the keys to joining many flat pieces together is to do some planning upfront. Sketch out the object you would like to build, including as many of the sides as you can. You can also use some of the main pieces as stencils, to help build some of the other parts.
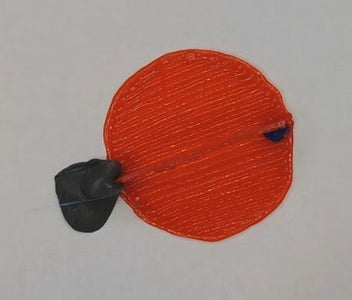
Once you have all the sides penned out, then you can start welding them together. The key here is to NOT use too much filament to join the pieces together. If you use too much, the pieces can start melting and lose their shape. You really only need a little bit of filament to weld parts together.
Holding them together and using the pen at the same time can be challenging- using some tac adhesive putty can be helpful here. Keeping your welding joints on the inside of your object can make it easier to apply your final surface finish later.
Step 4: Fixing Your Mistakes

Ok, this may not be a technique, but it certainly is something we need to talk about. 3D penning can require a delicate touch and no one wants to be hours into creating something and make a huge fatal mistake.
Luckily, 3D penning can allow you to correct or recover from your mistakes. When you are at the stage of building up the underlying structure of your object, don’t be afraid to get your flush cutters out, cut off the mistake and try again.
The final finishing layer is where you really need to take a lot of care, as mistakes here can be harder to recover from.
Step 5: Easiest Surface Finish


Now that we have covered how to make make the underlying structure of our 3D objects, let’s talk about one of the easiest finishing methods that looks good. I refer to this as the furry surface finish.
Make sure that the underlying surface has only small gaps and no large bumps or divots. The way to apply this finish layer is to make very small, random movements with your hand, as you slowly make your way across the object.
These random movements help to blend the final layer together and create a nice, uniform final surface. The video demos some different ways of visualizing this.
Great, now you are ready to move on to Part 3, Advanced Techniques!


