

Introduction: Arduino IDE Programming
Here are the steps to follow for programming on chipKit p32 board using Arduino IDE.
Step 1: Make Sure You Install MPLAB X IDE, and X32 Compiler Before You Think of Programming in Arduino IDE.
Step 2: Install the Arduino IDE 1.6.7 (or Latest)
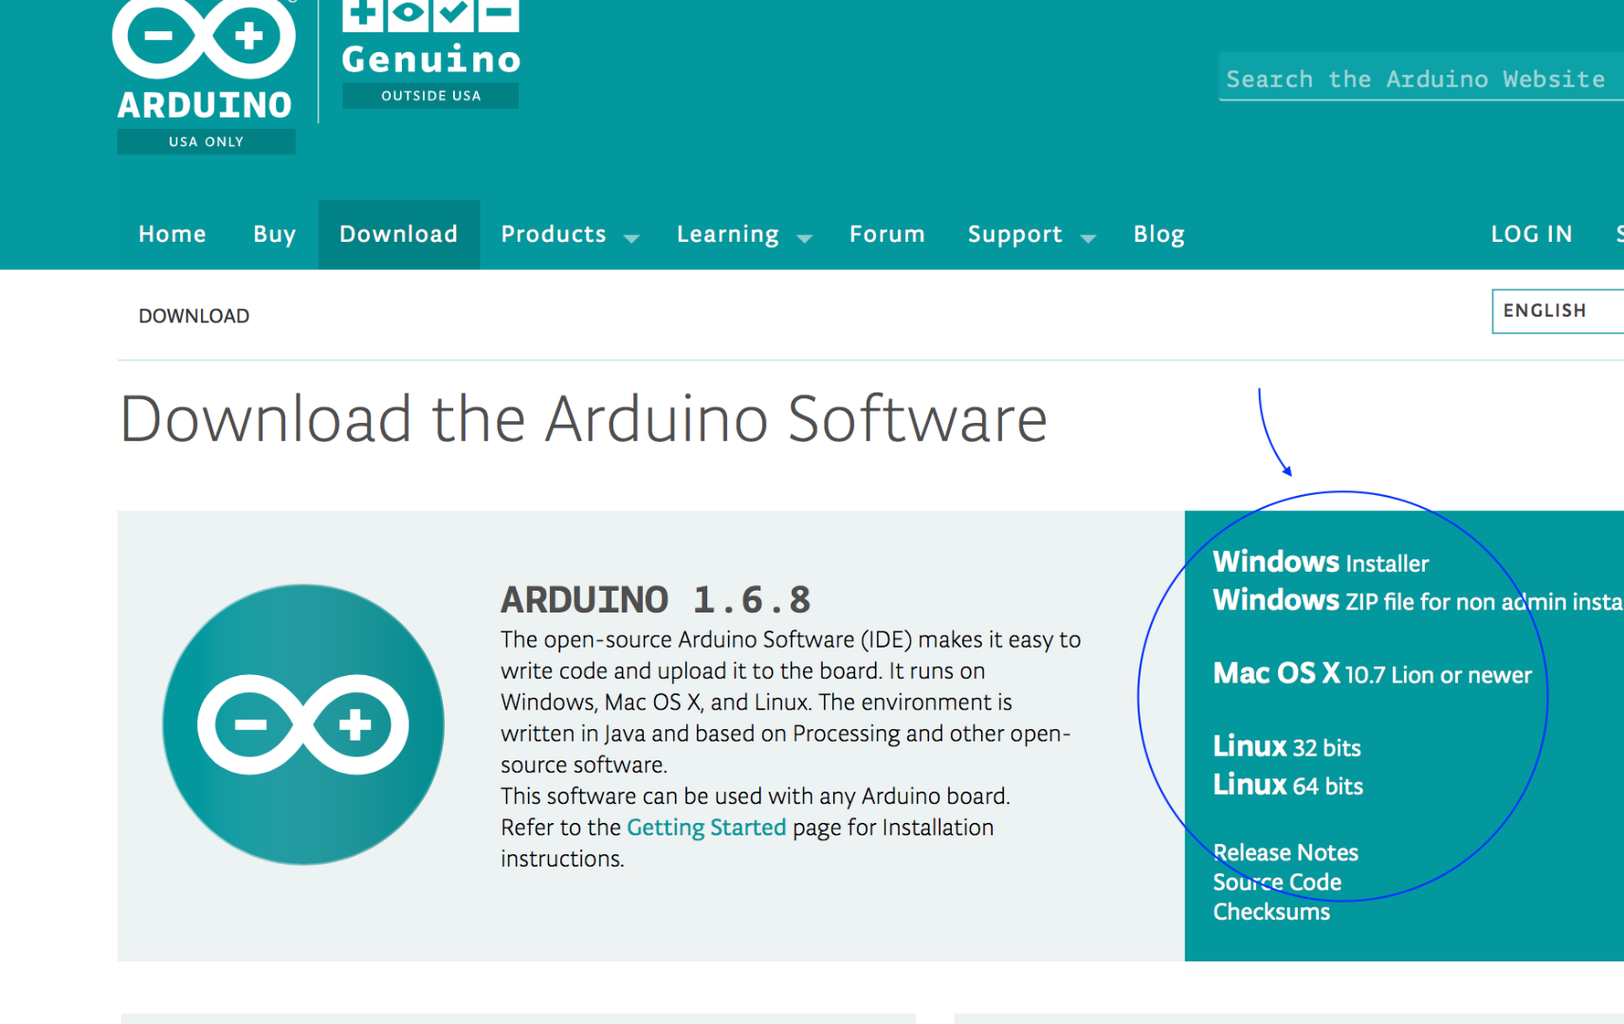
Click the link https://www.arduino.cc/en/Main/Software, and choose your operating system. This downloads the Arduino IDE. Now install it.
Step 3: Download the ChipKIT Core for Arduino IDE

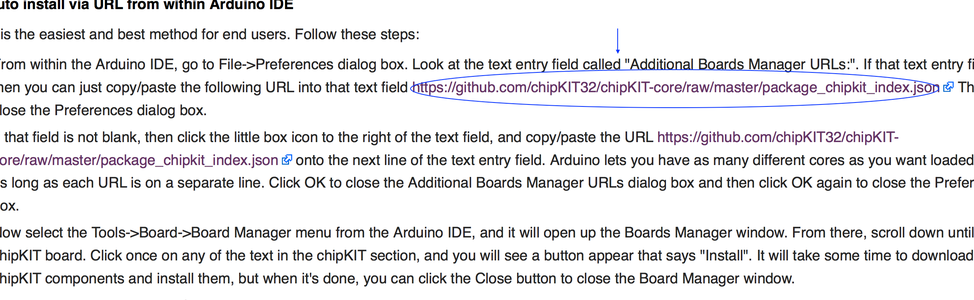

Go to the link http://chipkit.net/started/install-chipkit-software/
Select the chipKIT core(shown in image)
Copy the URL(shown in image)
Go File->Preferences(for Windows), or Arduino->Preferences(for Mac)
Now paste the copied URL in the Additinal Board Manager URLs box
Click Ok
Step 4: Install ChipKIT Board Support for Arduino IDE

Go Tools--> Board-->Boards-->Boards Manager
Look for chipKIT by chipKIT community, and INSTALL
Step 5: Change the Board to ChipKIT Board
Go Tools-->Board-->"Select your chipKIT board"
Step 6: Download the BOOT LOADER

Go to link http://bit.ly/1ptXXWh(for dp32 board)
Download the Bootloader ZIP file under the Design Resources
Unzip it, and you will find a .hex file.
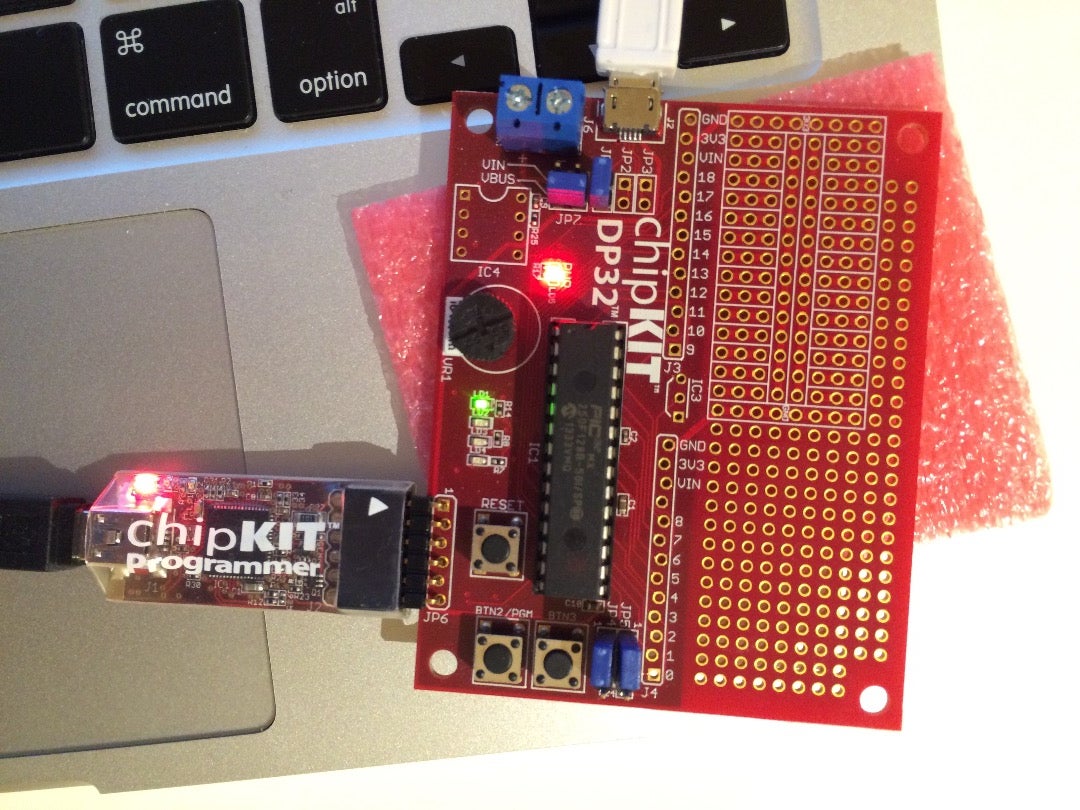
Step 7: Load the Bootloader Into the Board's Processor.

Start a new project in MPLAB X IDE
Choose Prebuilt(Hex, Loadable image) Project (shown in the image)
Choose your device, and select your hardware tool.
Now the important part, browse the downloaded boot loader, which is ".hex" file, and finish creating the project.
Conect your board to the system
Select "Make and Program Device Main Project". This loads the boot loader into the board.
Your bootloader is successfully loaded if an LED is flashing repeatedly.
Step 8: Programming Your First Arduino Project

Write the sketch.
Verify it by clicking on "Correct" button.(shown in the image)
Then select the desired Board and USB port from Tools.
And now UPLOAD it by clicking on the "right arrow".(shown in the image)
Your are all done running your first project.
