

Introduction: Fun Working With LED and POT - Arduino Insights


Hi guys.... a big hello to all you out there... this is first time i am presenting an instructable to you all from our org Electronics made Simple. So being an electronics engineer with very hard times spent in learning electronics in way its actually rather then any books can teach, i believe in learning things practically through fun way of learning..... So, here i am.... GONNA pin U ALL WITH STUFFS FROM VERY BASICS TO HIGH_ENDED STUFF...... keep in track.....!!!
Lets spark into..... without any further delay.....!!!
In this tutourial, we are gonna see basics you need to understand about LEDs and Potentiometer and working it with Arduino....
Step 1: Ground Works...


Make sure you get all this with you before you can start any circuit work. Components required for our this design are
1.Arduino UNO -1
2.Breadbord -1
3.USB cable for programming -1
4. Leds of any colour you want -4
5. 330 ohm resistors -4
6.10k pot meter -1
7. and fun - infinite
Step 2: Step 2:Placing LEDs in Its Place


Place all four LEDS on breadboard alongside the Arduino UNO board, i have picturized the pins of LED and connection to be made.
Make sure you ground all cathodes of LED with GND of Arduino. Our arduino board has 3 GNDs present. Now connect all LEDs with resistor for safe operation.
Step 3: Connecting Them All With Arduino UNO

Make sure all LEDs anodes are connected to arduino via a resistor normally to limit the current, now connect all anode pins of led in following fashion,
led 1 to pin2
led 2 to pin 3
led 3 to pin 4
led 4 to pin 5
GND all the cathode ends together with ground of arduino.
Step 4: Here Comes Potentiometer

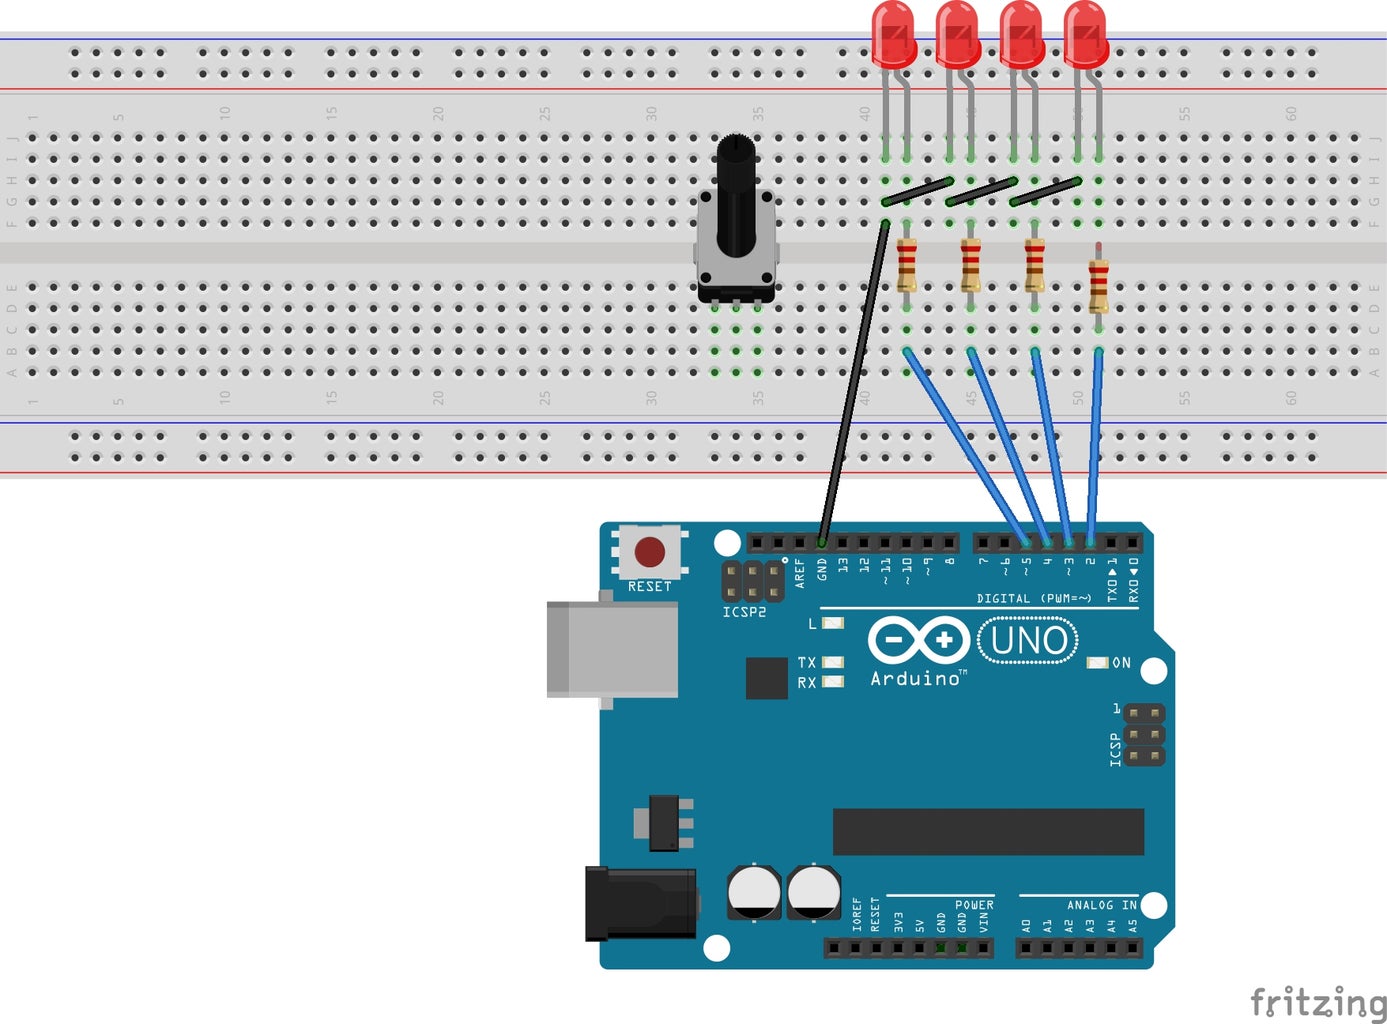

Potentiometer is normally a variable resistor which an designer can use to vary current using a knob or somekind. It generally consist of 3 pins normally pin1- GND, pin2 - O/P, pin3 - I/P. Now place the pot as shown, then follow the below connection,
pin 1 to ground
pin 2 to analogpin 0
pin 3 to +5 v
Step 5: Warp It and Get Code Done...!!!
Now copy the following code below to the Arduino IDE and upload it and then change the pot knob to vary the speed and intensity of LEDS.
int val;
void setup()
{
pinMode(2,OUTPUT);
pinMode(3,OUTPUT);
pinMode(4,OUTPUT);
pinMode(5,OUTPUT);
Serial.begin(9600);
}
void loop()
{
Serial.println(analogRead(0));
val = analogRead(0);
if (val > 100)
digitalWrite(2,HIGH);
if (val < 100)
digitalWrite(2,LOW);
if (val > 200)
digitalWrite(3,HIGH);
if (val < 200)
digitalWrite(3,LOW);
if (val > 300)
digitalWrite(4,HIGH);
if (val < 300)
digitalWrite(4,LOW);
if (val > 400 )
digitalWrite(5,HIGH);
if (val < 400)
digitalWrite(5,LOW);
}
Enjoy and have fun... more to come stay tuned.....
& don forget to visit our blog - http://electronicsmadesimplee.blogspot.in/
our facebook page - https://www.facebook.com/ELECTRONICS.MADE.SIMPLE

Participated in the
123D Circuits Contest


