

Introduction: Arduino Pedometer(without Accelerometer)

Ever wondered how to make a pedometer without using an accelerometer,then this Instructable shows how to make one. This pedometer connects wirelessly via Bluetooth to your android smartphone and displays the number of steps dynamically that is as and when you take a step. It even shows the speed, distance travelled and calories burned when it is asked for.
Step 1: Components Required
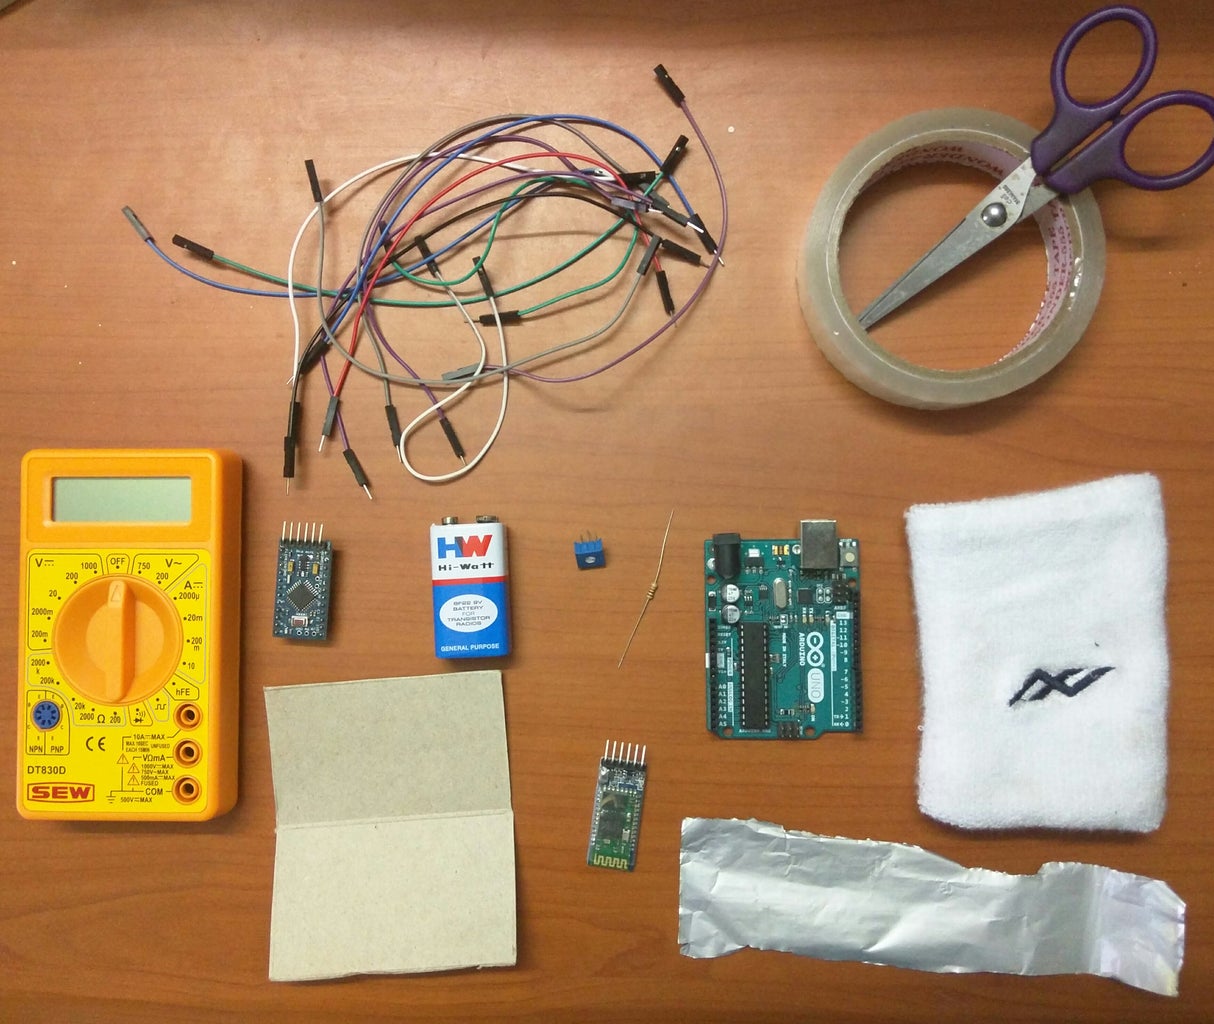
• Arduino pro mini (5V 16MHz)
• Bluetooth HC-05
• 10k potentiometer
• 10k resistor
• Cardboard
• Aluminium foil
• Jumper wires
• 9V battery
• Battery connector
• Arduino uno or USB to TTL converter
• Tape
• Android phone with bluetooth terminal app
• Digital multimeter
• Sweat band
• A pair of socks
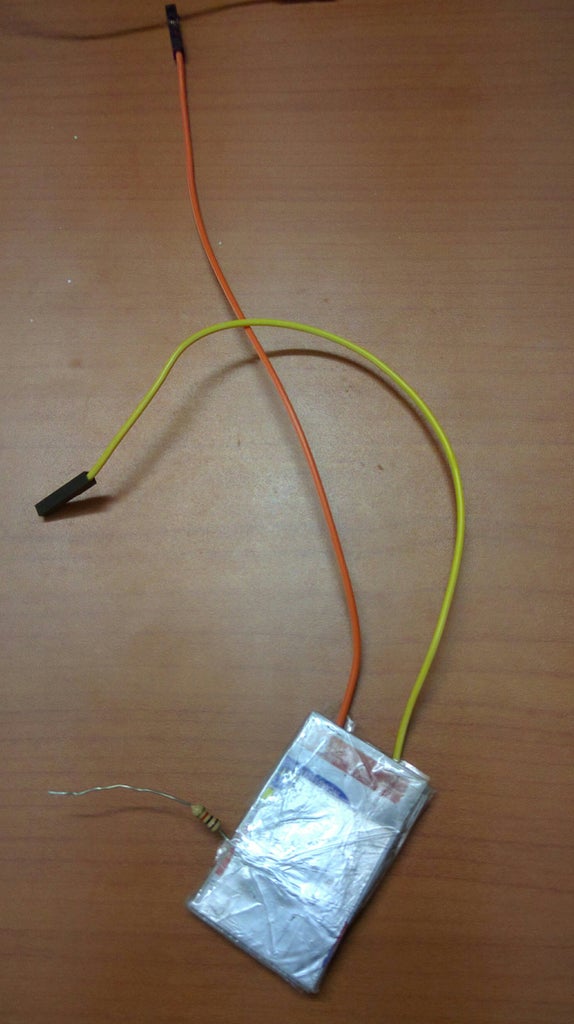
Step 2: Making the Sensor


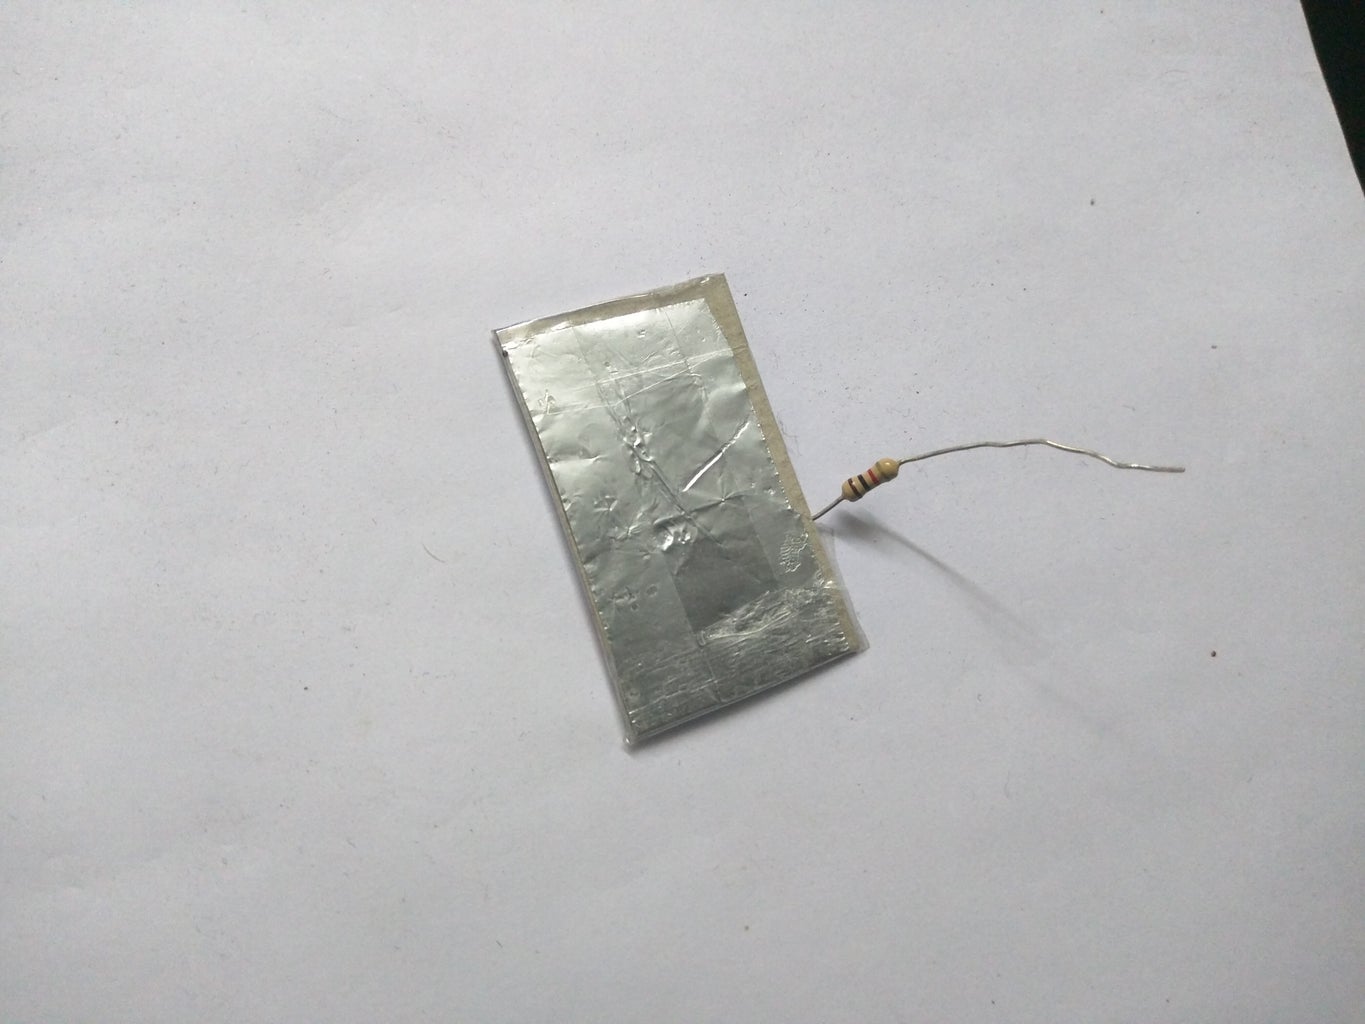


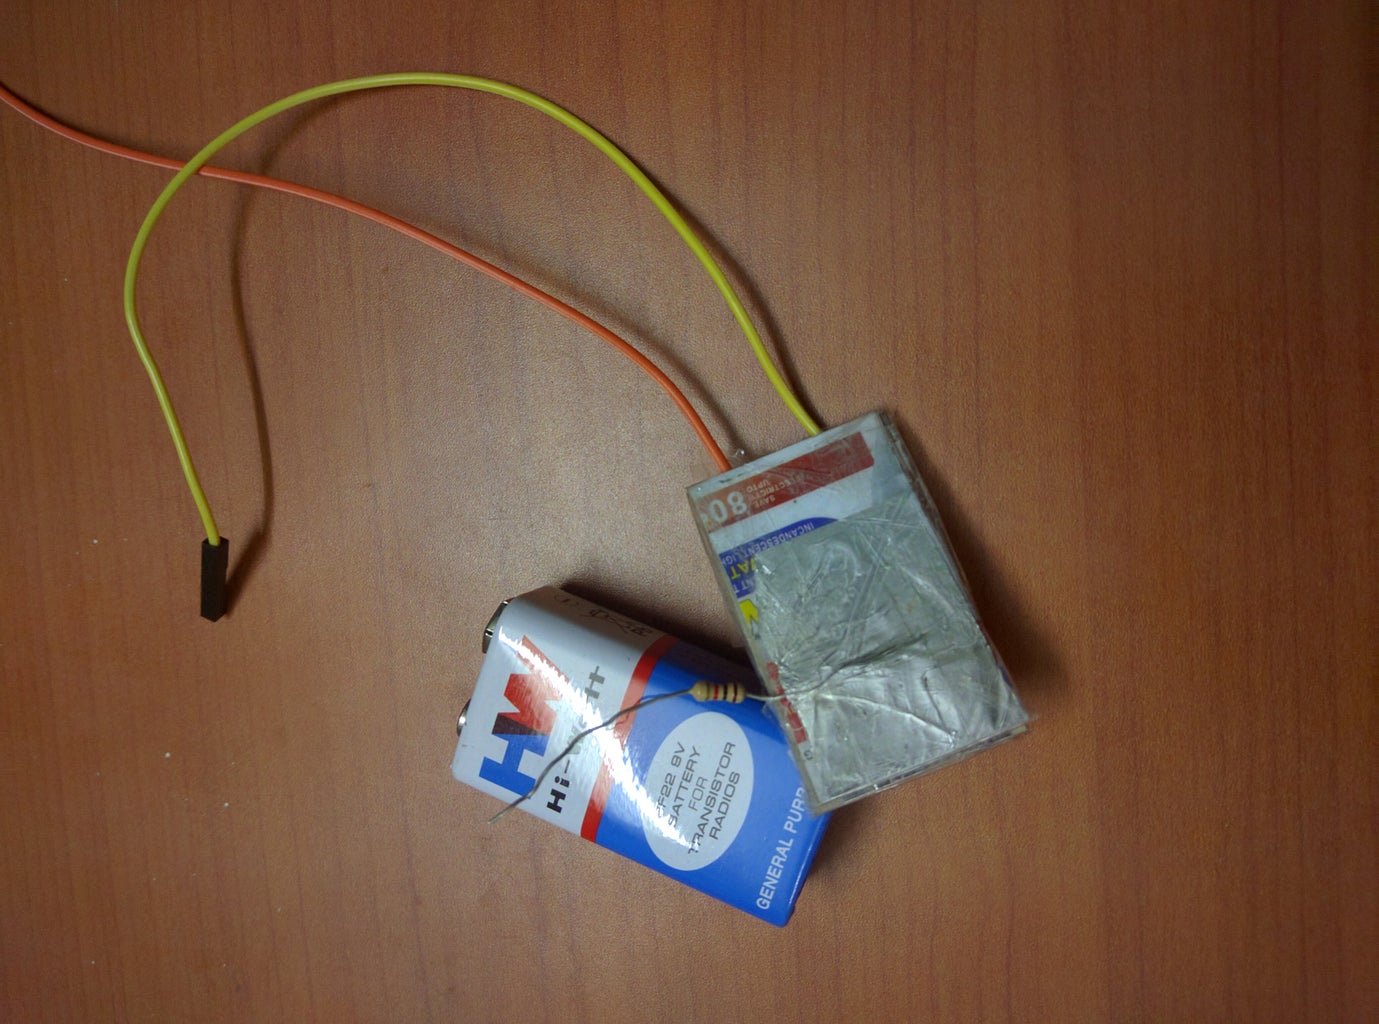
The basic idea is to make a switch that detects a footstep.
For this take two cardboard pieces of 4cm*2cm.Take two pieces of aluminium foil each of 6cm*2cm.One side of the cardboard should be covered with the foil and the other side to about half the length of the cardboard.Place the aluminium foil in this way over the cardboard and cover all the four sides in such a way that a small portion of the aluminium foil on one side of the cardboard is bare.Make another piece similar to this.
NOTE: Make sure that there is no gap between the foil and the cardboard. The only place there should be a gap is in between the bare aluminium foils of the cardboards when sandwedged together.
To one of the piece add a 10k ohm resistor so that it is in contact with the foil that is on the side of the cardboard that is not fully covered by the foil.Tape it in such a way that resistor does not moves.
To the other piece add two jumper wires on the similar side of the cardboard.Tape it in such a way that the wires don't move. I just used 1 wire and then had a tough time adding another.Make sure you use two wires before using tape.
Keep the surfaces of the cardboards with the bare aluminium foil surface facing each other and tape the entire arrangement.
NOTE:Do not tape it tightly.There should not be any contact between the foils when the arrangement is unpressed.
Finally check the arrangement using a multimeter.When pressed the resistance should decrease.
Step 3: The Circuit
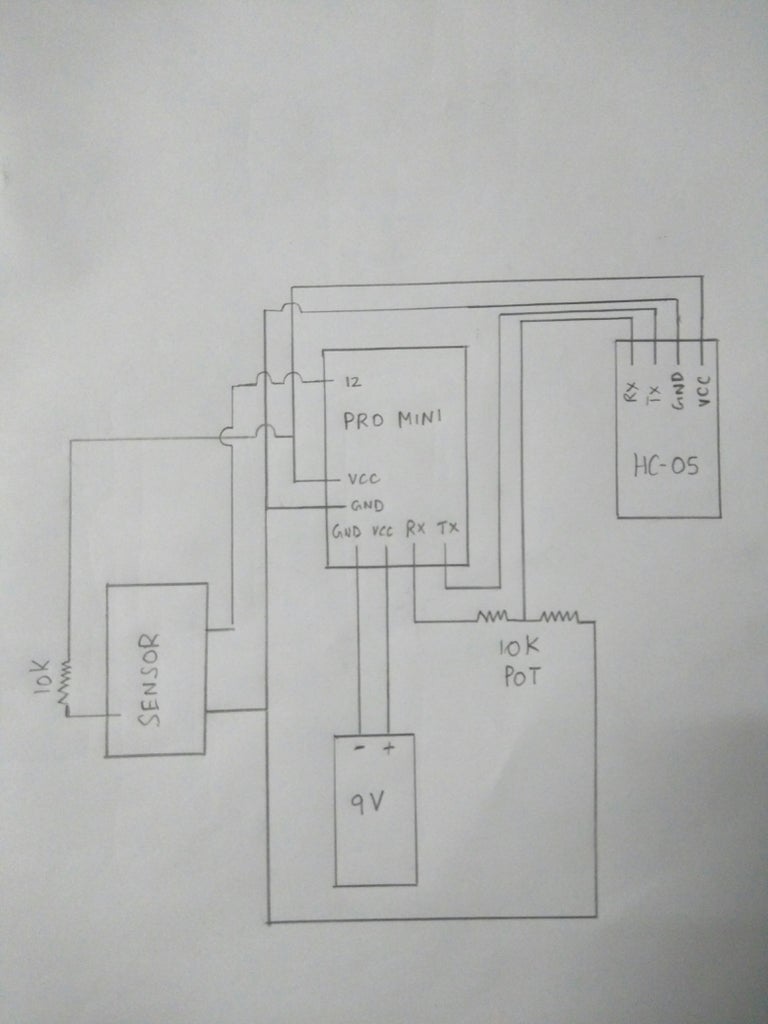
Connect the components as shown in the circuit.
Step 4: Android and Bluetooth Terminal

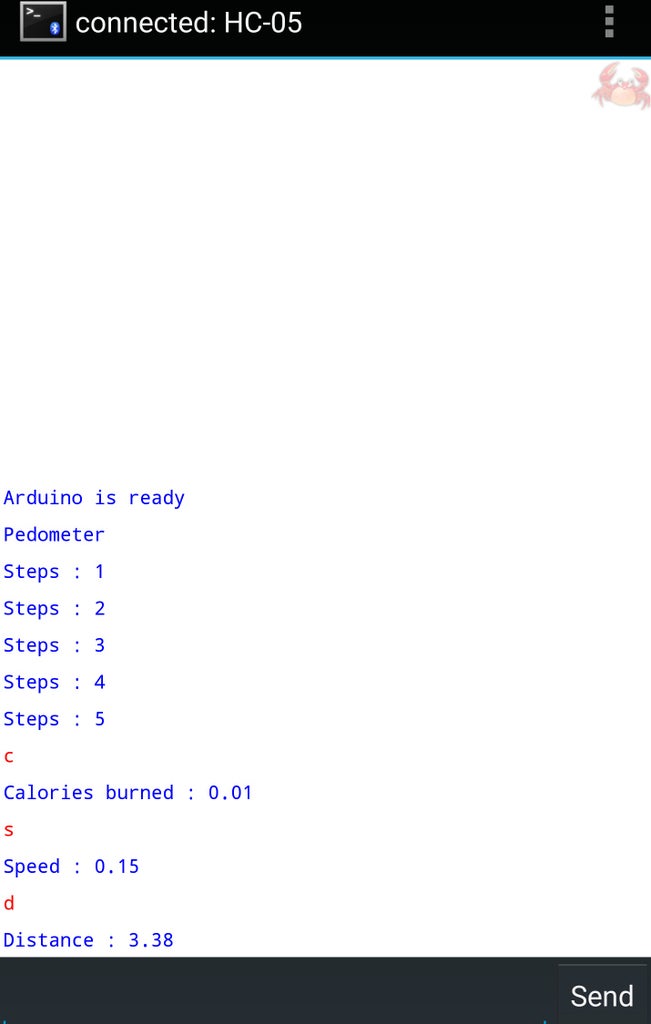
This pedometer uses the "bluetooth terminal" app available on the play store to display data in the phone. Once the app is installed connect it to the HC-05 module by using the menu button available in the top right corner of the app. Uncheck all the four checkboxes under setup in the same menu. The app is similar to the serial monitor which communicates with the arduino via usb. Here it works wirelessly using bluetooth instead.
Step 5: The Code
The code is pretty simple. Just change it according to your height and weight. One of the codes uses kilogram for weight and m/s for speed.The other one uses lbs. for weight and cm/s for speed. The line requiring modification is shown using comments. This was the most optimum code that i could come up with respect to distance travelled, speed and calories burnt. The letter to be typed and what it displays when send is clicked:
• 'c' for calories burned
• 's' for speed
• 'd' for distance travelled
There is no need for the software serial library as we use the same Tx and Rx pins that communicate with the computer.
There are two ways to program the pro mini:
1. Using an arduino after removing the main IC
2. Using USB to TTL converter
Whichever method you use try it on the serial monitor of the computer before using the app.
In any case you feel all other data other than the step count to be wrong, there are plenty of online calculators that give various results based on step count.In this case you might be in need of the start and end time too. Print the variable t to check the time elapsed since the beginning of the execution of the code.

Step 6: Placing the Pedometer
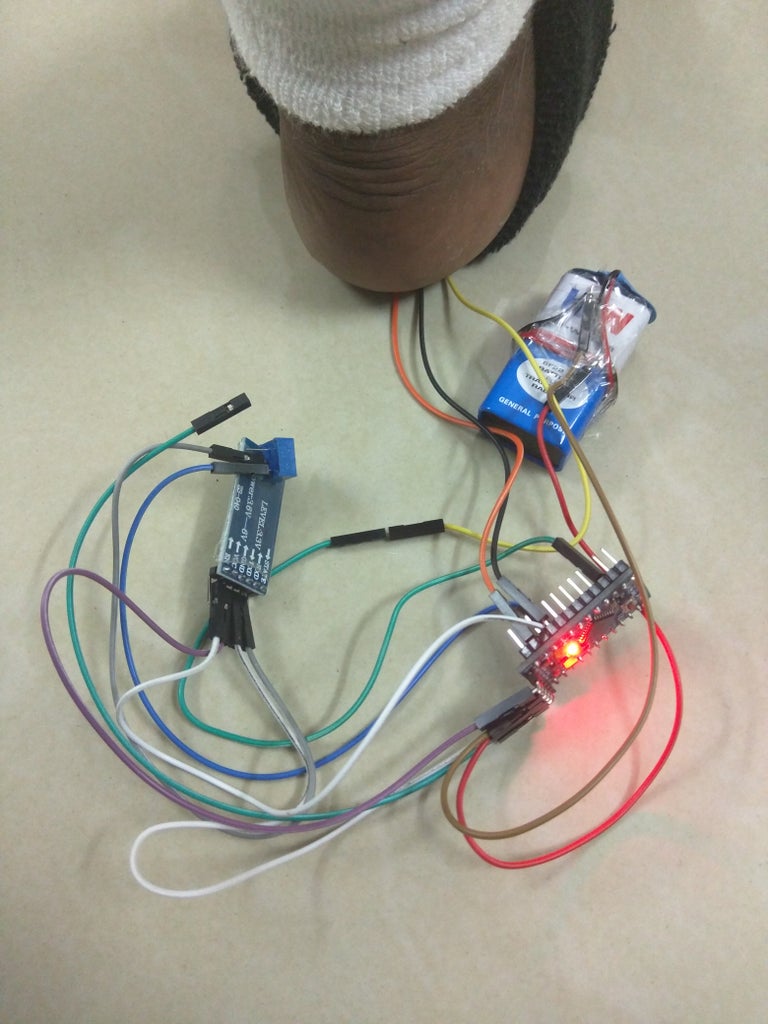
How you place your pedometer is very important because it might get uncomfortable during long usage. I could get my hands only on a soldered board. If you get an unsoldered board solder only the necessary pins. The sweat band should be just above the ankle in whichever leg you are using it. The sensor should be placed in the heel and the wear your socks over it. Now place the electronics in the space between the sweat band and the socks. It might seem bulgy but u can make it look less bulkier by distributing it around your band.
Step 7: Testing and Usage


Connect the pedometerto the Bluetooth Terminal app and check whether the steps are detected. Unlike a pedometer that uses accelerometer data this pedometer is very accurate. You need to keep the app running in the background to keep it connected to the HC-05.
There you have your pedometer!
:)
There you have your pedometer!
:)
