

Introduction: Arduino Slider Zoom

Tired of breaking your hands and your camera while pulling and twisting your lens trying to create the illusion of a dolly zoom? Look no further because now you will be able to do that thing I just said using this automated slider zoom, sponsored by Arduino (Arduino, please send cash to us)! Excited? Then keep reading ya'll.
Materials Needed:
- material for your base
- 2 metal railings
- 2 slide mounts
- 1 plate with holes
- 1 DSLR camera with a zoom lens
- 1 tripod head + foot
- 2 stepper motors
- 2 rubber belts (preferably with grips on one side)
- 5 zip ties
- 1 Arduino Uno board
- Arduino USB cord
- Power supply + cord
- 1 blank circuit board
- 1 electronic button
Total Estimated Time: However fast you work
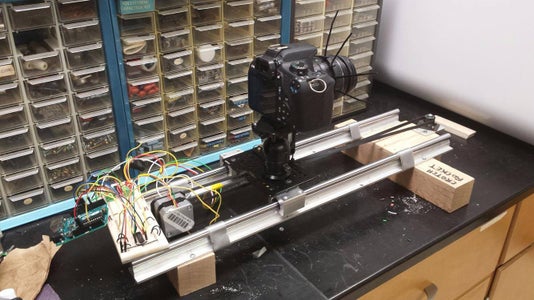
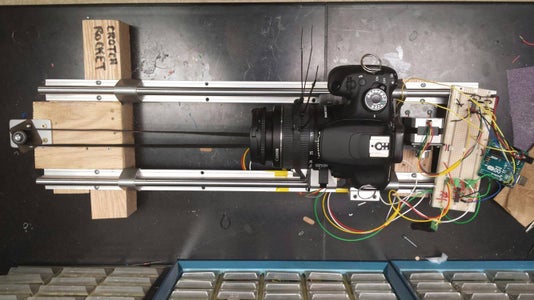
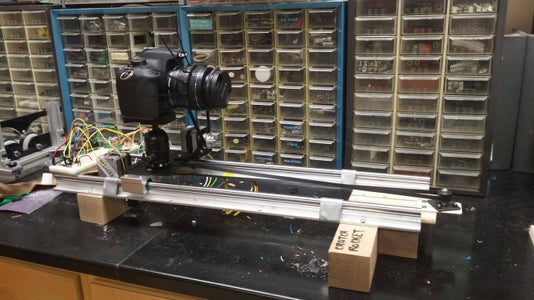
Step 1: Creating the Railing
There are many ways you can create the railing for your slider zoom. The important part of the slider is that you have control pulling the plate back and forth in small increments. For this instructable, we will be using a pulley system with motors.
- Start with establishing your base. We used two pieces of wood, but you can use one piece, or another material. Just make sure your material is thick enough for your screws.
- Attach your 2 railings to your base using screws. Make sure the railing is attached as straight as you can and that your screws are flush to the drill holes. If using one piece of wood, make sure the distance between your rails will allow for you attach the plate between them.
- Attach the slide mounts to the rails
- Screw plate into the slide mounts. If your plate does not have any holes in it, you will need to drill your own.
- Place one stepper motor at one of the ends of your base.
- Using one of your belts, loop the belt around the stepper motor and attach the ends to the front and back of your plate using the zip ties.
- It is recommended at this point to test your rail system. Create a circuit and simple code that will move the one motor back and forth. Adjust your belt if needed.
Step 2: Attaching the Camera
- Take your tripod head and attach it to the center of your plate.
- Attach foot to the bottom of your camera.
- Make sure that your camera will fit back into the tripod head and that the weight is supported on your rails.
Step 3: Making the Lens Move

- Attach the second stepper motor to your plate. If needed, create an extension to hold the weight or there is not enough room.
- Take your second belt and loop it around the stepper motor and lens. Attach the ends using zip ties. Be careful with making the belt too loose or too tight as the motor will not be able to move it. Also if needed, detach your camera from the tripod head so that you do not damage the lens.
- Move the zip tie connection to the top of your camera lens. If needed, add more zip ties for better grip.
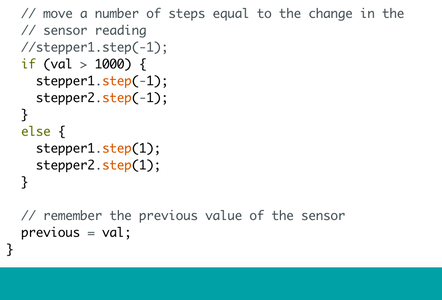
- Finish the circuitry and coding to make your slider zoom move back and forth with the press of a button. Above is the code used to make ours move, feel free to improve it to your own needs.
- You are now the proud owner of an automated slider zoom!
