Introduction: Arduino Slot Machine
This project is my implementation of an alien themed slot machine using two ATmega328P-PU micro-controllers. The slot machine is for entertainment and educational purposes only. I tried my best to make the game simulate a real slot machine as closely as possible. The project is completely built. An enclosure was added after the parts arrived from China and I soldered everything up. The project took about a month for me to build in my spare time. The most difficult part of the build for me was understanding all of the math involved in making the game behave the way the casino industry would expect a simple slot machine it to behave, and being able to prove it.
Step 1: How the Game Works
The game has three reels with the same unique 25 symbols appearing on each reel (one of the 8x8 matrices on the component with 4 8x8 matrices isn't used.) There are five different ways to win. If you get three spaceships, you win the jackpot. If you get one or two spaceships you also win some credits. If you get two or three symbols to match you also win. If you get a spaceship and two symbols matching, as depicted below, the game pays out based on the winning event with the lowest probability/highest payout; in other words winning events are mutually exclusive, you can't win two different ways on a single spin of the reels. This kept the programming a little simpler. There were plenty of other challenges for me.
Step 2: Slot Machine Menu & Features
The slot machine has several interesting features which are accessed via the 20 x 4 I2C capable LCD display using two navigation buttons and a select button. The buttons use a fairly sophisticated de-bouncing algorithm that takes advantage of the micro-controller's external interrupt capability. This is the main menu.
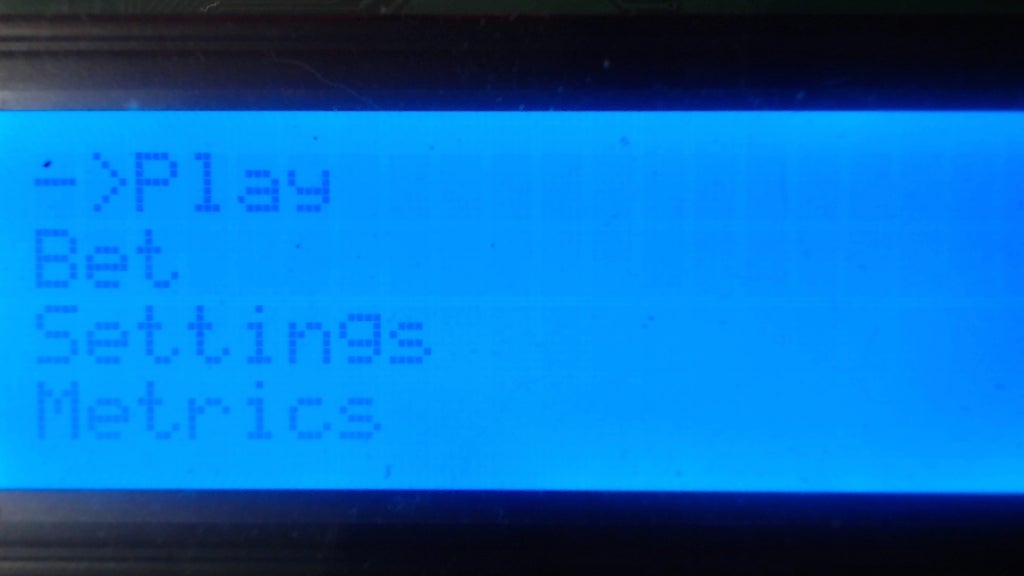

Since there are six lines in the menu you have to scroll down using the 'navigate down' button to see the entire menu. There is a lever/knife switch dedicated to 'spinning' the reels. In addition to that you can also select 'Play' from the main menu. You can change your bet at any time.
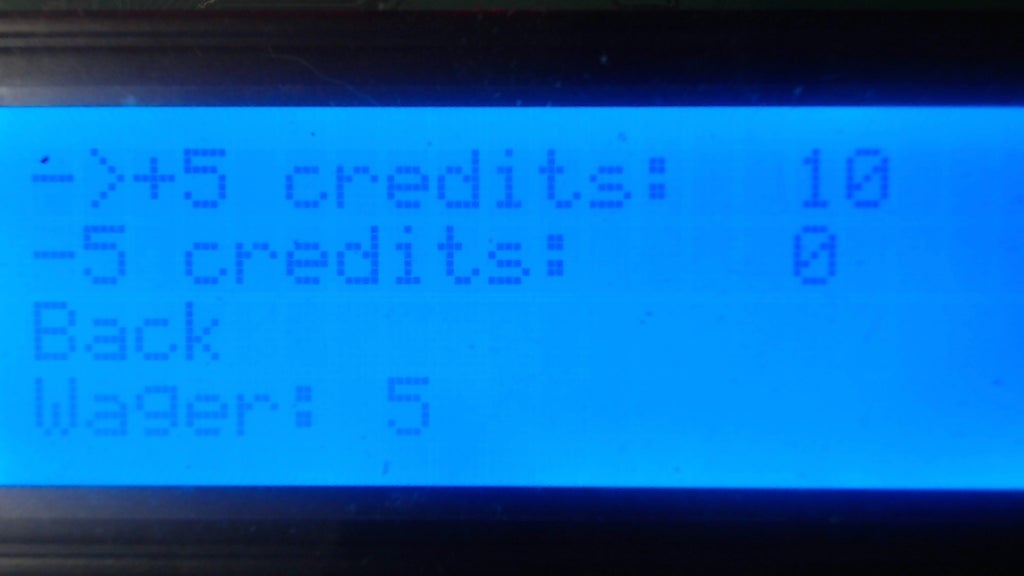
The most exciting feature is that the game can be played in 'auto' mode; i.e. you select the auto mode option from the settings menu on the LCD screen and the game plays over and over again until you select the option again or 1 million plays have occurred. This is a critical function for testing the game. You can also disable the sound here.

Via the menu on the LCD it's also possible to view all of the metrics generated from the simulation. These metrics are also output and may be viewed in the serial monitor if you connect your micro-controller to the monitor via the RX and TX pins using a USB cable. The list of displayed metrics includes your credit balance, the number of times you hit the jackpot, and the number of times you won credits by any other means. This allowed me to run simulations based on the various payouts, and was useful for establishing and proving out the payout table. The payout table itself is not configurable; once it is set it should stay the same. I suppose it would be possible to make the volatility index configurable by using it to drive the payout tables, but that would require a lot more work.
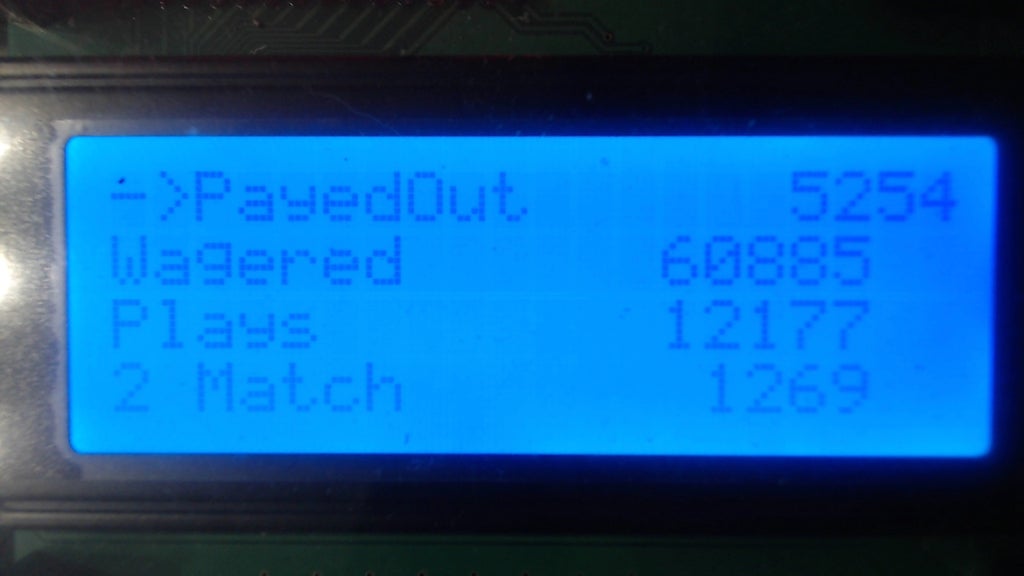
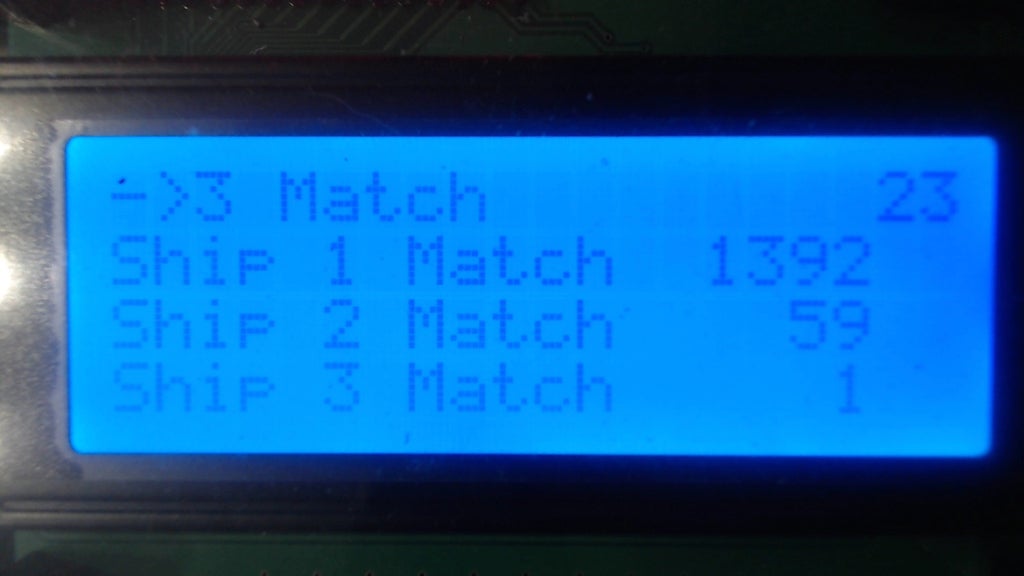

The Reset option allows you to reset all of the metrics (except EEprom writes), back to zero. The chip will work for about 100,000 writes to EEprom. Since there's 512k of EEprom available on the chip, and we're only using a fraction of that, it would be possible to actually move the location of the metrics in EEprom as we approach 100,000 writes. I have not implemented this feature but it would be a means by which to extend the life of the chip.
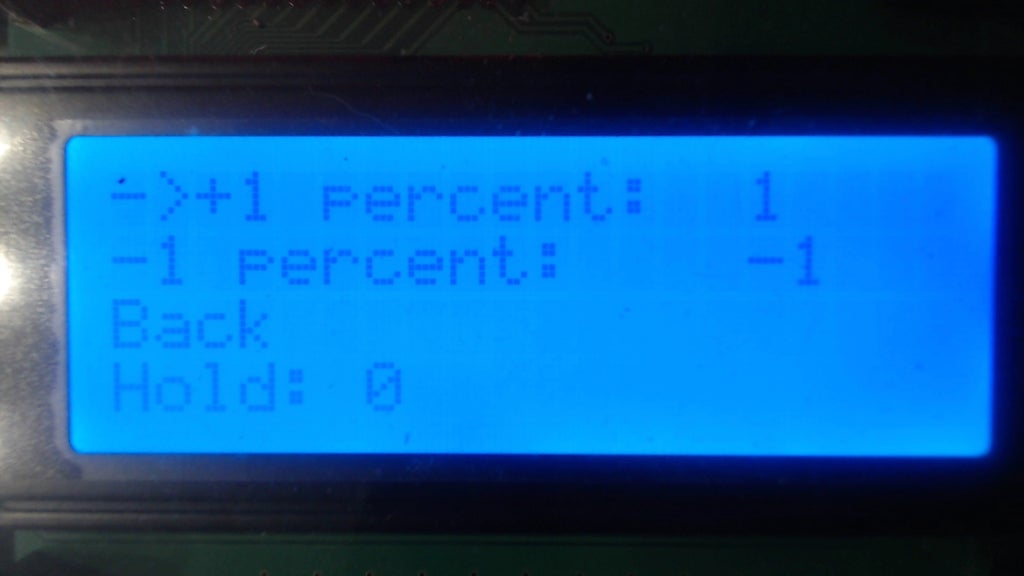
Finally, the hold, or the percentage of each wager kept by the house (over time), is configurable. Remember that after performing a Reset operation the hold needs to be set again.
The player's credit balance is always shown in an eight digit seven segment display.

Step 3: Understanding the Math
A lot of work went into making sure that the game was realistic. The probabilities were calculated and the payout table was designed so that the game has an acceptable Volatility Index (VI). This index measures how predictable the machine's behavior is. A machine with a higher VI is more likely to make the player (or the house) more money. It is less predictable than a machine with a lower VI. It's true that the same exact game will exist in different casinos (or even the same casino) with different VIs. The VI is changed by manipulating the payout schedule. For our game here are the probabilities and payouts for each kind of win.
Note that the odds (far right) and the payout (far left) are dramatically different. If this game was programmed so that the payout table matched or closely followed the odds, it's VI would be unacceptably high. The hold is calculated as a percentage of the payout, and is the portion of a wager kept by the house/casino. As stated you can set the hold via the LCD menu. Bear in mind that different jurisdictions have different regulations that govern the maximum hold for slot machines in that jurisdiction. A typical maximum hold is 15%. Understand that setting the hold to the maximum allowed by law doesn't necessarily maximize the profit generated by that machine, because a higher hold might discourage players from using the machine. I suspect, however, that many players ignore the hold, which is typically buried in fine print, and that the demand curve for a machine is relatively vertical (meaning that the cost of using the machine, the hold, is largely ignored), and that profit generated by the machine is far more dependent on the location or placement of the machine as well as the design of the game itself. But that's just speculation. I'm sure there are some savvy gamblers out there who are sensitive to the hold.
The spreadsheet, available with the code, with three tables was built to prove that the game is working correctly (the first table appears above). The first step in building the spreadsheet was to accurately calculate the odds of each type of win (the Calculated Probability columns).
Three Spaceships
The probability that three spaceships will appear is the inverse of the total number of possible combinations. The number of winning combinations, one, over the total number of possible combinations, 15625. There are 25 unique symbols on each reel, so the probability is 1 / (25 x 25 x 25), or 0.000064. That makes the odds, 1/probability - 1, equal 1 to 15624. I learned how to calculate the odds from the probability here.
Three Symbols Match (except spaceships)
The probability that three symbols, other than the spaceships, will match is 24 (the number of unique symbols on each reel minus the spaceships) divided by the number of possible combinations. 24 is the numerator because there are 24 combinations of three symbols matching. 24/15625 = 0.001536. That makes the odds about 1 to 650.04.
Two Spaceships
There are 24 x 3 total combinations of two spaceships matching. That's because there are thee ways to make two matches of a spaceship. Give X = spaceship and Y = any other symbol, XXY, XYX, and YXX. There are 24 possible values for Y. So 24 X 3 / 15625 = 0.004608. The odds are 1 to 216.01.
One Spaceship Appears
For each reel there are 24 x 24 combinations possible for a single spaceship appearing. A spaceship can appear on any reel, so you need to multiply the number of combinations available on a single reel by three reels. So the probability is 24 x 24 x 3 / 15625 = 0.110592. Odds are 1 to 8.04.
Two Symbols Match
For any given two symbols, except the spaceships, there are 23 (25 minus one spaceship minus one symbol that would make it a three symbol match) x 3 reels x 24 symbols that are not spaceships. The probability is (23 X 3 X 24)/15625 = 0.105984. Odds are 1 to 8.44.
Now that I have the probabilities for each kind of win I can use the spreadsheet to design the payout table in a way that makes the volatility index acceptable (< ~20). To understand how to do this I relied heavily on thisthis post. I entered values in the House Income column of the first table, using a process of trial and error, until the VI was under 20 and the Total in cell J10 was as close to zero as I could get it. Using those values I set THREE_SPACESHIP_PAYOUT, THREE_SYMBOL_PAYOUT, TWO_SPACESHIP_PAYOUT, ONE_SPACESHIP_PAYOUT, and TWO_SYMBOL_PAYOUT in SlotMachine.ino accordingly. Then, first by using a hold of zero percent, I ran five simulations of 1,000,001 plays, and entered the values from the metrics menu into the appropriate rows and columns in the Actual Results table.
I observed that the Probabilities Actual closely tracked with the Calculated probabilities, and that the Pct Diff Prob column was reasonable. I also matched the values in the House Pays row up with the range of values from the Income High and Income Low columns of the 1,000,000 row of the Understanding Potential Income table (the second table), and observed that the values from the Actual Results table were inside of the range specified by the Income High and Income Low columns. The Understanding Potential Income table defines the expected range of income for a given hold value with a 90% confidence interval. In the example below the hold is set to 0, so the likelihood of winning match the likelihood of losing. If you play the game 1 million times there is a 90% likelihood that the Income will be between 16,432 and -16,432.
After working with the spreadsheet and the program and running millions of simulations I was able to work out the defects in the program, to address the defects in the spreadsheet and to define values for the payout table that kept the VI < 20. Finally I changed the hold to 15% and ran another set of 5 simulations to verify that the game's income is in line with expectations if it were to be deployed in a real world situation Here is the income table for a 15% hold.
And here are the actual results.
If you want to really understand all of the math behind setting the payout values I encourage you to examine the formulas in the spreadsheet. If you find any errors kindly point them out to me; I am not a mathematician (or a C programmer) by trade, so the standard disclaimer applies.
Step 4: Acquiring Tools and Parts
I used an FTDI USB to serial board to program both ATmega328P-PU micro-controllers in-place. These connections are not depicted in the Fritzing schematic. For instructions on setting up the FTDI break out board on your solder-less breadboard follow this link. You may need to google around a bit to nail the setup. I believe this post also helped me troubleshoot an issue I was having trying to get the micro-controller to automatically reset at the start of programming via the FTDI breakout board. Remember to place a 100 nF capacitor in series with the connection between the ATmega328 reset pin (position 1/PC6/reset pin) and RTS on the FTDI break out board so that you don't have to hold down the reset button when you want to program the chip. If you elect to use your Arduino Uno to program the chips, instructions are found here. If you're just going to program the chips once with the supplied code it's probably quickest and easiest to just program them from the Arduino Uno.
Both mico-controllers are set up with the 'Arduino' chip (the ATmega328P-PU) on the breadboard. If you're planning on ultimately building this project by soldering the components together, or if you just want to copy what I've done here when you breadboard the project, you'll want to understand how to set up the Arduino on a breadboard. Follow the excellent instructions here for doing that. Those instructions include the procedure necessary to follow if you need to load the Arduino bootloader on the two chips, which you will most likely need to do if you purchase the chips from a supplier in China and/or via e-bay, as suggested here in the part's list. To do that you'll need an AVR programmer like the AVRISP mk II or the USBTiny ISP. You can also just use your Arduino, if you have one, to burn the bootloader. All of your options are explained when you follow the link above.
Parts
| # | Cost | Part/Description |
|---|---|---|
| 2 | $3.00 | ATMega328P-PU, one for the slot machine and one for the the I2C credit LED display slave |
| 1 | $1.20 | Seven Segment display with 8 digits |
| 1 | $3.78 | 8x8 matrix 4 segments MAX7219 To simulate spinning reels and display the symbols. Only three of the for segments are used. |
| 1 | $5.37 | I2C 2004 Serial Blue Backlight LCD Module 20 X 4 2004 |
| 2 | $4.00 | solderless breadboard |
| 6 | $1.00 | momentary contact buttons. One controls spinning the reels, three for navigating the menu, two for grounding pin 1 of the ATMegas |
| 1 | $0.10 | RGB Diffused Common Dathode Used to signal various things |
| 1 | $0.10 | Green LED indicates if power is being supplied to the boards. |
| 6 | $0.30 | 10k ohm Resistor 4 to pull up each of the buttons, 2 for pin 1 of the ATmegas. |
| 4 | $0.20 | 1k ohm Resistor Between each of the buttons and the ATmega input pins |
| 4 | $0.20 | 330 ohm Resistor For the red, green and blue leads of the RGB LED. |
| 2 | $0.50 | 16MHz crystal One for the Slt Machine's ATmega328p-pu and one for the LED display slave's ATmega328p-pu Both run at 16MHz |
| 1 | $0.10 | Slide switch For the power supply, to turn the game on and off |
| 2 | $1.00 | Piezo buzzers. One for the Slot Machine chip and one for the display slave chip. |
| 4 | $0.40 | 22pF capacitor |
| 6 | $0.60 | 0.10 uF capacitor |
| 2 | $0.20 | 100 nF capacitor These are optional and lonly needed if you're using the Arduino Mini USB serial adapter for programming the Slot Macine chip, as I have |
| 2 | $0.20 | 10uF capacitor To help smooth out the supply voltage |
| 1 | $1.00 | 7805 Linear Regulator To regulate the voltage supply, 5v |
| ? | $?.?? | Generic jumper wired and hookup wire. You'll need a good amount of this. For the most part I make my own, but I use the jumper wires, too. |
| 1 | $?.?? | 5v power supply. You can use a wall mart of batteries, whatever works for you. For the final product I suggest 2 18650 batteries in series. |
| 0, 1 or 2 | $13.20 | Arduino Mini USB Serial Adapter For programming the ATmega328P-PU chip in place. You can also use your Arduino Uno to do the programming, or substitute a FTDI USB to TTL Serial Adapter. Not depicted in the schematic. |
| 0, 1 or 2 | $1.66 | FTDI USB to TTL Serial Adapter For programming the ATmega328P-PUs in-place. Not depicted in the schematic. |
| 0 or 1 | $10.00 | Arduino Uno For programming the two micro-controllers. |
| 1 | $2.00 | Half size solder-able breadboard |
| 1 | $2.00 | Full size solder-able breadboard |
Here is the enclosure I've ordered, into which I'll insert the components:
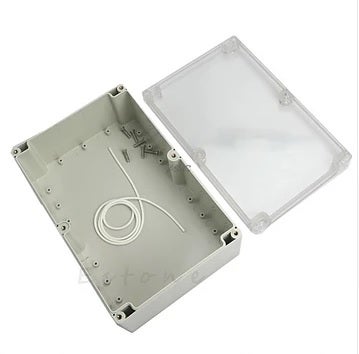
This item is available here for $13.80. That's a little on the pricey side in my view. I'm hoping that everything will fit and that the top is very transparent so that I don't have to cut holes in it to see the reels and the credit balance display. We'll see how it goes when it gets here! Suggestions welcome.
Step 5: Building the Circuit
The Fritzing schematic is available here.
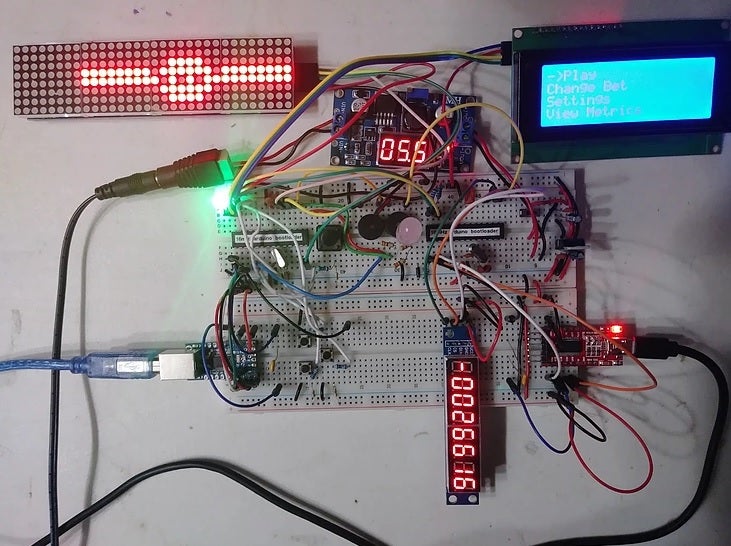
Below I've included a directions on wiring the micro-controllers, because the Fritzing diagram is crowded. This doesn't represent all of the connections necessary, but it should clear up any confusion. I haven't grounded all of the unused pins, but I am probably going to do that in the final product. If you're having trouble following the Fritzing diagram with respect to setting up the circuitry for the power supply, remember to look here, under Adding circuitry for a power supply. Remember to add the switch between the breadboard ground rail and the power supply circuit so that you can power the circuit off and on without having to unplug or disconnect the power supply. That will be important when we put everything into an enclosure.
Slot Machine
Pin 1 - RTS on the FTDI USB to Serial break out board, reset button
Pin 2 - TXD on the FTDI USB to Serial break out board
Pin 3 - RXD on the FTDI USB to Serial break out board
Pin 4 - 1K ohm resistor - momentary 'spin' button
Pin 5 - 330 ohm resistor - RGB LED blue pin
Pin 6 - unused, consider grounding it
Pin 7 VCC - breadboard power rail, 0.1uF capacitor
Pin 8 GND - breadboard ground rail, 0.1uF capacitor
Pin 9 XTAL1 - 16MHz crystal, 22pF capacitor to breadboard ground rail
Pin 10 XTAL2 - 16MHz crystal, 22pF capacitor to breadboard ground rail
Pin 11 - unused, consider grounding it
Pin 12 - unused, consider grounding it
Pin 13 - unused, consider grounding it
Pin 14 - DIN on the 8x8 matrices
Pin 15 - 330 ohm resistor - RGB LED red pin
Pin 16 - 330 ohm resistor - RGB LED green pin
Pin 17 - piezo buzzer positive - negative piezo buzzer - breadboard ground rail
Pin 18 - CS on the 8x8 matrices
Pin 19 - CLK on the 8x8 matrices
Pin 20 AVCC - breadboard power rail, 0.1uF capacitor
Pin 21 AREF - breadboard power rail
Pin 22 GND - breadboard ground rail
Pin 23 - leave this pin floating, it's used to seed the random number generator
Pin 24 - 1K ohm resistor - momentary 'navigate up' button (mistake in Fritzing diagram!)
Pin 25 - 1K ohm resistor - momentary 'navigate down' button
Pin 26 - 1K ohm resistor - momentary 'select' button
Pin 27 SDA - Pin 27 SDA on the display I2C ATmega328P-PU slave
Pin 28 SCL - Pin 28 SCL on the display I2C ATmega328P-PU slave
Display Slave
Pin 1 - RTS on the FTDI USB to Serial break out board, reset button
Pin 2 - TXD on the FTDI USB to Serial break out board
Pin 3 - RXD on the FTDI USB to Serial break out board
Pin 4 - unused, consider grounding it
Pin 5 - unused, consider grounding it
Pin 6 - unused, consider grounding it
Pin 7 VCC - breadboard power rail, 0.1uF capacitor
Pin 8 GND - breadboard ground rail, 0.1uF capacitor
Pin 9 XTAL1 - 16MHz crystal, 22pF capacitor to breadboard ground rail
Pin 10 XTAL2 - 16MHz crystal, 22pF capacitor to breadboard ground rail
Pin 11 - unused, consider grounding it
Pin 12 - unused, consider grounding it
Pin 13 - unused, consider grounding it
Pin 14 - unused, consider grounding it
Pin 15 - piezo buzzer positive - negative piezo buzzer - breadboard ground rail
Pin 16 - CS on the seven segment display
Pin 17 - CLK on the seven segment display
Pin 18 - DIN on the seven segment display
Pin 19 - unused, consider grounding it
Pin 20 AVCC - breadboard power rail, 0.1uF capacitor
Pin 21 AREF - breadboard power rail
Pin 22 GND - breadboard ground rail
Pin 23 - unused, consider grounding it
Pin 24 - unused, consider grounding it
Pin 25 - unused, consider grounding it
Pin 26 - unused, consider grounding it
Pin 27 SDA - Pin 27 SDA on the slot machine I2C ATmega328P-PU
Pin 28 SCL - Pin 28 SCL on the slot machineI2C ATmega328P-PU
Step 6: Installing Software
All of these libraries will need to be installed into your Arduino development environment if you wish to compile the code so that you can upload it onto your ATmega chip. This page explains how to install an Arduino library.
Step 7: Coding the Slot Machine
I will not be taking you through the code line by line. It's extensively commented and there's nothing tricky going on anywhere. So use the Force, read the source. If you're not familiar with the manipulation of registers on the ATmega386 and would like to understand more about how to write code for the AVR micro-controller without relying on the Arduino library, I'd encourage you to get a copy of Elliott William's excellent book, "Make: AVR Programming". If you happen to have a subscription to safaribooksonline.com, you'll find it there. Otherwise it's available here on Amazon. In these programs I use the Arduino functions in some places, and in other places I manipulate the registers directly. Sorry about that.
The first thing you might notice is that the program makes extensive use of global variables. There's a good discussion on this topic at Stack Overflow. I'm not going to promote or defend heavy use of global variables here, but I would encourage you to understand all perspectives on the topic and recognize that there's a strong argument for using them on an embedded application project with a single programmer and limited resources.
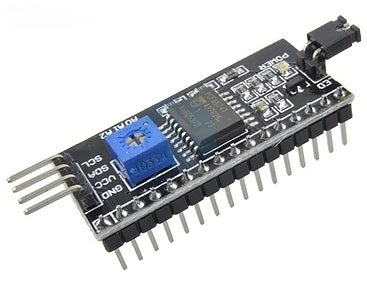
I do make use of some libraries, without which this project would have been impossible for me. The Timer Free Tone Library is used to drive various frequencies through the passive piezo speaker. In SlotMachine.h you'll notice that there are a slew of defines for musical notes. You can use that to put together any melody you wish. I only use a handful of them to play part of the theme from "Close Encounters of the Third Kind" when the SlotMachine's micro-controller starts and the setup function runs. I selected the timer free library because I thought I was going to need the timer for something, but I ended up not using the timer at all. It's available if you need it. The LED Control Library is used in both SlotMachine.ino and slotCreditDisplaySlave.ino. In the former it's used to control the three 8 x 8 LED matrices that serve as the slot machines reels. In slotCreditDisplaySlave.ino the library facilitates access to the 8 digit seven segment display that displays the player's credit balance. This would be a good time to mention that I tried to avoid using another AVR chip (ATmega328) just to serve up the credit balance, but I could not find a way to control the 8 x 8 matrices and the 8 digit seven segment display from a single micro-controller. So in the end I had to create an I2C slave to serve that purpose. It's definitely the case that you could use a less expensive AVR to do the job of displaying the credit balance, but to keep things simple for this article I elected to use another ATmega328P-PU chip. On the bright side, when you win a large jackpot the credits continue to count up on the credit display slave while you can go ahead and spin again. The LiquidCrystal/LCD and the LiquidCrystal I2C libraries are needed to facilitate access to the 20 line x 4 row LCD display. As mentioned you can substitute a 20 x 2 LCD if that's all you have on hand, just by changing the definition of LCD_SCREEN_HEIGHT from 4 to 2. Be sure that the LCD display you acquire for this project is I2C capable. If it isn't you'll need to acquire an I2C SPI serial interface board port module for LCD1602 adapter plate, part number PCF8574, depicted below, and solder it to your LCD1602 display.
The game can be in a number of different states at the same time, and the machineState variable tracks the states. For example, it can be 'spinning' and in 'auto mode' at the same time. I don't really make heavy use of this concept inside of the program; not as much as I have in other programs, anyhow. But there is some conditional branching based on the state. There is also the concept of events, and events are dispatched and handled in the ProcessEvents function. It would probably be better if there was an event queue, but I didn't go that far.
There's a list of known defects and 'to dos' in the comments section of SlotMachine.ino. Sometimes when you 'spin' the reels (by pressing the spin button or selecting the 'Play' option from the LCD menu) one or even two of the reels don't move. That's because the random number generator behind the scenes picked symbol that's already displaying for that reel. This could be fixed to make the game appear more realistic, but it's not really a defect. The reels don't finish spinning left to right, as they do on most slot machines. This is done by design, to keep things simple. It would be possible to have the reels finish spinning from left to right by sorting the three random numbers that are generated for each spin in ascending order before the reels actually spin, and I didn't bother.
As far as 'todos', I would at some point like to add brown out protection and watch dog protection, just to go through the exercise and learn how to do it. Note that 80% of the space allocated for global variables is already consumed. This is the point at which things can start to become unstable with the ATmega386 and Arduino programs. We're at that point with this program. I've had to do some budgeting the keep things working, and I wouldn't recommend adding any more globals to the program. This would make it difficult to add more functionality to the Settings portion of the menu, for example, because the menu consumes a lot of global variable space. I did try to solve the global variable problem by moving the menus into program memory, but I couldn't get that to reduce the space used by globals, I think because the compiler needs to pre-allocate all of the space for the menus anyhow. More work could be done to spice up the game a bit; I could make more use of the RGB LED and the piezo buzzer, celebrate a win a little more, maybe make a better sound when money is lost, but I'll leave that to anyone who wants to play with it.
I had to design all of the symbols for the game. Some of them will remind you of the classic arcade game 'Space Invaders', and I may have borrowed those from somewhere. The rest of them I designed by hand, and some of them are less than professional looking. I used this site to help design the symbols on the 8 x 8 LED matrices. If you want to adjust the symbols you can do that in SlotMachine.h, and play with them to your heart's content. It won't affect the program logic. For the symbols I represent the numbers in base 2 / binary so that you can design them with your text editor.
The code is available here on GitHub.
Demo


