

Introduction: Arduino Synth / Tone Generator

This is a Synth / Tone Generator that uses the Tone command that is native to the Arduino. It has 12 individual keys that can be set up to play any frequency of square wave. It has the ability to go up and down octaves with a button. It also has a second Arduino that will generate a "beat" and you can cycle through each beat and adjust the tempo of the beat with the potentiometer. It outputs to a single speaker. It might look complicated but it is actually pretty straightforward to make and you can customize your sounds by changing the code.
Step 1: Materials
- 2 Arduino Unos
- 17 1kΩ Resistors
- 1 50kΩ Potentiometer
- 16 Tact Switches (Pushbuttons)
- 1 4Ω Speaker
- 1 9V Battery
- Lots of wire
If you want to solder the final board and make a final product like mine you will also need
- 1 Protoboard
- 2 28 Pin Sockets
- Male and Female Headers
- 1 5V Regulator
- 1 47 uF Capacitor
- 2 16 Mhz Crystals
- 2 On/Off Switches
- A toy keyboard to remove the keys from
Step 2: Wire the Breadboard

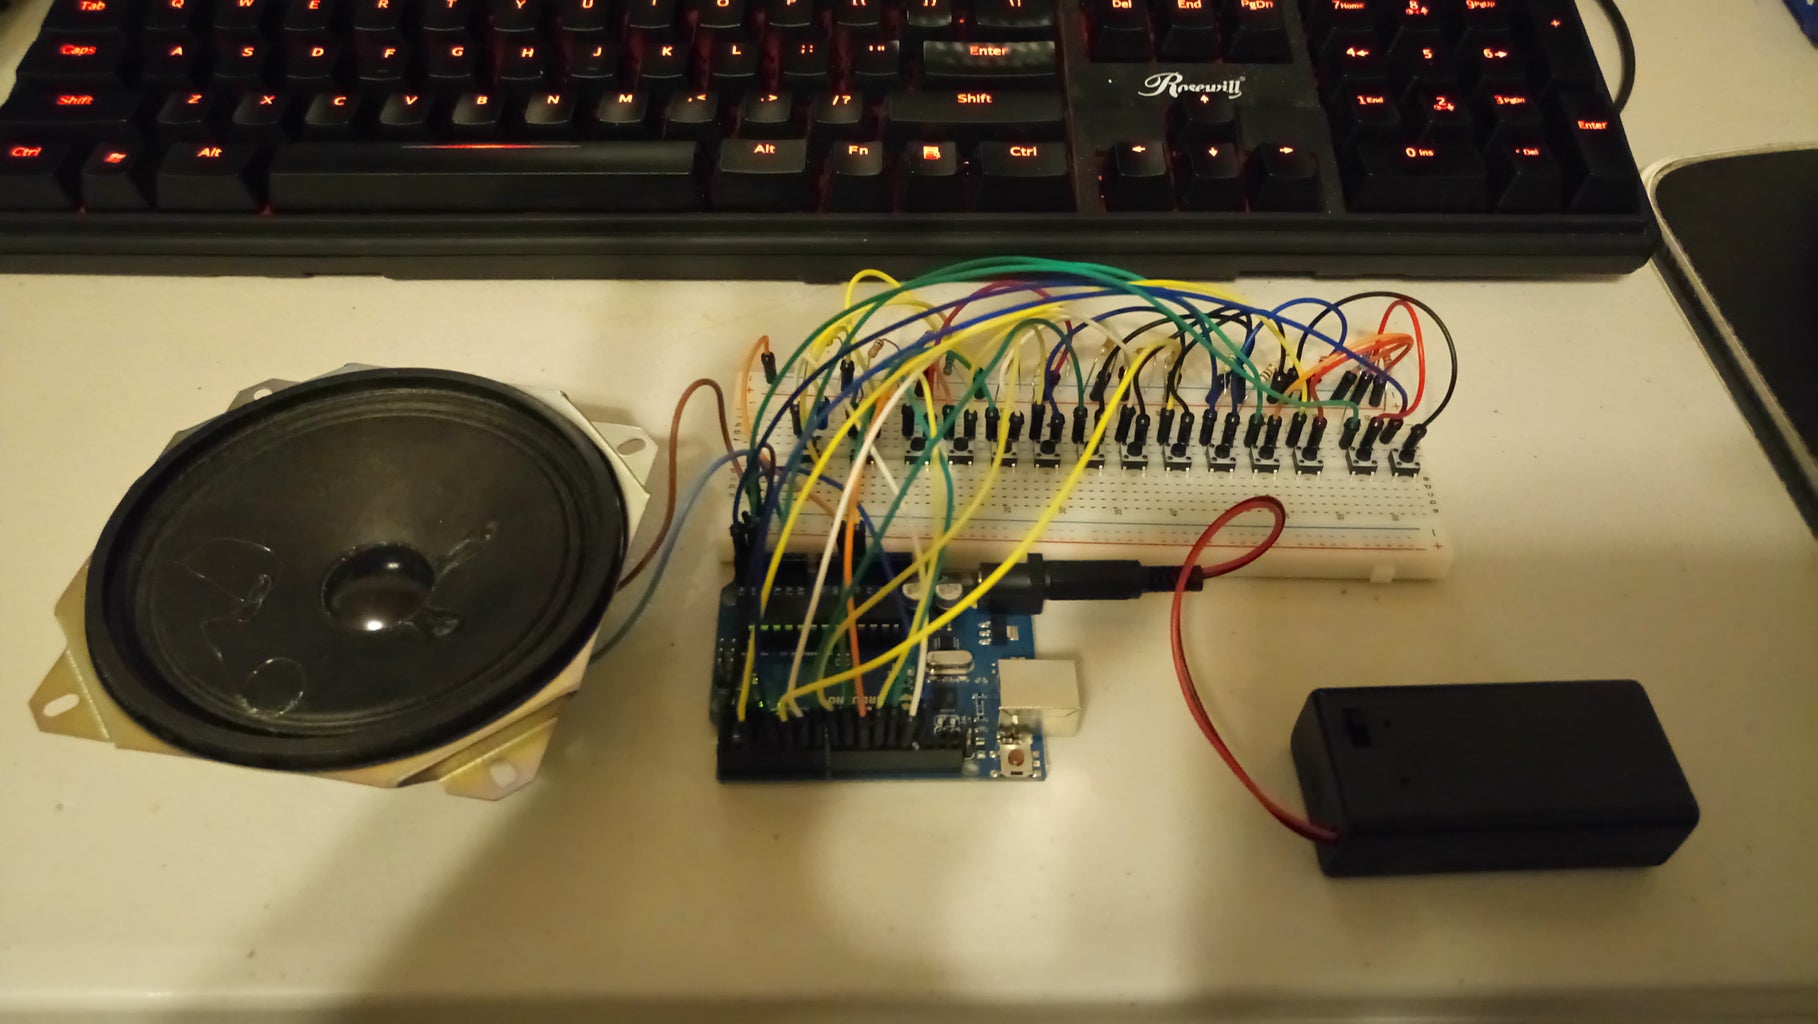

Using the image above create the circuit on the breadboard.
For the first arduino hook 12 tact switches up to pins 13-2 each with their own pull down resistor. Connect 2 more switches to A5 and A4 the same way. The last thing to connect is the speaker. Connect one end to ground and the other end to pin 0.
For the second arduino hook 2 switches up to pin 9 and 10 the same way as before. Connect the 50k potentiometer to pin A0, 5V, and with a 1k resistor to ground. Lastly connect pin 8 to the same wire on the speaker that you did pin 0 on the first arduino. Don't forget to connect the grounds of both arduinos together.
Step 3: The Code

Next upload the Tone Keyboard code to the first arduino and the Rhythm Section code to the second ardunio. If the code doesn't want to upload try disconnecting the speaker temporarily and try again.
I explained most things in the code itself so I will just show you how to change different things to achieve different sounds.
To change the frequency of each key on the keyboard you have to change the number in the Tone command in the Tone Keyboard code (I put the number you change in bold below)
if (cN == HIGH)
{ tone(0,(16.35 * octave)); }
By default I have put the base frequency's of musical notes but you can change them to whatever you want.
To change the Beats/Rhythms you have to change the Rhythm Section code. Similarly to the Tone code all you have to do is change the frequency (Bolded below) and it will change which note to play. You can add another delay and tone if you want to add more notes to the rhythm.
if(pattern == 1)
{ tone(8, 55, sensorHalf);
delay(sensorValue);
tone(8, 58.27, sensorFourth);
delay(sensorHalf);
tone(8, 58.27, sensorFourth);
delay(sensorHalf); }
You can refer to the chart above which has the frequency's for each musical note on each octave so you can create your own rhythm.

Step 4: Creating the Final Product

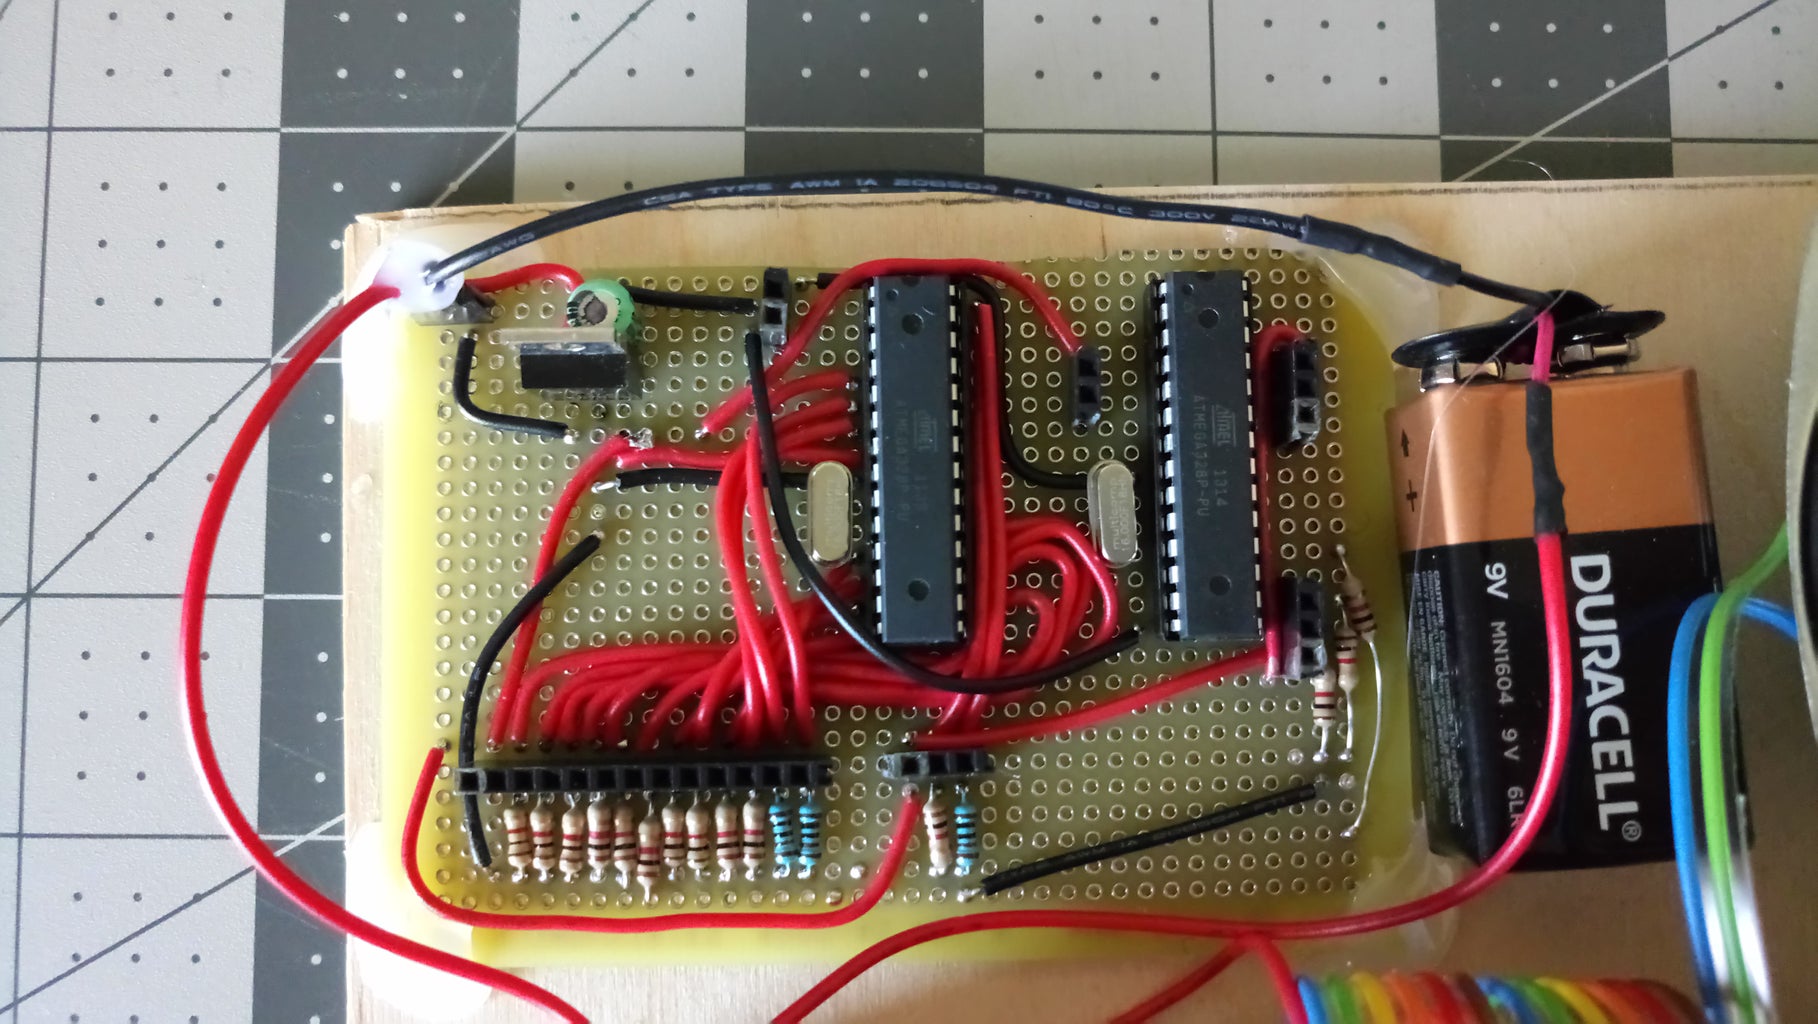
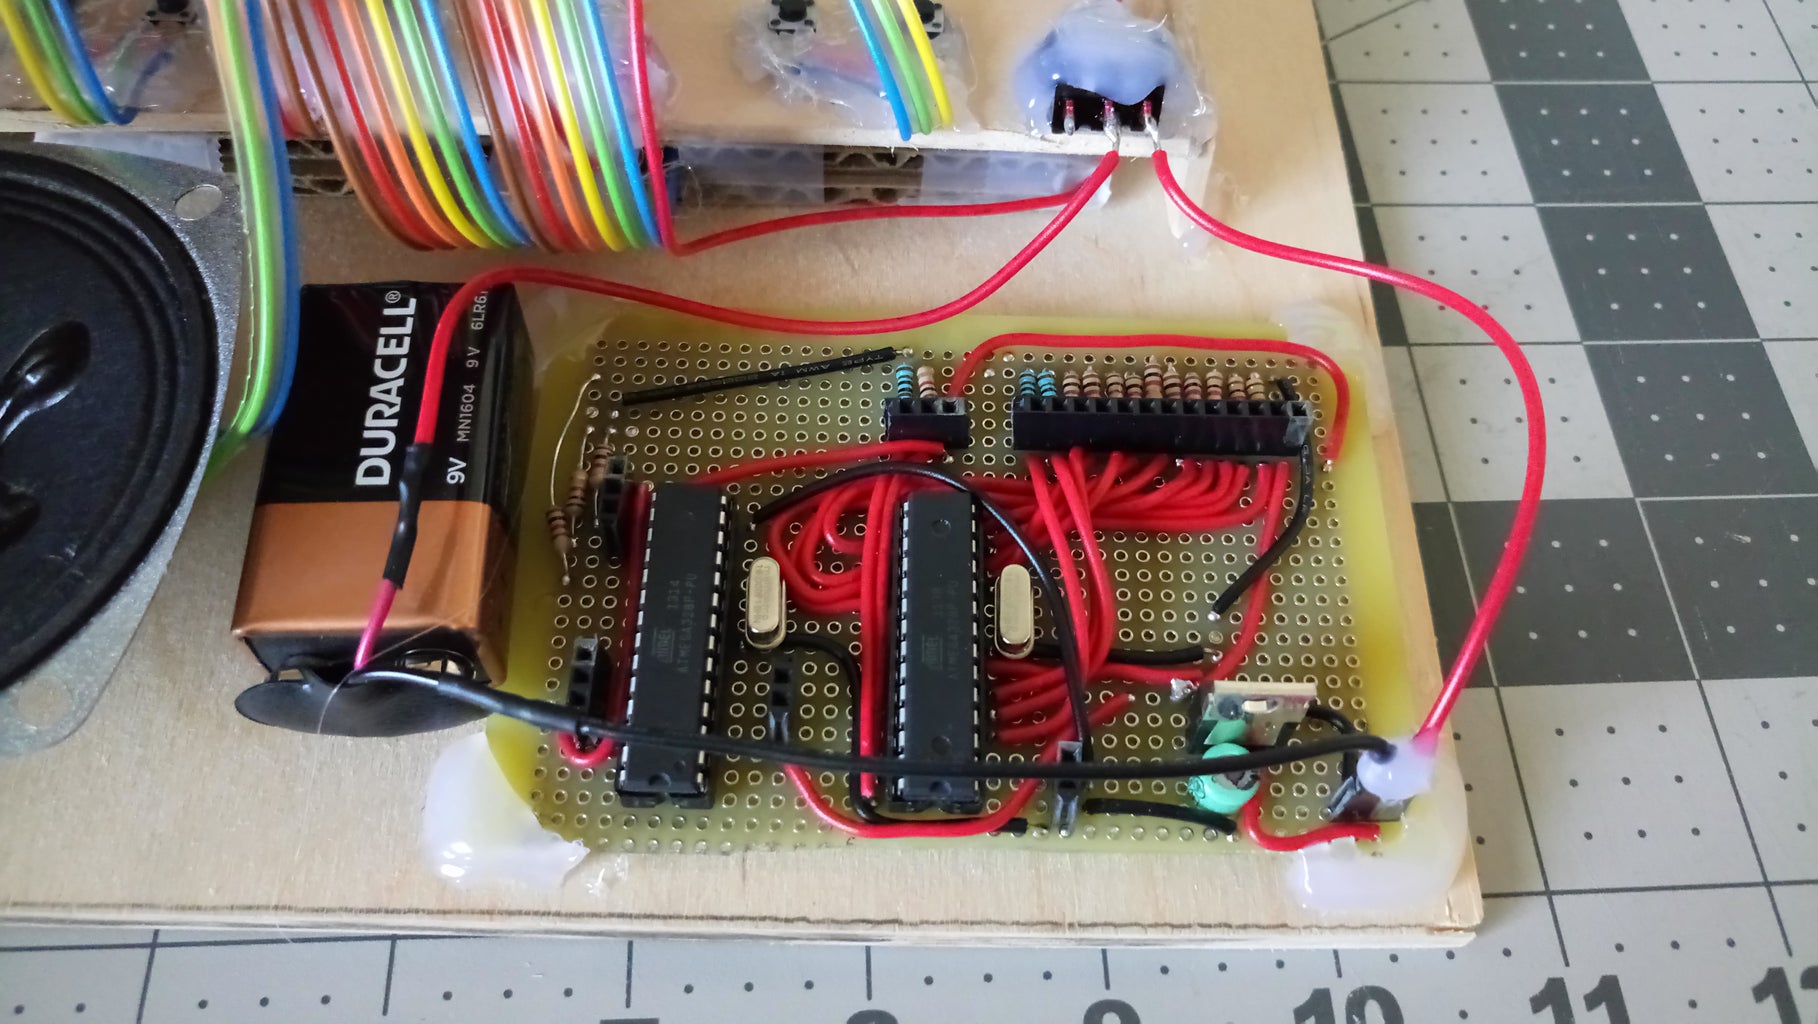
This step is optional but if you want to do what I did you will have to solder a board with both micro controllers on it. All you have to do is take the IC's off of the arduino board and solder them to a blank pcb (you should use sockets).The only extra things you have to do are connect a 16Mhz crystal between pins 9 and 10 on each IC. You have to use a 5V regulator to step down the 9V from the battery to power the circuit. Put a 47uF capacitor between 5V and ground to help keep the output steady. Ground is pin 8 and 5V is pin 7 on the IC. Refer to the Pinout diagram to see which pins on the IC correspond to the digital pins. Mostly it is just taking the circuit on the breadboard and moving it to the pcb. Using headers might take extra time to solder but they will make troubleshooting much easier so I would advise using them. To create the keys I took apart an old toy keyboard and put the tact switches under each key. Once you finish creating each piece you can create a case for it. I just hot glued everything to some wood but you could make it look a lot better than mine if you wanted to.
Step 5: Test It Out!
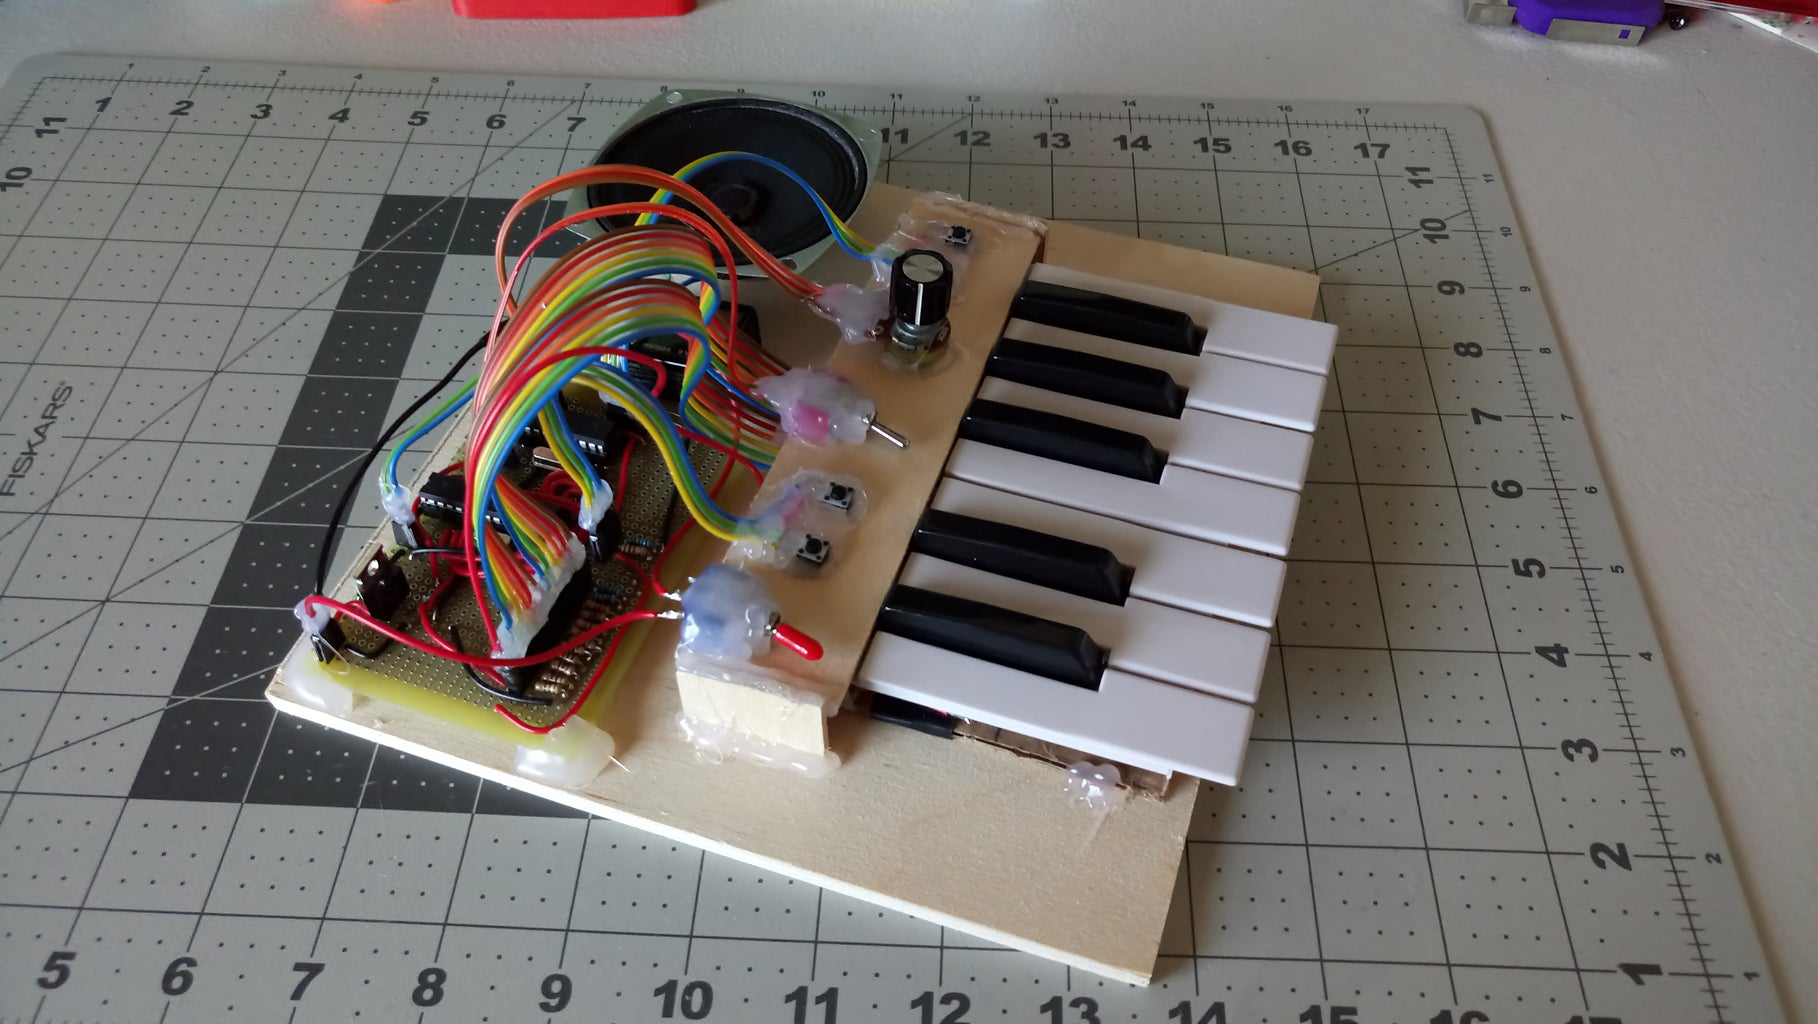
Now you can have fun with your new synth. It only has 1 note polyphony so you can only play simple songs but with the rhythm section turned on you can make some really cool sounds. Have fun!


