

Introduction: Arduino + TFT = Visual Music


Summary:
- Audio: In this project the Arduino reads a string of notes written in the music notation format we have called Easy Music Language. It selects each musical note (or rest), determines its frequency and plays that note.
- Graphics: The Arduino draws each note played on a musical staff drawn on the TFT screen. The sketch uses a range of notes from whole notes to thirty-second notes, as well as dotted notes (1 1/2 duration), sharps and flats. Note stems are drawn in up or down orientation as appropriate. The quarter rest symbol is used to represent all rests regardless of duration.
Why this Instructable?
- The Instructable was written to encourage others to compose and play music for the Arduino.
Step 1: Assemble the Components

Parts List:
Arduino Uno
Adafruit 2.8 " TFT shield
piezo buzzer - or - speaker with appropriate resistor - or - amplified speaker for sound output.
As noted in an earlier Instructable, the TFT shield covers the digital pins that we use for sound output. In this sketch we use pins A0 and GND to connect the speaker or buzzer. How do we manage that? By making an interim shield with side pins that are not obstructed by the TFT shield. Is there an easier way? Yes, you can purchase a shield with side terminals. This can be either a full proto shield, or a wing shield, such as the one you see here:
https://www.adafruit.com/products/196
Other versions are available; search on-line for Arduino wing shield or screw shield.
If you connect a speaker, use the correct resistor to protect your Arduino. You can verify the speaker's resistance with a multimeter, and then use Ohm's law to calculate the correct size of resistor so that you do not draw too much current from the A0 pin. See:
http://playground.arduino.cc/Main/ArduinoPinCurrentLimitations
As it says at that link, 'be nice to your Arduino.'
Another alternative: you could connect the A0 and GND pins to an amplified speaker.
Take your time assembling the Arduino and its shields. There are a number of pins to line up, and we want them inserted properly.
Here are links to two of our earlier Instructables that show how the Arduino / TFT shield assembly was put together.
https://www.instructables.com/id/Scrolling-text-on-TFT-screen
And a link to the Adafruit TFT shield tutorial:
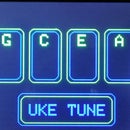
Step 2: A Demo - What It Looks Like / Sounds Like
Watch this demonstration to see what the partnership of your Arduino Uno and a TFT shield can do.
Note: the original on-screen graphics are clear and crisp, just as you would expect from one of these TFT screens. If you have a TFT shield, load and run the Arduino sketch to see it run first-hand.
Step 3: EML - Music Notation for Arduino
The music notation used is EML (which stands for easy music notation). It was developed to facilitate musical note entry for Arduino tunes.
You can write your own composition in EML and save it in the melody file MELODY_FILE.h. Simply replace the notes in MELODY_FILE.h with the notes of your composition. Then play the tune on your Arduino.
EML example: 4C#4.
This means 4th octave C#, quarter note duration, dotted (1 1/2 duration).
Example: 3c32
This means 3rd octave C 32nd note duration.
Example: r2
This means a rest of half note duration.
Example: 5d-4
This means a 5th octave D flat, quarter note duration.
- You will note from the first two examples that it is not necessary to enter a capital letter for notes - either uppercase or lowercase is acceptable.
- You need enter the octave and note duration only when it has changed from the previous note or rest. This string of notes 4C2 4D4 4E4 is equivalent to 4c2 d4 e. (And the latter uses less of our Arduino RAM.)
- When you enter a string of notes for Arduino to play, remember to end each line with a space before the quotation mark that ends each line. Otherwise you may have difficulty loading that line into memory.
- There are options for storing your melody files. Here we have placed the melody file in a header file and included it in the main sketch. You may also store melody files in separate file directories. (See comment in sketch explaining how to do this.)
- Similarities between EML and Music Macro Language are coincidental, with this one exception: MML's notation for sharps ( '#' or '+') and flats ( '-' ) has been adopted for EML. (See more about Music Markup Language at
Step 4: A Note About Memory
The Arduino Uno has limited SRAM memory. The sketch uses an array of note strings to play music, and this array uses RAM memory. If your own composition is longer than the sample provided here, and you find that it does not play, try making it shorter. Or you could upgrade: switch to an Arduino Mega - it can handle compositions that are several times longer.
Step 5: A Note on the Graphics


The first picture is a photo taken of the gramophone graphic used as a title page on the TFT screen.
This graphic was drawn on the TFT screen using Adafruit's TFT graphics library; it consists of a number of lines drawn with the tft.drawLine function.
The original gramophone drawing was drawn in Inkscape. (In fact it was drawn for an earlier Instructable: Arduino Tone Music - you can see the original in full colour there.) To convert it for the TFT screen it was processed by Inkscape into straight line segments, and then those straight line segments were extracted from the resulting SVG file by a Ruby program written by Andrew, our code expert.
The second picture is a screenshot of the header file that Arduino uses to make this image.
The original musical symbols were exported from Inkscape as PNG files of the desired size, then exported to PBM using GIMP, then post-processed by a Ruby program (thanks, Andrew) to turn them into code that can be used for a header file. But here's an alternative method you could use: Adafruit has a java utility called Img2Code that converts images into a byte array that can be used as a bitmap by the Adafruit-GFX-library
https://github.com/adafruit/Adafruit-GFX-Library
To conserve SRAM memory, the graphics data are loaded into progmem.
The third picture is a screenshot of the header file used for these music symbols. Header files are saved in tabs in the Arduino IDE. The complete files are included in the 'download' step below.
The last picture is a snapshot of arcs drawn on the screen.
Step 6: Download the Arduino Files
You can download the sketch and header files here.The .ino file is the main Arduino program.
(Note: 06/16 up-dated the musicSymbols.h file.)

Step 7: The Arduino Program Sketch

The sketch file - visualMusic.ino - has been commented for this Instructable.
The header files - MELODY_FILE.h, musicSymbols.h, and gramophone.h - are stored in tabs, which you open in the Arduino IDE.
The main sketch, visualMusic.ino is divided into these parts:
PART ONE - LIBRARY HEADERS, CONSTANTS, GLOBAL VARIABLES
PART TWO - FUNCTIONS FOR NOTE PROCESSING
playMusic FUNCTION - This function examines the melody file's String of notes (which are written in EML format), selects each segment separated by spaces (i.e. each separate note) and sends each segment in sequence to the function parseNote().
noteIndex FUNCTION - Given a character representing a note, noteIndex returns the position in the octave. This is used to position notes on the screen. Example: 'C' => 0, 'D' => 1, 'E' => 2, 'R' for rest => 7 .
parseNote FUNCTION - parseNote receives a note String from playMusic and determines the musical frequency and other characteristics of that note. It then passes these values to the note handler function named handleNote().
handleNote FUNCTION This is the 'note handler' - it both plays the note and draws it on TFT screen.
PART THREE - setup() AND loop() FUNCTIONS setup() calls functions that draw screen graphics and play music. There is nothing in loop() - because we play the tune a specified number of times, not indefinitely.
PART FOUR - GRAPHICS FUNCTIONS
drawStaff FUNCTION - Draws musical staff lines
eraseNotes FUNCTION - erases a section of the screen before drawing each note
There are six separate functions that draw whole, half, quarter, eighth, sixteenth and thirty-second notes.
draw_shapes FUNCTION - uses data from the header file gramophone.h to draw the gramophone graphic used on the title screen.
Step 8: Acknowledgement

Thanks
- to Andrew Wendt for heavy-duty coding help and patience, and for the magic that produced our graphics. (There are no bugs in his code.)
- to Adafruit for the shield and its graphics libraries that make it easy to access TFT screen functions.
- to Microsoft for Windows Live Movie Maker.
Step 9: Now It's Your Turn ...
Use this program and its notation language to compose some original music for your Arduino to play.
The music will play if you don't have a TFT shield.
As mentioned earlier, it is not necessary to repeat octaves and note lengths when you are writing notes for Arduino to play.
You will be able to play note melodies, but not multi-note chords.
It helps to be realistic about Arduino's musical potential and its limitations - that makes it easier to compose enjoyable tunes.
This is just one of many interesting projects that you can do with Arduino and a TFT shield.


