

Introduction: Arduino Traffic Display Using Google Maps API


Hello Everyone!
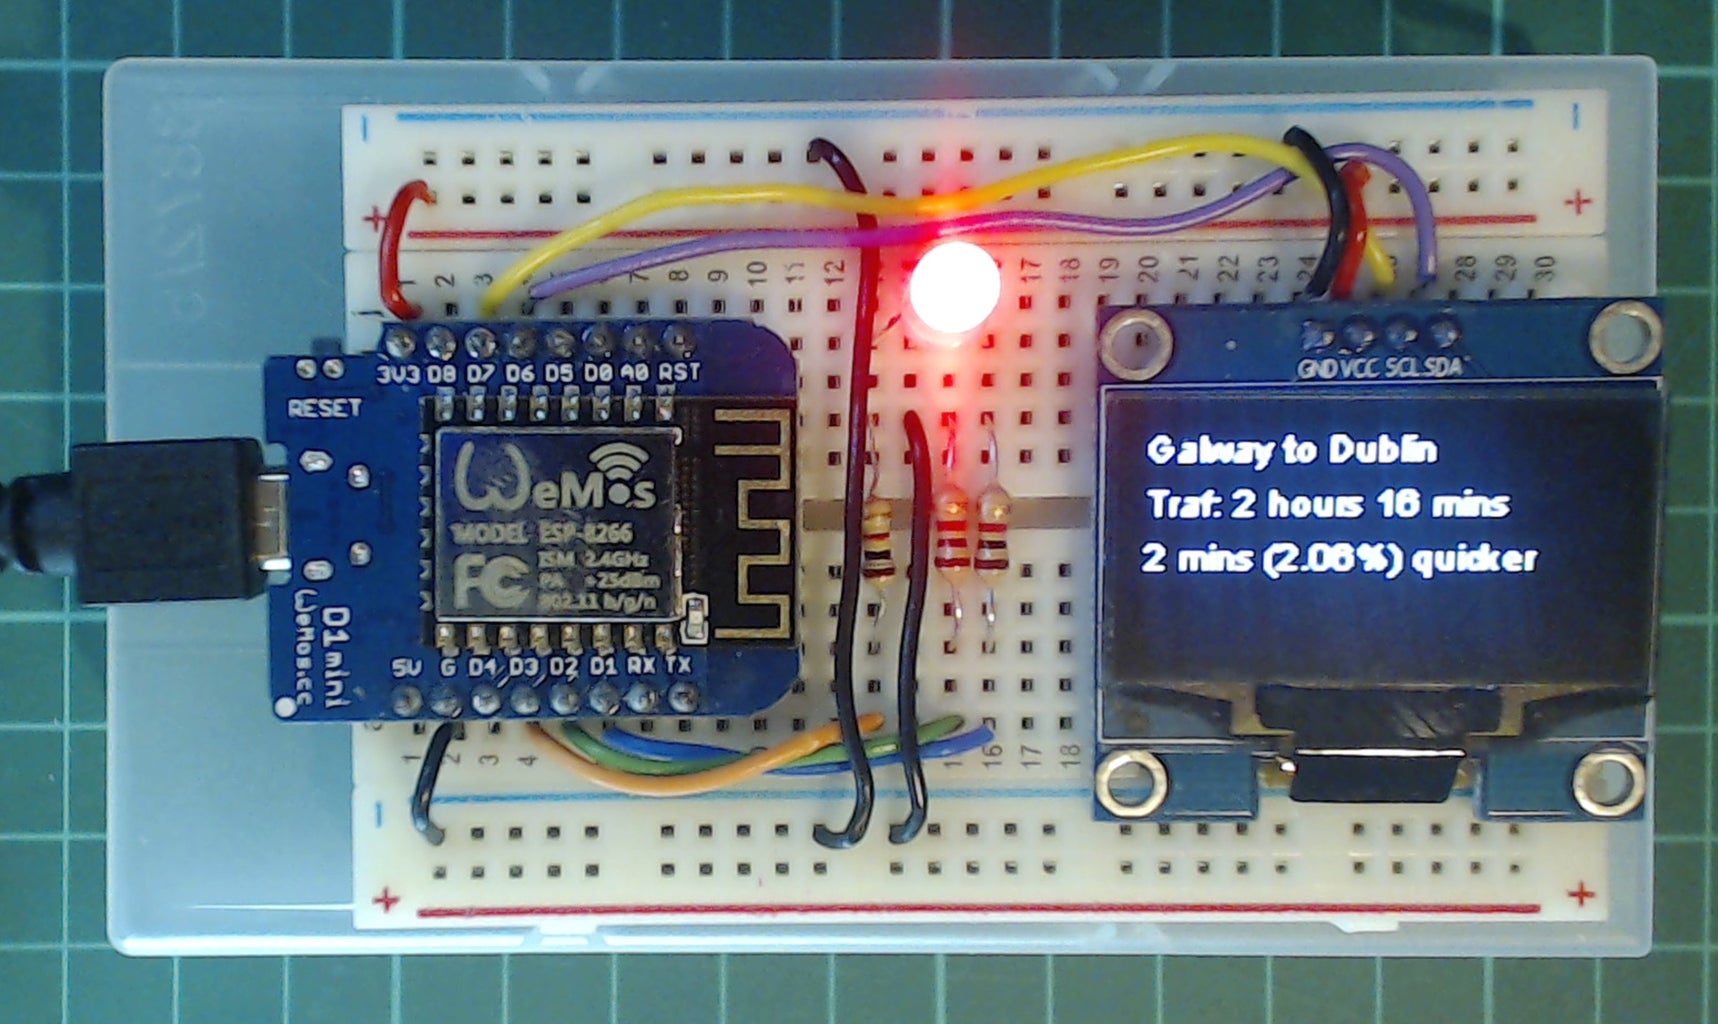
In this instructable I'm going to show you how to make a Arduino device that gets traffic data from the Google Maps API and displays it to a screen and will also set the colour of a RGB LED.
The project runs on an Wemos D1 Mini (ESP8266) programmed via the Arduino IDE and costs roughly $10 in total to make.
The Arduino Traffic Display in this instructable will have the following features:
- Gets the estimated travel time between two locations from Google Maps
- Is configured dynamically using Telegram messenger
- Configurations are persistent across resets (Uses SPIFFS, internal flash memory on the ESP8266 board)
- Displays to an OLED screen and a RBG LED
The code should run on any ESP8266 board, but the small one with only a couple of GPIO pins will not have enough pins for the display and RGB led.
Step 1: Hardware
First thing we need to do is put together the hardware for the project You'll need the following
- Wemos D1 Mini - any ESP8266 dev board should work
- 1.3" OLED Display (The 0.96" version will also work) - I really like these displays as they only need two data wires
- RGB LED - this is a 10 pack but you only need one
- Breadboard, 3x 1K resistors and wires - You probably already have these, if not a basic starter kit is probably a good option
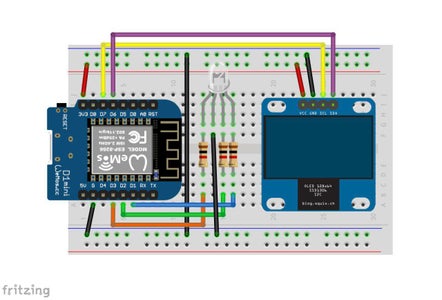
You then need to assemble it as shown in the wiring diagram.
Step 2: Google Maps API Key


In order to get the traffic data from the Google Maps API you need use an API key, these are free and very easy to get.
- Click on this link
- Scroll down to Quick start steps and click the Get a Key option
- Type in the name of your project and click the checkbox to agree to the terms and conditions
- You will then be given your key that you need to use later in the sketch
I recommend trying out your key using the following URL to make sure it's working correctly (Make sure to change the key at the end!)
https://maps.googleapis.com/maps/api/distancematrix/json?origins=Galway,+Ireland&destinations=Dublin,Ireland&departure_time=now&traffic_model=best_guess&key=PutYourNewlyGeneratedKeyHere
Step 3: Telegram Bot Token and Chat ID


Telegram is an instant messenger very like whatsapp.One advantage it has over whatsapp is it allows you to create bots, which are programs that you can interact with in the chat application. We'll be using the Universal Arduino Telegram Library.
To use the library the first thing you need to get is a Bot Token, to get this inside telegram search for "botfather" and type the "/newbot" command. Then follow the onscreen instructions for naming the bot. Botfather will return you a bot token that you will use with the library.
Bots can only message you if you've first started a conversation with the bot first, so click on the link to your bot in the message that botfather sent and click the "Start" button
So the bot knows where to send the message you are going to need to add your chat id to the sketch, this is your unique identifier on Telegram. The easiest way to get this is search for a bot called "myIdBot", press the start button and send the "/getid" command.
You should now have everything you need to use Telegram to control the Arduino Traffic Display.
Step 4: The Code
You now have everything you need to program you board with the example sketch which you can get off the project's Github page.
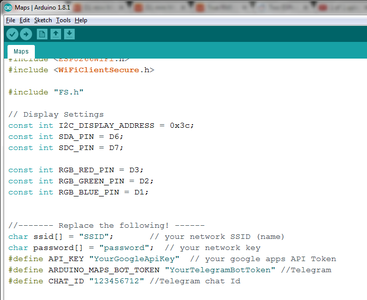
- Open the traffic-notifier sketch in the Arduino IDE.
- There is a list of libraries up the top of the sketch, they will all need to be installed if you do not have them already (All are available on the Arduino Library Manager)
- If you scroll down a small bit, you will see a section with the comment Replace the following, update everything in here
You should now be able to program your board with the sketch.
Step 5: Controlling the Device Using Telegram
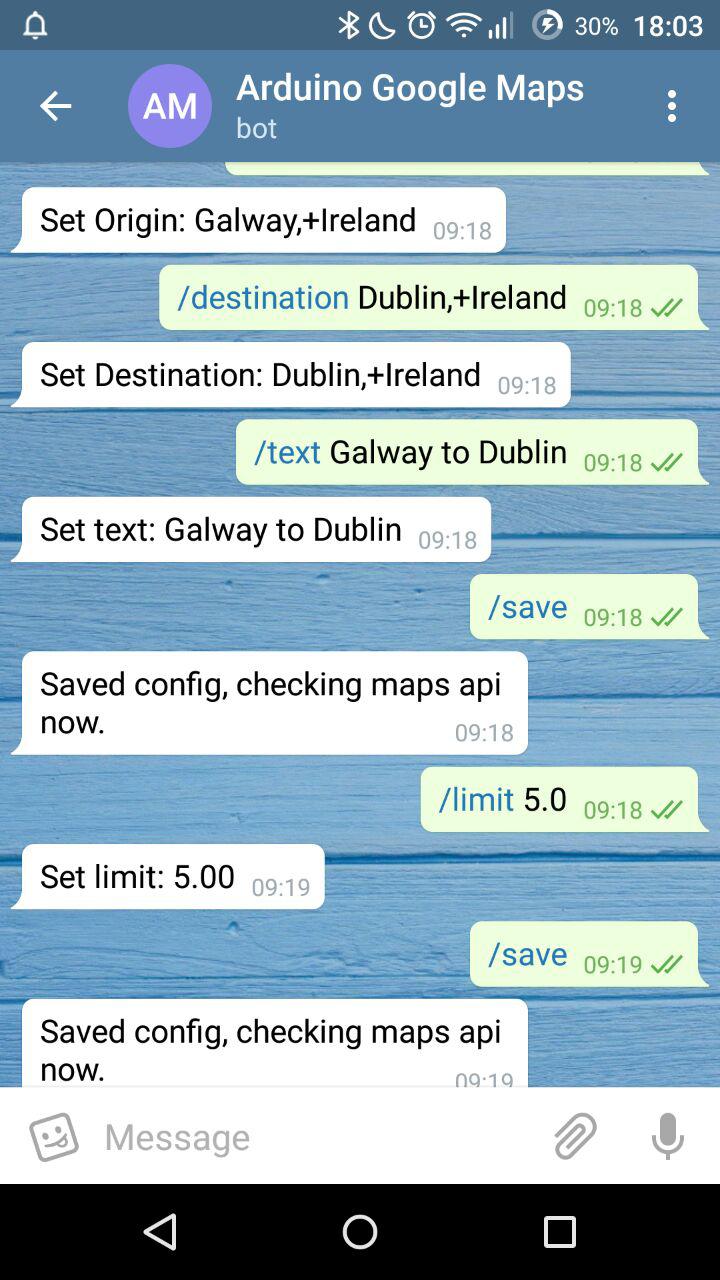
When the device powers on and connects to the WiFi it will send you a message via Telegram.
You can reply back to the device to send commands to configure it. Here is a list of the commands and what you can do with them
- /start
Lists out the available commands to the bot - /values
Lists the currently configured values that the bot has - /originlocation
Sets the place you want your journey to start from. See comment below the list - /destinationlocation
Sets the destination of your journey. See comment below the list - /limitvalue
Sets the limit of when the LED should turn red based on percentage difference. Value is a float (a negative percentage difference would mean the traffic is slower, so this would normally be a minus value (-10.0) or 0.0) - /save
Saves the configured value to a file (this file will be loaded at start up) and also will force a update from Google Maps
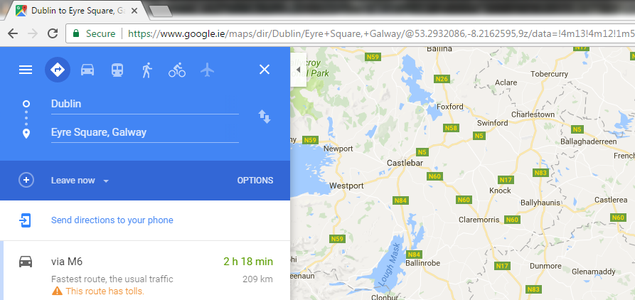
Note on locations, if you want more precise locations go to Google Maps and get the travel time between the two areas. You will see the origin and destination in the URL, you can use those values as they appear in the URL.
And that's it! Hopefully you enjoy this project, please let me know if you have questions or feedback.
Thanks alot
Brian
