

Introduction: Arduino Vending Machine

Cutting the pieces
The vending machine is a box so your gonna need 6 sides.
You need a base 4 walls and a roof/top.
2 sides 6 x 12
top 6 x 7
bottom 7.5 x 6
Step 1: Cutting Rabbets

You need to cut ravets so everything fits in nice.
Back board- Cut Ravet in middle of board so your shelf can fit in nice. Also Ravets on the side of the back board for the 2 sides to fit nice.
Sides-Ravets in the side to fit on the back.
Step 2: Adding a Shelf

Your gonna want a shelf to fit your Arduino and servo on top.
Cut the shelf perfectly to fit inside and fit it to the back ravet.
Also need a hole to feed the wires to the Arduino and servo.
Either nail gun in place or hot glue or wood glue.
Gonna need a hole for the snickers to fall
Step 3: Adding the Roof
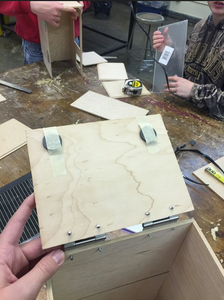
Your gonna want 2 hinges of any kind to fit the vending machine.
Simply Screw the hinges to the back of the vending machine to the top of the roof piece.
Step 4: Adding the Hole for the Snickers

You just need to make a little cubie for your fun sized snickers to fit in.(Make Snug)
As in the picture above we hot glued cubbie to the back so it was elevated to the height of the snicker bar.
Make sure the cubbie doesn't stick out the top.
Place right to the right of where the hole is that the snickers fall to
Step 5: Adding the Servo

Cut a hole in the shelf for the servo to fit snug. (it will hang out the bottom)
Place the servo behind the spot where the snicker will sit so you can make an arm to push the snickers.
All the wires will be fed through a small hole on the shelf.
Step 6: Glass and Adding the Paint

Cut a whole so you can retrieve the snickers
Add plexi glass about halfway so you can see the snickers fall
Cut a whole just big enough for the button to fit snug.
You can simply add any paint you want to the outside to fit your needs.
Cover the glass with tape so you don't paint the glass.
Enjoy your finished product


