

Introduction: Automated Plant Monitoring System

We decided to make a project which would help people see the importance of technology on our environment and with their lives. We came up with researching the projects that students have done using the Arduino. But we thought of making something that is existing but not most students have done improving it, so we decided to make an Automated Plant Monitoring System. This project is divided into two groups, the first group is in charge of nursing the plant meaning they will operate the sensors by using the website buttons upon monitoring the plant's status while the second group monitors the plant's status automatically, meaning they would just monitor by viewing on what has been displayed on the LCD TFT and let the raspberry pi do the secondary components do the tasks. Our major components for this project was the Gizduino and Raspberry Pi 3. Since plant owners are still doing the manual process of monitoring their plants for it to grow, by applying technology and some knowledge that we learn from school and researching what kind of materials or components should we use, it will be possible to make their monitoring easier and faster.
Step 1: Functionalities


Since we referred our project to the Automated Greenhouse that is already done here in Instructables. We added some functionalities to be compatible on our project title. We use different sensors in order to measure the temperature, humidity, luminosity, rain drop, and we added the GSM/GPRS module in order to send a message to the plant owner.
To measure the internal and external temperature within our project, we use two pieces of DHT11 temperature and humidity sensor. The external has not much function but it can be help in giving the current measurement of the external temperature. While the internal temperature gives signal to the fan and the servo window to open once the printed temperature value increases from 30 which is to be shown on the LCD TFT that we provided with the Raspberry Pi on it. Otherwise, if the temperature value is less than 30 the fan and the servo window will be close.
The soil moisture sensor helps in measuring the humidity of the soil. If the soil measurement value is determined as wet, the water pump won't sprinkle water on the plant to avoid drowning it. And if the soil measurement value is dry, it will pump the water and sprinkle on the plants. The luminosity is for the sunlight measurement. As the value of luminosity is printed as bright, the bulb won't open, and if the printed value is dark the bulb will open to give enough light to monitor the plants even at night.
Here is the twist on our project, we had this rain steam sensor in which we use it as the signal for the servo roof to open and close. As the rain steam sensor sensed some rain drops the servo for our roof will automatically close to cover the plants because we designed our acrylic case with a hole on the center to mount our automated roof. And if there is no water or rain drops on our sensor the roof will open. Lastly we had this ball float switch, when the water level on our container is full the ball float switch will signal the GSM to send a message written "The Tank is FULL!" to the plant owner. This GSM availability is only for manual mode, and will be inactive once it is switched to automatic mode.
Step 2: List of Components

Remember to be more careful on handling the sensors especially upon testing or troubleshooting. We took time on troubleshooting each components and manage to replace it as soon as possible.
Step 3: Coding
We provided the codes that we have use in this project:
Gizduino/Arduino program:
A newest arduino ide is now available. You can easily download it, but in our case we use the Gizduino version 4.1 so have to install a Gizduino patch that is availble on the E-Gizmo website. The latest Gizduino patch is already availble for the the newest arduino ide. You may also install the prolific drivers to enable the Gizduino port on your laptop or pc.
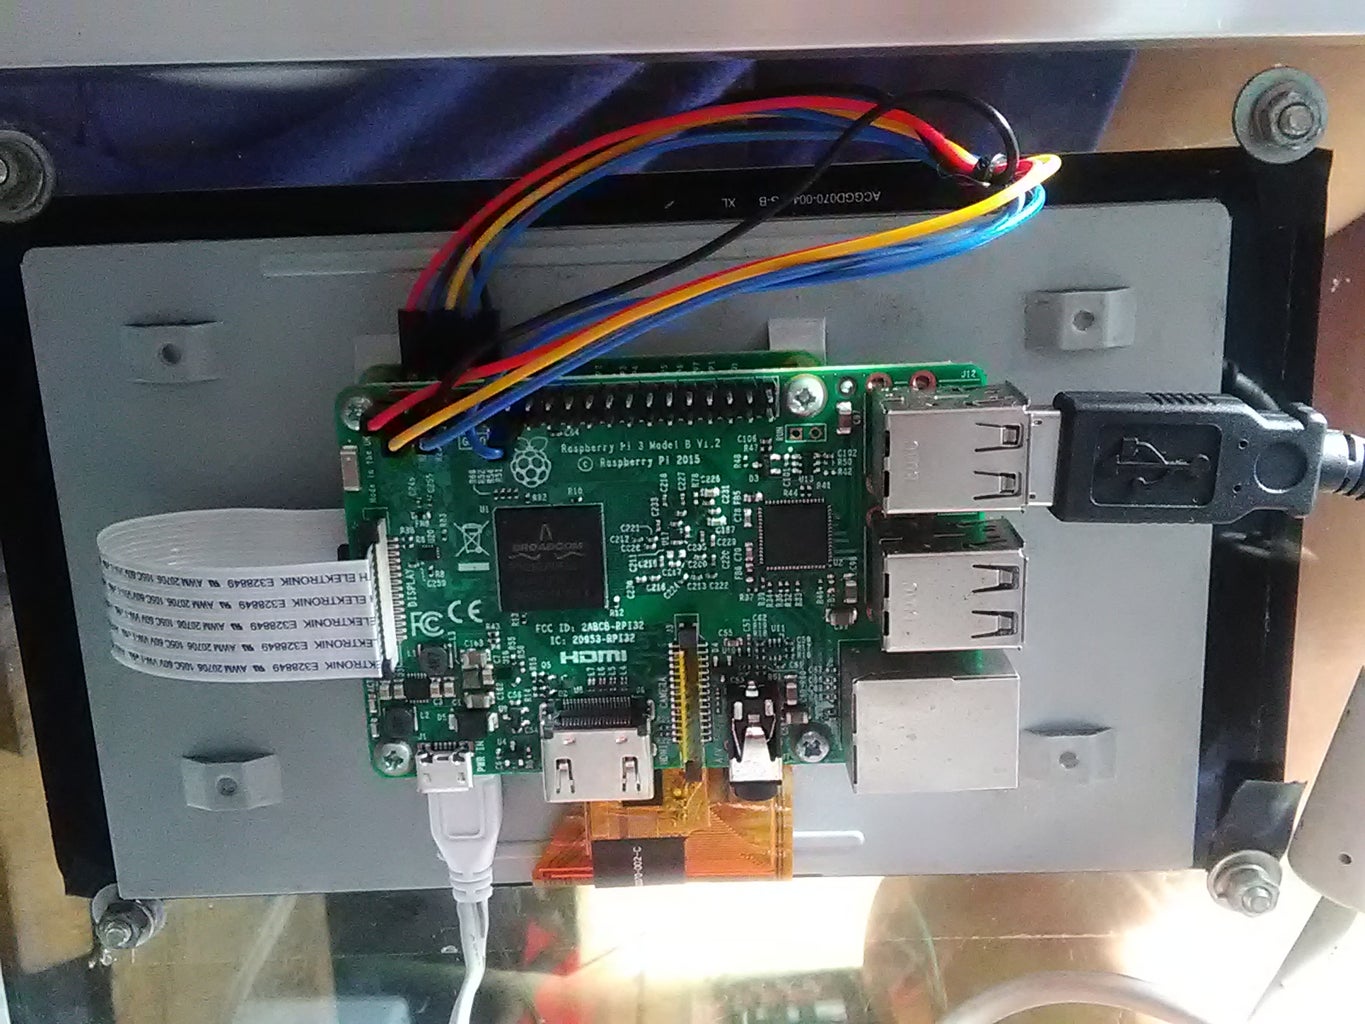
Raspberry Pi program:
We installed the MySQL server and the Python bindings for MySQL. For the web server we installed the Apache2 package, putty and VNCTight Server.
Raspberry script:
For this script, we used the MySQLdb library. The script is the bridge between the Arduino and the raspberry pi. It allows us to save the data from the Arduino board into the database and send the new set point values defined by the user into the Arduino program.
Website:
For the CSS files, we already provided it on the .rar folder you just have to download it.

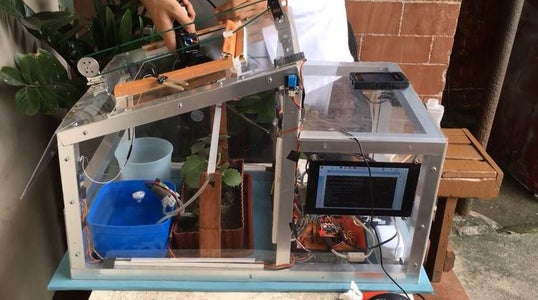
Step 4: Project Assembly


Step 5: Testing


Step 6: Reference
credits to: https://www.instructables.com/member/ViDes/
Step 7: Members


