

Introduction: Automatic Ice Bucket Vendor Based on Arduino


Last friday few engineers from DFRobot took their the Ice Bucket Challenge to raise awareness for ALS. We decided to do it in a maker way with an automatic ice bucket vendor based on Arduino.And we are challenging all makers around the world, now it's your turn!
Introduction
This project is launched in two days ago. We’re going to do the ice bucket challenge to the makers all over the world. So we build a fast prototype, which is an automatic ice bucket challenge vendor. This machine is based on Arduino. When the guy standing in front of the machine, the Arduino controlled system will pull the rope and pour out the ice and water in the bucket.
Let’s see the BOM of the machine.
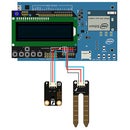
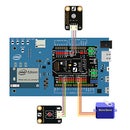
- Romeo V2.0 × 1 Arduino based robot controller
- RS485 Shield × 1 For driving the RS485 ultrasonic sensor
- URM06 – RS485 version × 1 Used to detect the person go through the machine
- Digital push button (White) × 1 Reset the software buffer and start the game
- 12V DC Motor w/Encoder × 1 Pull the wire
- 11.1V Lipo battery × 1
- shelf × 1 To put the machine on
- bucket × 2
- Aluminum plate × 1
- rope × 1
- tape × 1 roll
- Aluminum profile several
- iron wire several
- wood stick several
- screws & nuts several
- Long screw or rod × 2 Shaft of the bucket
- Motor mounting piece × 1
- Coupling × 1
How does it work?
We use Romeo v2 to drive the motor and extending sensor quite easily with the 3pin headers. The range of this ultrasonic sensor is about 10 meters. However the detecting angle is about 15 degrees. So it could achieve the detection in a specified range. The motor is integrated with holzer encoder. So the Arduino controller could know the length of nylon wire to pull. And the button is used to start the game and clear all the buffer after one turn...
Let’s start to make it.
Step 1: Step 1: Design

Design your machine, and draw it down on the paper.
Step 2: Step 2: Assemble the Aluminum Profiles

Assemble the aluminum profiles reference to your design.
Step 3: Step 3: Winding Wire


We need to wind two parts of wires ,each part with several rolls of wires. The first part is used to hold the bucket. It is on the 4/5 (or 3/4) height of the bucket.
The second part is on the 1/5 (or 1/4) height of the bucket. Use the tape wrap up on the wires.And also wrap up the handle of the bucket, make it stable when it’s working.
Step 4: Step 4: Fix the Bucket

The long screws are used to be the shaft of the machine, winding wires to make it stable. Be careful the bucket should turn round so the wires can’t lock the bucket.
Step 5: Step 5:Assemble the Plate

Assemble the plate on the top of the aluminum profiles
Step 6: Step 6:Assemble the Motor


Assemble the motor and the mounting piece on the plate.
Then assemble the coupling and the rotor.
Step 7: Step 7:Link the Rope

Make the bucket and the rotor linked by the rope.
Step 8: Step 8: Assemble the Electrical Components


Assemble alle the electrical components, and link them all.
Step 9: Step 9: Finish


Our automatic ice bucket challenge vendor is finish!


