

Introduction: Basic Paper Masks


I have used this basic idea to make masks with students from age 4-18. The first steps are easy and then the person can customize the mask however they choose. The same idea can also be used to make little finger puppet masks.
Step 1: Materials

Minimal Materials:
1 Scissors
4 Sheets of scratch paper
1 Stapler and at least 10 staples (tape could be used in place of staples).
Additional materials:
Construction Paper
Fabric
Glue
Glitter
Markers
Crayons
Colored Pencils
Step 2: Making a Strip


Staple three sheets of paper end to end.
Step 3: Making a Cylinder
Wrap the paper around your head to test the fit and staple the ends together making a cylinder.
Step 4: Closing in the Top.
Staple a piece of paper across the top of the cylinder.
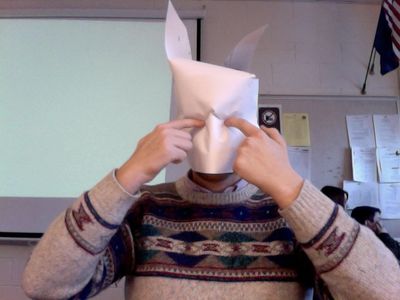
Step 5: Find Your Eyes
Put the mask on your head and press (gently) into your eyeballs. Where the paper is crinkled cut eye holes.
Step 6: Personalize
I like this simple wolf robot mask. I make two diagonal cuts into the top to make ears, and I cut triangles out of the bottom to make teeth. See the additional images for more ideas.

Participated in the
Crafting Speed Challenge

Participated in the
UP! Contest


