

Introduction: DIY Quadcopter for Beginners


Drones are awesome. They are great tools and some fun to mess around with. This instructable is designed to help you build a cheapish quadcopter that can get you started on your love of quadcopters. You may have seen the dpi phantom and such which cost around 1000-2000 dollars. This basic quadcopter should only cost around 200-300 dollars depending on how many parts you already have.Then again this quadcopter will not have GPS hold or altitude hold but these are easy to add to the board if you would like later on. When finished you may try putting on go pros, gimbals and other things you desire.
This instructable is aimed at those who want a cheaper quadcopter and want to enjoy building and designing their own quadcopter. For this instructable I try to make it so that anyone who has no experience can build their own quadcopter. Please bear with me if you already know some stuff.
REMEMBER: quadcopters are fun things to use. BUT they have powerful motors and sharp propellors. NEVER work on the quadcopter with the propellors on. NEVER fly above crowds and try to stay away from homes and cars. If we all follow these guidelines quadcopters will be fun for everyone for a long time to come. Thanks.
(This Instructable is a work in progress and if you want to see more please comment)
Disclaimer: I am not responsible for any fails, injury, or waste of money. This is simply what i did and what found out. Thanks .
Step 1: Go Get the Parts


When buying quadcopter parts the best place to buy is Hobbyking. They have the best customer service, easy returns and great prices. Hobbyking is an online store so to save you having to make multiple orders and pay for shipping twice or more, here is a list of stuff you will need.
Control board:Naze 32 acro version
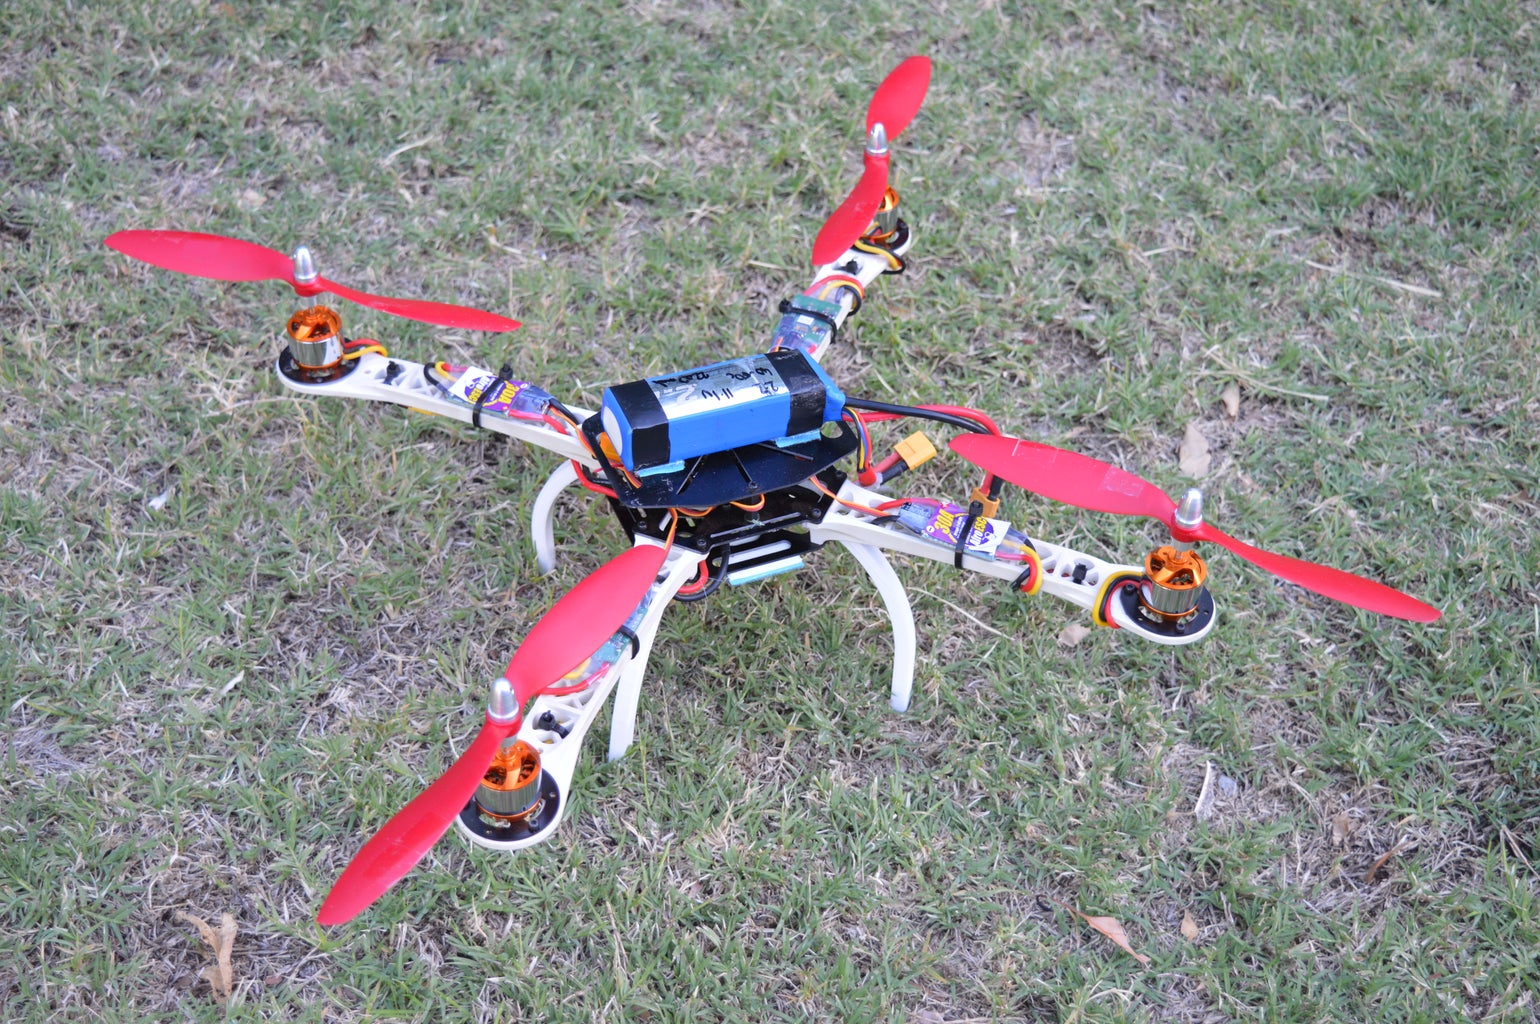
Frame:sk450 frame (the legs on mine are 3d printed and do not come with the quadcopter)
Transmitter and receiver:basic 6 channel turnigy transmitter and receiver
9 channel better turnigy transmitter and receiver
any other receiver and transmitter that you like or have already.
Motors x4:1000kv motors
Propellors x4 each: Counter Clockwise propellors (red) and `Clockwise propellors (red) get 4 of each
ESC's x4:30 amp afro esc
Battery:4000mah 10c multistage battery (you can choose most 3s batteries above 2200mah, This battery is good because it is 10c making it lighter and still having longer flight time) ps. I have a 50-60c 2200mah battery so ignore that, its just i haven't gotten around to getting a new one yet. Mine is heavy and low capacity and i only get 5 minutes flight time.
Battery Charger:IMAX B6 AC or DC charger (COPY) (you can get the genuine if you like but not necessary)
Power distribution board:4 socket power distribution board
Cable ties: Get this possibly from hardware store or look on hobbyking
Double sided foam tape (mounting tape): get this from local hardware store
heat shrink(optional): get from where you like.
Velcro (optional): very useful buy where it is cheapest
Think about getting a hex head set of screwdrivers. They are very useful and you will need to get one eventually or get an align key from you local hardware story.
This could cost 250-350 dollars approximately.
Step 2: Understand Your Parts
Control Board: The control board is what helps you control your quadcopter and is the brain of your quadcopter. It will manage the signals given to it and make the quadcopter more stable and easy to fly. I started off with a kk2 and wasn't happy with it so hobbyking replaced it with a naze 32 acro board. Acro does not mean it is acrobatic it just means that the control board isn't the full version (gps and barometric pressure etc in full version). This board is a great one and I strongly recommend it.
Frame: The frame is one of the simplest parts of your quadcopter and one of the key parts. It hold the whole thing together. It holds the motors and other bits together into your actual quadcopter. I chose the sk450 as it was the desired size and was rather popular and had easily accessible spares.
Transmitter and Receiver(tx and rx): The transmitter and receiver allow you to control the quadcopter. The tx or transmitter sends the signal and is the one you will hold whereas the rx or receiver is the one on the quadcopter receiving the signal and sending it to the control board. I like the turnigy 9x and 9xr. The 9xr is nicer but also more expensive and you still need to get a module and receiver for it. I chose the orange dsm2/dsmx module. This you don't need to understand. Just remember that you can use a tx and rx you already own as long as it has 6 channels. The turnigy 9x is a simple set with 8 or 9 channels and a receiver (although the rx is rather bulky) and i recommend it as a starter tx and rx set.
Motors:The motors on the quadcopter convert the electrical energy into your kinetic energy in the form of a propellor spinning. I chose 1000kv turnigy motors from hobby king and i think they are alright. You can choose similar ones if you would like or understand what you are doing. The motors have 3 wires which shows they are brushless. This means they are more efficient and the common rc motor.
Propellors:Propellors create your thrust and cause the quadcopter to fly. I chose 9x4.7 props. This is rating for propellors that defines the pitch and the diameter of the prop. The 9 is the diameter and the 4.7 is how far forward it would move for one rotation in theory. You can choose slightly bigger or smaller props if you know what you are doing. Remember the numbers always go upwards on a quadcopter. You need to remember to get clockwise and counterclockwise props. They are needed to counteract torque which wants to spin your quadcopter around uncontrollably. Trust me get cw and ccw props and get lots ( you will break them A LOT).
ESC's: Electronic speed controller. These are put between the power distribution board and motor to control the speed of each motor. They have two wires on one side which go to the power distribution board which leads to the battery. On the other side they have three large wires which go to the motors wires. There are also three smaller wires which go to the control board. These handle the signal and get the info from the control board to know how fast to spin the motors.
Battery: The battery is a lithium polymer battery, similar to what is in phones. They are very light and powerful. This powers the quad. I chose a 3c battery which means it has 3 cells (kinda like small batteries) joined together inside. This gives me 11.1volts or up to 12.6 volts when full. Each cell has a nominal voltage of 3.7 volts. It is a 4000mah battery which is rather large and indicates the capacity of the battery. It has a 10c discharge rating. 1c is equal to 4 amps for this battery so 10 times that is 40amps meaning you can safely draw 10 amps without the battery being damaged. My motors only pull 21amps max so that is fine.
Charger: The max is a good charger and I linked the copy version which is cheaper but i think should be just as good. If you like you can get the original. This charger can handle 1 cell to 6 cells so this is good. It runs of ac power. It has a us plug so get an adapter for your country. For this battery you can charge it at 4.0 amps safely which is 1c and is the safe way of doing it. I recommend charging at 3.8 amps because that makes the batteries life longer.
Power distribution board: This is handy part of the quadcopter which you can make yourself but is cheap to buy so why not?? It is rated for 20 amps which is borderline for this quadcopter but works fine for me. It takes the batteries power and splits it into four plugs which fits the esc's an powers them which in turn power the motors.
Cable ties: handy for quadcopter building
Double sided foam tape:handy for quadcopter building also good for vibration dampening and control board mounting.
Heat shrink:handy for quadcopter building (not really necessary for this build)
Velcro:handy for quadcopter building and sticking stuff to other stuff temporarily e.g. batteries.
Hex head screwdriver set:handy for quadcopter building. You will need one for the frame building.
Step 3: Turn Them Into a Quadcopter!!


Basically once the parts are chosen this part is easy, screw the motors onto the arms, plug the esc's to the motors and plug them into the power board. Then connect all the esc wires to the naze board as shown in the instructions that come with it and plug the naze into the receiver however you choose to do it, following the instructions.
DONT ATTACH PROPS YET!!!! (unless of course you have some great hatred for your fingers)
Step 4: Tune Your Quadcopter
To tune your quadcopter is suggest looking at some videos on youtube as it is very hard to explain in typing, Flitetest have multiple great videos regarding the naze and will simply explain how to tune the PID settings on your quad.
Step 5: Fly Your Quadcopter
Again check out Flitetest's videos on how to fly a quad.
basically start by hovering your quad facing away from you then once comfortable start to move forwards and backwards and side to side SLOWLY and keep it facing away from you. Then try walking behind it like its a dog and control it. Then try to get used to it flying side on to you and finally face on. It all takes a lot of practice but its worth it in the end.

Participated in the
Make it Move Contest 2016


