

Introduction: Biosand Filter


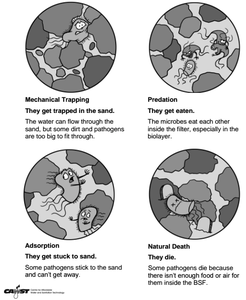


A biosand filter is a simple type of water purification system that uses sand, gravel, gravity and some simple engineering to purify water contaminated with biologics and some chemicals. Its structure is generally made of concrete or plastic and is filled with layers of gravel and sand that encourage the growth of good microbes that are naturally present in water, just like in the ground in nature. These good microbes develop into what's called a "biolayer" or a "biofilm," which destroys pathogenic (i.e., disease-causing) microbes to create clean drinking water. The sand also causes pathogenic microbes to become trapped, adsorbed (i.e., stuck to the sand particles) or die from lack of food or oxygen.
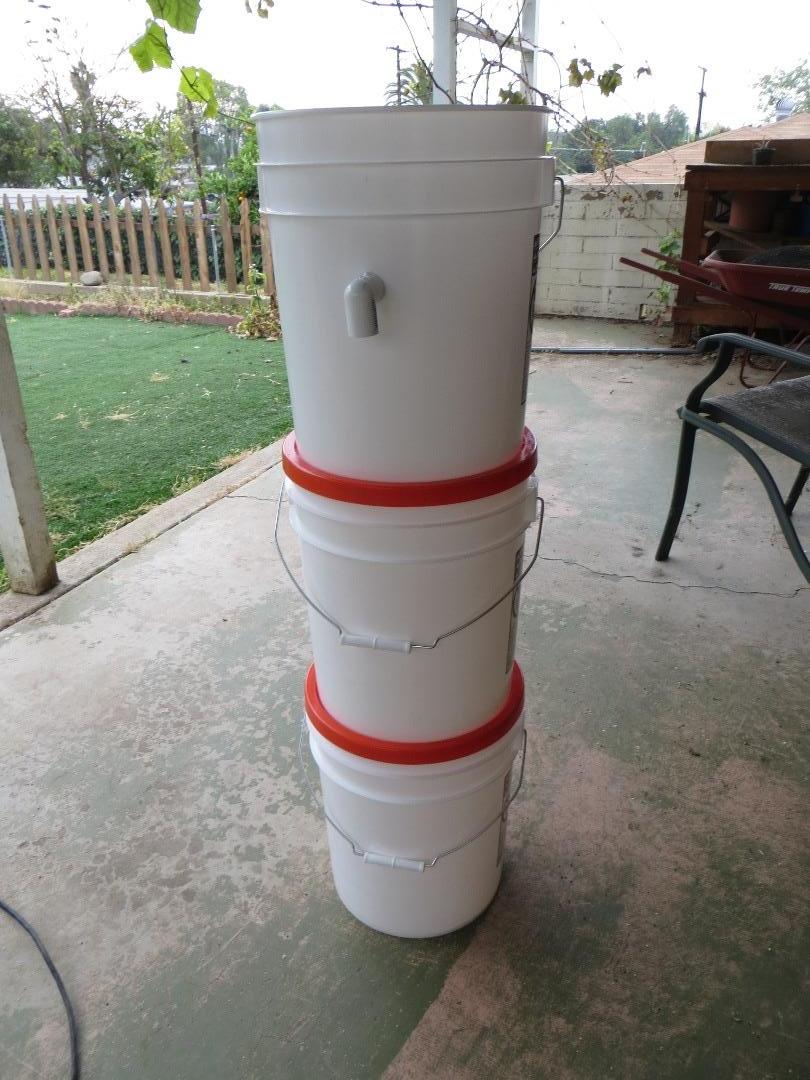
The biosand filter constructed in this Instructable was made using materials commonly available at any hardware store (Home Depot in this case). Two were built to test their effectiveness for a real-world application in the community of Chakicherla Pedda Patapu Palem in Andhra Pradesh, India for an Engineers Without Borders project run by the San Diego Professional Chapter's James Harper, PE. Check out this Engineers Without Borders project at the EWB San Diego Professional Chapter website.
Many types of biosand filters are out there, but the standard one that is currently in use all of Africa and other parts of the world is made out of concrete. The Centre for Affordable Water and Sanitation Technology (CAWST) developed a great biosand filter construction guide that has lots of useful information. I've attached a PDF copy of this document to this Instructable for your knowledge and reading pleasure.
A few other interesting biosand filters out there have been made by Surfers Without Borders and the BioAusable Project.
----------------------------------------------------------------
This project is ongoing and not complete but should be completed within the next two weeks. Please check back soon for more to come!
Attachments

Step 1: Research Research Research
You should always complete your due diligence (i.e., educate yourself until you can make informed decisions) for every project, small or large, that you start. This gives you a solid foundation on which to design, build, test and optimize everything you make so that your projects work just as you want them to! It's also really cool to see what other people have done; there are some SMART PEOPLE out there; why not learn from them?
Here are some of the better sources of information I've found on biosand filters, from most helpful to least.
CAWST.org* BiosandFilters.info* SlowSandFilter.orgAfropedea.orgHydraid.orgOffTheGridNews.comKnowledgeWeighsNothing.orgH2OHow.comAberAndOut Blog
Step 2: Effectiveness and Limitations


Effectiveness
The effectiveness of this type of filter varies based on many factors:
1. Was the filter installed more than 30 days ago?
It takes the filter about 30 days to grow an effective biolayer.
2. The filter is used at least once per day using water from the same source every time.
3. A pause period (see Step ?) is used after each filling.
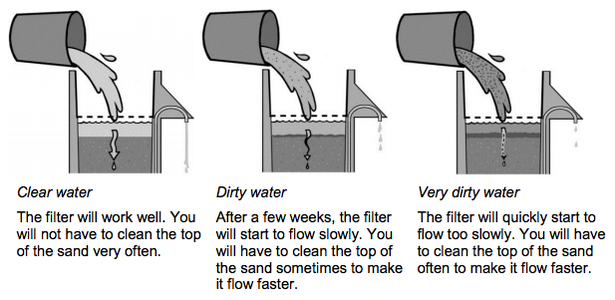
4. The water poured into the biosand filter is clear.
If you only have access to dirty or cloudy water, leave it in a separate bucket until the sediment settles out of it. Then, pour in the clear water on top and discard the sediment.
5. There are no leaks or cracks in the biosand filter container.
6. There is a diffuser on top of the sand.
7. When the water stops running, the water surface is 5 cm (2") above the top of the sand.
8. The top of the sand is flat and level.
9. When the filter is full, the water flow rate is 400 mL per minute or less.
Types of Water
This filter should be effective when using fresh natural water sources that have not been pre-treated (e.g., rivers, lakes, wells). It is important to note that this type of filter will not be effective when using chlorinated water sources, such as the municipal water supplies available in many cities.
----------------------------------------------------------------
Note that the information reported here refers to the biosand filter described by CAWST in the document linked in the first step of this Instructable and is not specific to the particular biosand filter described in this Instructable. However, the design of the biosand filter described in this Instructable is similar to that described in the CAWST document and should thus have a similar effectiveness.
Step 3: Buy Your Materials

Here are the materials I used. I specifically chose these materials to make this filter as cheap as possible while still being readily available. All materials should be available at your local hardware store.
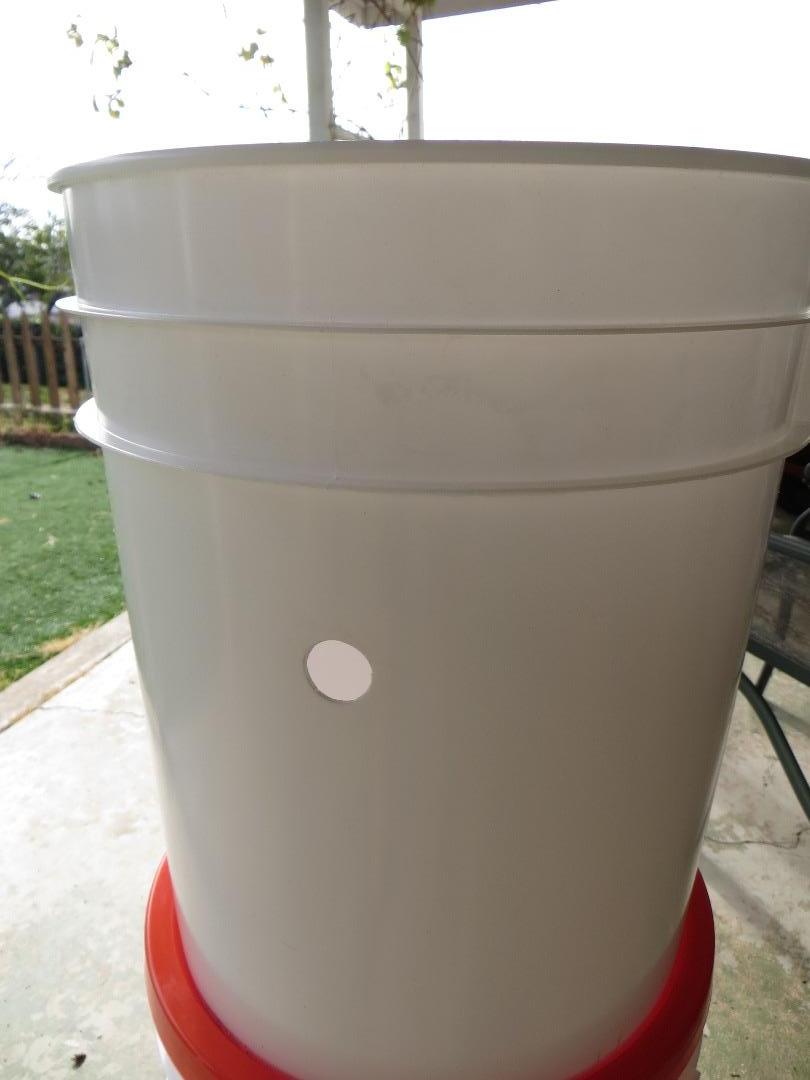
- Three 5 gallon buckets with lids
- 51 inches (4 feet 3 inches) of 1/2" PVC Schedule 40 pipe
- A little extra wouldn't hurt to account for errors in measurements
- One 90 1/2" PVC degree elbow with one threaded female end and one female press fit end
- One 1/2" PVC sprinkler riser
- These seemed to screw all the way into the above female elbow's threads so that the o-ring below will seal properly on the inside of the top bucket.
- One o-ring with a 3/4" inner diameter
- At Home Depot, I bought a pack of #215 O-rings.
- One 90 degree 1/2" PVC elbow with one threaded male end and one female press fit end
- One 1/2" PVC T joint
- Two 1/2" PVC end caps
- Silicon caulk
- PVC cement
- Super glue
- Goo Gone
- To get those stubborn retail stickers off!
...
Note: a press or interference fit is a type of connection where two smooth-walled parts come together tightly to form a solid rigid connection. In this project, threaded PVC and press fit PVC are used in different locations.
Step 4: Get Your Tools


These are the tools I used.
- Eye protection (100% required whenever using power tools!)
- Ear protection (99% required whenever using power tools!)
- Power drill with 7/8" spade bit or hole saw
- This bit is usually used for wood but works fine here on plastic
- Dremel with a multi-purpose cutting bit
- The Dremel is really nice for cutting the middles out of the bottoms of the buckets and the lids, but a keyhole saw or something similar could work as well. My jigsaw was too big to get close enough to the rim around the buckets' bottoms and lids.)
- Hacksaw
- 220 grit sand paper
- Makes all the edges of your cuts and holes really smooth!
...
Step 5: Start Building, Part 1
First, some rules.
- Again, always wear eye protection and almost always ear protection!
- It is VERY IMPORTANT (and good practice) to clean all cut edges with fine-grit (e.g., 220 grit) sand paper.
- This makes sure everything works well, fits together and looks good.
Remove all UPC labels. They are ugly and could potentially contaminate your water. Goo Gone as needed.
Alright. Here we go!
- Drill a ⅞” diameter hole using a spade bit or a hole saw 6” down from the top of what will be your biosand filter's top bucket. This is the hole that will allow the clean water outlet pipe to pass from inside your filter to the outside so that you can gather.
Step 6: Build Build Build, Part 2

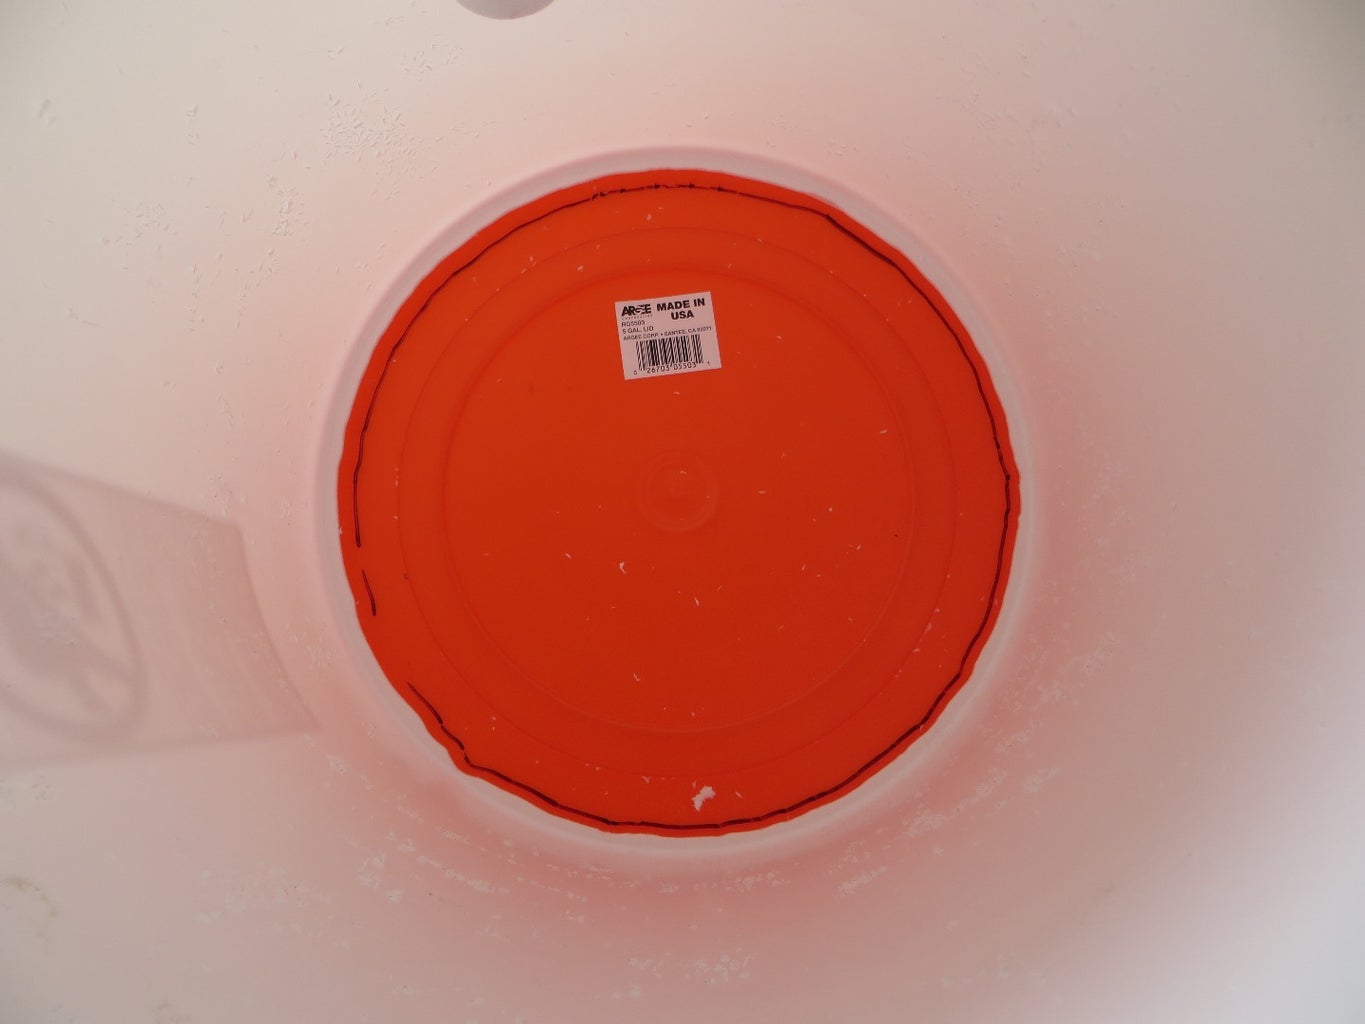
Cut out the bottoms of your top bucket and one other (i.e., your middle bucket) with your Dremel.
- Be sure to leave a ¼” to ½” wide rib to retain the rigidity of your bucket's walls.
Step 7: Build Build Build, Part 3
Place a lid on your bottom bucket and stack your middle bucket on top of your bottom bucket's lid. Using the cutout in the bottom of your middle bucket, mark out where to cut out on your bottom bucket's lid.
Repeat this process for the middle and top bucket, respectively.
Clean up all of the plastic debris generated, particularly inside the buckets.
Now, you should be able to stack all of your buckets in the correct order and have a large hole going through from the top bucket to the bottom bucket.
Step 8: Build Build Build, Part 4
Cut the following lengths of 1/2" PVC tubing:
- 1x 33.5” for your main tube
- 2x 1.5” for the coupling sections between the T joint and the elbow joints
- 2x 6.75” for the collection tubes at the bottom of the filter
Step 9: Build Build Build, Part 5


Drill ⅛” holes in the collection tubes every ¾” or so around their circumferences and along their lengths (i.e., turn your collection tubes into swiss cheese!).
- These perforations ensure that water will flow throw your filter even if some of these holes get clogged over time.
- After you finish drilling, try your best to clear out the plastic debris from the inside of each tube. This is the hardest and most tedious part of the project. Do it while watching an episode of your favorite TV show.
- Be aware: that plastic is messy and goes everywhere! Be sure to vacuum up as much as you can.
Step 10: Assemble!


Let's put it all together now, shall we? No need for glue yet; just a dry fit for now; gluing comes next. Be sure NOT to seat all PVC connections yet; they can be very hard to get undone even without gluing.
- Stack all of your buckets in their proper order, if they aren't already. Leave the top lid off.
- Place an end cap on each collection tube.
- Connect each collection tube to one of the press fit elbow joints.
- Connect these two assemblies to the connecting tubes.
- Connect these two assemblies to the two opposing sides of the T joint, creating a single assembly.
- Connect the main tube to the remaining side of the T joint.
- Connect the press fit side of the half-threaded-half-press-fit elbow to the top of the main tube.
- Screw on the female side of the sprinkler riser onto the threaded side of the half-threaded-half-press-fit elbow that is now at the top of the main assembly.
- Carefully work one of the o-rings over the threads of the sprinkler riser to the base of the threads. The o-ring should be sitting up against the non-threaded outer portion of the sprinkler riser. You should now have the completed inner assembly for your biosand filter.
- Carefully lift the entire assembly into the inside of your stacked buckets. It will be a tight fit, but it should fit!
- Turn the assembly so that the sprinkler riser pokes out through the 7/8" hole you made at the beginning. The riser and hole may not line up vertically; if so, adjust how your main tube sits in the T joint and in the half-threaded-half-press-fit elbow; only ~1/4" of the main tube needs to sit in each of these joints in the final assembly. It is critical that the sprinkler riser pokes out easily through the hole; any stress on this connection will only be magnified after sand and gravel is added to the filter. If you have to chose, err on making the main tube too long rather than too short. The collection tubes should be sitting firmly on the bottom of the bottom bucket.
- After ensuring proper placement of the sprinkler riser and the assembly as a whole, screw on the final outlet elbow, which should be half-threaded-half-press-fit. Ensure that the o-ring seals well against the inside of the top bucket; the o-ring should be compressed slightly but not smashed to smithereens! Moderately tight is good. :-)
Step 11: Glue It Up


After ensuring all lengths of tubing are correct, paying particular attention to how the sprinkler riser exits the outlet hole, disassemble everything and start gluing everything up using PVC cement.
- A surprisingly thin amount of glue is required in the press fit connections. No big drips and globs are required. Just thinly coat both mating parts and press them firmly together in their correct orientation.
I would suggest checking each connection for fit in your filter as you glue each connection to make sure that it fits into your filter as intended. PVC is very forgiving stuff UNTIL YOU GLUE IT; then, it's not easy to fix and will require additional materials.
This is also a very good time to seal and glue up the buckets! Run a bead of silicon sealant around the lids on top of the bottom and middle buckets so that they seal to the buckets that they mate with. This will make sure your filter doesn't leak.
- We will be super gluing this connection after the silicon sealant has dried for extra strength.
Step 12: Final Assembly
After you glue your final connection and rethread the top two threaded components onto the main tube, replace the assembly inside your buckets and screw on the outlet elbow.
Last thing before you leave your filter to dry: add some super glue from the outside between the lids on top of the bottom and middle buckets and the middle and top buckets, respectively. This will give your filter a bit more strength. I added about 1/4 tsp every 2 inches around the circumference of each lid.
Allow the PVC cement to dry for however long the directions indicate (usually 2 hours). Be sure to leave the top lid off so that the cement may outgas (i.e., give off fumes as it dries) as needed.
Step 13: Get Your Gravel and Sand
This project is still a work in progress, but I will be following the instructions in the CAWST PDF, Part 2, Stages B-D; this document is linked in the Introduction of this Instructable.
Step 14: Wash Your Gravel and Sand
This project is still a work in progress, but I will be following the instructions in the CAWST PDF, Part 2, Stages B-D; this document is linked in the Introduction of this Instructable.
Step 15: Add Your Gravel and Sand to Your Filter
This project is still a work in progress, but I will be following the instructions in the CAWST PDF, Part 2, Stages B-D; this document is linked in the Introduction of this Instructable.
Step 16: Instructions for Use
TBD
Step 17: Testing and Performance
TBD
Step 18: Conclusions
TBD
Step 19: Future Work
It may be possible to increase the effectiveness of this filter even further using a piece of wood in the outlet tube. Check out this Popular Mechanics article on wood xylem.

First Prize in the
Apocalypse Preparedness Contest

Participated in the
Explore Science Contest


