

Introduction: Birch Bark Custom Wrap for Amazon Echo Dot


The Amazon Echo Dot 2nd generation (http://a.co/iePwpCc) currently comes in either black or white and uses Alexa for various tasks. It’s a pretty handy device with a growing list of ‘skills.' And, there are a number of commercial options to dress-up your Dot such as cases (http://a.co/c0hP9Dj) and skins (http://a.co/bP1INKG).
But maybe you want your Dot to suit your own style or you want to decorate it with different colors? Maybe you enjoy the challenge of a diy project to dress up Alexa? If so, a custom wrap for your Dot is just the thing.
This Instructable provides step-by-step instructions to easily prepare a removable wrap for your Dot. The basic steps are to cut a paper strip as a template and mark the shape and position of the access hole through which the power and audio plugs pass. Next, use this strip of paper to cut the final material strip as well as to mark and cut out the access hole on that final material. You’ll glue this strip into a ring and slip it on your Dot. Plug the Dot back in and you’re good to go! If you have all materials and tools handy, it should take less than 30 minutes of ‘hands-on’ time to cut the wrap and about 1 hour or less of glue drying time.
Step 1: Materials

In addition to the Echo Dot that you’ll be decorating, you need
Scissors or X-acto craft knife
Pencil
Ruler
Paper to make template
PVA adhesive (e.g http://a.co/3aT5Z0h) or other appropriate glue and small brush to apply it
Two small binder clips
Material for the wrap. There are many possible choices e.g. decorative paper or fabric or vinyl. I used thin birch bark collected while hiking. If you decide to use birch bark, please note that you should only collect it from dead or down branches. Peeling it off a standing live tree will damage the tree.
Optional materials: Rotary cutter and self-healing cutting mat
Step 2: Safety
Scissors, craft knives and rotary cutters have very sharp edges.
Adhesives are probably not good for your skin.
Please take appropriate care when following this Instructable
Step 3: Cut Template Strip


The first step is to make a paper template. This will make remaining steps easier and you can use it over and over again. This is very simple. Using your craft knife, rotary cutter or scissors, cut a rectangular strip of paper that is just wide enough to cover the sides of the Dot and is long enough that it overlaps a bit in the back. The strip should measure 1 1/8 inches wide and 11 1/2 inches long (2.8 cm x 29.3 cm).
Step 4: Cut Out Hole for Cords on Template


Position the strip of paper on your Dot so that the access depression on the Dot is about 1 inch (2.5 cm) from one end of the strip and the strip long edge is aligned just below the top of the Dot. Gently press the paper onto the edges of the access depression. If using an X-acto knife and if you have steady hands, then VERY GENTLY use the tip of the blade to cut out this hole while you hold it in place on the Dot. Otherwise, use your fingers to make an impression of the edges on the paper and use scissors to cut out this hole. Note, this now establishes a top and bottom to your strip since this hole is closer to one edge of the Dot.
Step 5: Cut Final Material


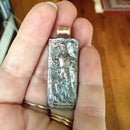
Now that your template is ready, use it as a guide to cut out whatever material you want to use for your Dot’s wrap. I used birch bark and cut it with the craft knife to make the strip with the hole cut into it.
Step 6: Mark Overlap and Apply Adhesive


With the Dot unplugged, wrap the strip around it so it is just snug but not tight and use pencil to mark the edge where the overlap ends. Take the strip off the Dot. Apply PVA adhesive with a small brush from your mark to the nearest end of the strip. Press the other end on top of this glued area to form your wrap. Use binder clips to hold the glued regions together until the glue is dry. This took about an hour with the birch bark but YMMV depending on the material you use. If the adhesive doesn’t work well on your material, you may want to try sewing the ring closed as an alternative.
Step 7: Decorate and Enjoy Your Dressed Up Dot


Once the adhesive dries, slide the wrap onto the Dot. You may need to ease it on from the bottom up, since the bottom has the rounded edges. Plug in your Dot and you’re done!
Isn’t she cute in her birch bark coat?

Participated in the
Homemade Gifts Contest 2016


