

Introduction: Bokoblin Mask From the Legend of Zelda Breath of the Wild


Hide among troupes of monsters with this Legend of Zelda Breath of the Wild Bokoblin mask!
During previous Halloween festivities, we've found that full face masks reduce visibility and usually aren't worn. In the game, Link's face is completely visible while he wears the Bokoblin mask, making this a great choice.
Here's the short form: cover a hard hat with fabric and glue a bunch of craft and construction foam to it; hold the ears out with steel wire.
Step 1: Cover Hard Hat With Fabric


I used this 3M hard hat and another hard hat we found in the trash. To get the right shape, I reversed the suspension in the 3M hard hat so the brim was at the rear, and cut the entire brim off the trash hard hat.
Using Fusion 360, I made a template and cut and sewed together six panels of brown fabric to cover the hats (here's a description of the geometry of panels to a sphere). Here's the Fusion drawing. I then hot glued the fabric to the hats. Once covered, they had a Sherlock Homes look to them. I may have gone overboard on this step -- just gluing and folding a single piece of fabric probably would have sufficed.
Attachments

Step 2: Make the Ears From Craft Foam and Wire


I cut the ears from craft foam. To get the proper ear shape, I pinched the foam together at its base and secured it with hot glue. I ran steel wire through drilled holes in the hard hats, and on the inside of the hat, glued the steel wire in place. On the second set of ears, I got smart and put the steel wire between the two layers of craft foam to better hide it.
Step 3: Cut the Nose and Horn From Foam


With a hot wire cutter, I cut the nose from pink insulation foam and the horn from white insulation foam. After cutting, they were lightly sanded to remove sharp edges. Both were glued on with hot glue. The hot glue was hot enough to melt the foam, so gluing required some care. When possible, I would apply the glue to non-foam sections (fabric, plastic...) and let it slightly cool before pressing in the foam.
Step 4: The Button Eyes


The button eyes are more craft foam with yarn. I glued on two layers to give them a bit of depth.
Step 5: More Foam for the Teeth


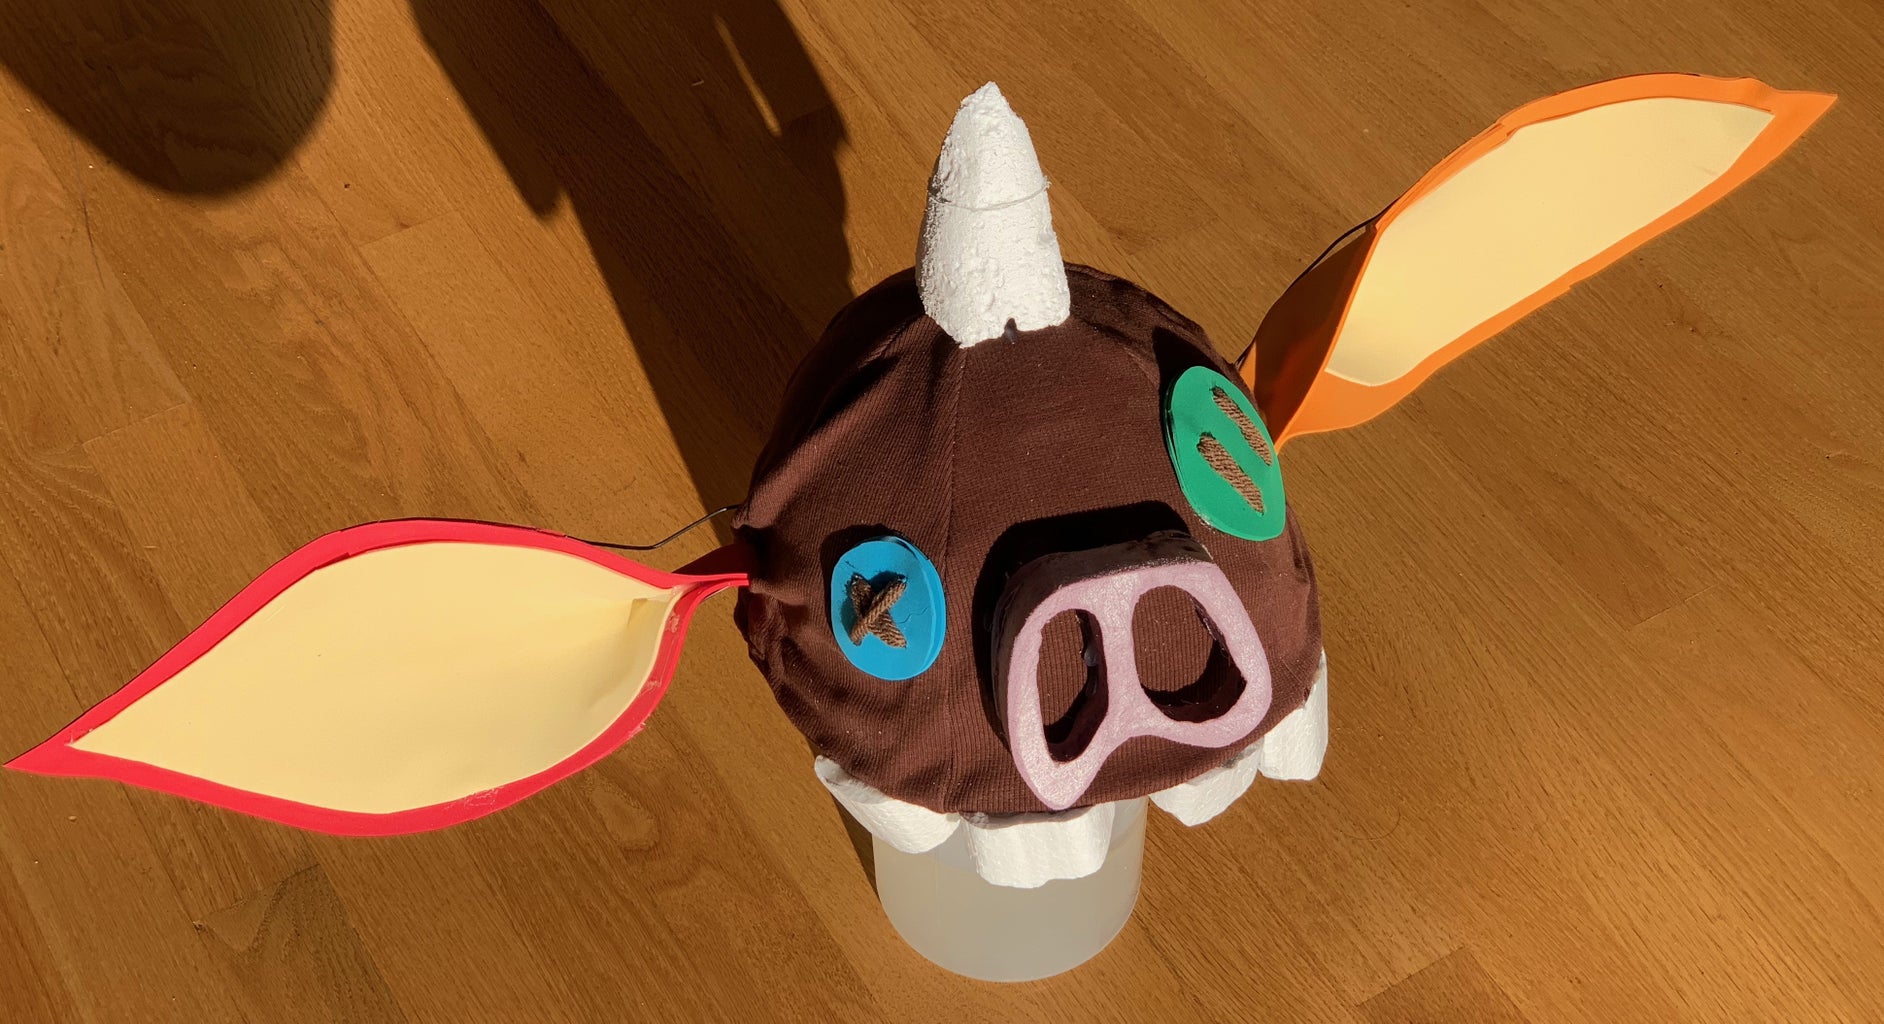
The teeth are more white insulation foam cut with a hot wire cutter. However, I did not sand them, because I wanted the sharp edges. I glued them on last because between them and the horn, the mask is now awkward to hold. I used an assistant and a water pitcher.
Step 6: Family Legend of Zelda Halloween Costume


Other members of the family did not heed previous experience about full-face masks, and made Korok masks.
Yahaha! You found me!


