

Introduction: Bright Ball IOT


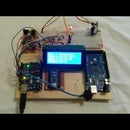
This project is based on the control, via the app Blynk, a matrix of neopixel, since a simple lamp was not enough I added a watch and a temperature and humidity sensor, but we see in detail.
Step 1: Components
1: Arduino R3
16: NeoPixel WS2812B
1: LCD 16x2 with I2C module
1: RTC (Real Time Clock) DS 1307
1: DHT 22 (temperature and humidity sensor)
1: DC DC Converter Adjustable Step Down
1: Linear Regulator LM1117
1: ESP5266-01
3: Button Switch
1: Diverter
1: Diffuser for exterior opal white ball lamp
1: Electrical junction box
1: Resistor 220 ohm
1: Resistor 510 ohm
1: Resistor 1K ohm
1: Resistor 470 ohm
3: Diode 1N4007
Electric wire
Step 2: Led Matrix


I built a small array of nepixel as in the diagram below, it is controlled by Arduino with the library "Adafruit_NeoPixel.h", it is very bright and it is advisable not to look, when the LEDs are turned on.
Step 3: Sensor DHT
I used the DHT 22 sensor to monitor the environmental conditions, the LED color variation, represents the temperature, in 12 color variations, from blue (cold) to red (hot).
Step 4: Clock


The clock is controlled by the RTC, I used a DS1307 but it can also fit the DS3231, for details see "Clock Set Date Time", contrary to that project, I removed the pull-down resistors to the buttons, P1, P2 and P3, which are used to adjust the time, and I made a small change in the code.
Step 5: IOT


Arduino is connected to the internet via the ESP8266, which in turn, is connected to the App Blynk
Through the phone you can change the color of the lamp depending on the mood.
The colors are set as follows:
V1 = Red
V2 = Green
V3 = Blu
V5 = Yellow
V6 = Purple
V7 = Cyan
V8 = White
V4 = Temperature
Step 6: Electric Scheme


As you can see from the wiring diagram, the heart of the circuit is "Arduino", in my case I used "Arduino Nano".
For the pin A4 and A5 are connected to the respective SDA and SCL of the I2C 16x2 Display, and the RTC.
The temperature and humidity sensor is connected to Pin 4, through a resistor Pull-Up.
The Diverter, connected to pin 12 of Arduino, switches from the IOT mode to a nice play of light, referred to as "rainbow".
To power the ESP8266 I used a LM1117 regulator, while for lowering the voltage at RTX, I used a resistive divider (R1-R2).
The group D1, D2, D3 have a protective function:
- D1 protects against reverse polarity.
- D2, in case we change the Arduino code, prevents the feeding of Neopixel matrix.
- D3 lowers 5.6 Volts to 5 Volts
Attachments

Step 7: Arduino Code
Code from create.arduino.cc: https://create.arduino.cc/editor/Tittiamo/84101b65-3c2c-4315-8504-5afa448945da/preview
libraries :
- Wire.h – Arduino IDE
- RTClib.h - https://github.com/adafruit/RTClib
- LiquidCrystal_I2C.h - https://github.com/fdebrabander/Arduino-LiquidCry...
- DHT.h - https://github.com/adafruit/DHT-sensor-library
- Adafruit_NeoPixel.h - https://github.com/adafruit/Adafruit_NeoPixel
- ESP8266_Lib.h - https://github.com/esp8266/Arduino
- BlynkSimpleShieldEsp8266.h - https://github.com/blynkkk/blynk-library/releases...
Parameters to be set in the code:
- char auth[] = "YourAuthToken"; enter the Token code of app Bynk
- Blynk.begin(auth, wifi, "ssid","password"); enter the SSID and password for your router Wi Fi
Step 8: Utilization
Since my cat does not like the Christmas tree, during the holidays, I used this lamp in "rainbow mode"

Participated in the
Microcontroller Contest 2017

Participated in the
Lights Contest 2017


