

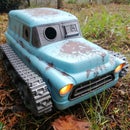
Introduction: Budget FPV RC Car


I have been working on converting my Redcat Gen7 RC truck into a nice First Person View (FPV) buggy, with a fully 3D printed body, this is not that instructable, but is a stepping stone towards it! Gearbest contacted me to see if I wanted to use any of their products so I figured I'd use the opportunity to see what kind of FPV car I could throw together cheaply and easily (that is why all the links are from Gearbest, but buy whatever you want, I'm no corporate shill :-P )
The cool thing about the setup I have made here is that it can be popped right into any of my RC toys in seconds. It wont be the best range or highest quality, but it is quick and easy.
Car Choice
I searched for a ready to run (RTR) car under 100$ with an open cockpit which would give good visibility for FPV.
There are at least two good options in 1:12 scale (I chose the first)
There are other interesting options, but they went over my $100 limit
JJRC Q46 1:12 RTR RC Car - Looks like a great cockpit for PFV
WLTOYS 10428 1:10 RC Car - Clone of the Twin Hammers which means spares should be easily available
Camera Choice
My goal for this project was "cheap and simple" so I went for an "all in one" camera + transmitter combo, but beware that this will severely limit your range.
Camera + Transmitter that I used
Video Transmitter (VTX) Choice
No external transmitter was needed, since the camera has one built in.
Video Goggle Choice
There are oodles of options, an choosing one goes beyond the scope of this intro but I had only read good things about the Eachine Goggles Two, so I bought a set locally. I am very happy with the Goggles Two for the price, but you must be aware there is no recorder (DVR) so you cannot record footage - not a problem for me because I intend to use the RunCam for recording in the future (and who want's to watch glitchy recorded video anyway?).
If you decide to choose other goggles make sure you read up on the following to help make your choice:
- Box/Glasses style (Goggles Two are "box" style which are generally much cheaper, yes they make you look like an idiot, but let's face it, no one has ever really looked cool playing with toy cars anyway...)
- Viewing angle (Goggles Two are really good here, a narrow viewing angle will feel like you are watching a small TV at the end of a passage)
- Built-in receiver or not (built-in is cheaper, but a negative if you want to move to other frequencies later)
- Diversity (Can the receiver choose the best signal from two input antennas)
- DVR (Can you record the footage inside the goggles - beware it will be the same low quality you are looking at)
Voltage Regulation
You will need to power your camera, and there is a good chance that means you need to supply 5V (at 500mA in the case of my camear with the builtin 25mW VTX).
On a hobby grade RC you will probably have a 5V output on your Electronic Speed Control (ESC) which you can use, but for these cheap RTR cars that isn't an option.
There are two solutions
- Use an external BEC
- Use a linear voltage regulator (like the LM7805)
I chose the second option. More about this in the next step!
Step 1: Connect It Up!

There is very little to do here since we are using a camera with a built-in transmitter. Everything is covered in the video
Voltage Regulation
The only concern is voltage regulation. If we were to power the camera directly off the car's battery we would definitely damage it.
Reading the datasheet on the camera shows that we need
- 5V supply voltage
- 500mA current
Both of these can easily be achieved with an LM7805 linear regulator (although if you want a "plug and play" solution, just buy a standalone 5V BEC designed for RC toys).
Modular Setup
As you can see in the video, I soldered two XT60 connectors back-to-back and connected the regulator into the middle. I did this so that I can remove the whole thing and drop it into any of my other vehicles that use XT60 connectors, thereby converting them to FPV in minutes.
Step 2: Attach the Camera

In keeping with the theme of cheap and easy I decided to simply mount the camera using double-sided foam tape.
Should you be doing this project on a true hobby-grade RC then now would be the time to mount your camera on a servo or two so that you can look around while driving, but we'll keep that for my next Instructable.
Step 3: Drive It!

Well, that is all there is to it.
- Charge up the batteries on your car, transmitter and FPV goggles
- Plug the regulator assembly into the battery
- Plug its 5V output into the camera
- Plug its 7.4V output into the car
- Turn the car, transmitter and goggles on
- Hit "scan" on the goggles
- Drive until the wheels fall off!
Step 4: Upgrades and Improvements
Video Quality
If you are interested in recording high definition video then I cant see a better option than the tiny RunCam Split 2 which can also record HD video while transmitting the analog signal. I will be using it along with a 200mW transmitter, in my upcoming Redcat Buggy
Video Range
The ways to get more range are
- Better antennas (There are many options, circularly polarised will help reduce multipath effects)
- Higher power VTX on the car (200 or 600mW)
- Lower frequency (5.8GHz is terrible for ground based FPV, since it is severely attenuated by obstacles - I only chose it because it is (a) cheap (b) has tiny antennas
You could order a cheap camera that doesn't have a built-in VTX and use a higher power transmitter to increase range without springing for the RunCam if you don't need to record HD footage.
Pan and Tilt
The next step in immersion is to add a head tracker to the goggles and pan/tilt servos to the camera, so that you can "look around" while driving. This is impractical on these cheap cars though, since you will need to swap all of the electronics for hobby-grade equipment, as well as replacing the radio with one with more channels.


