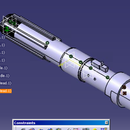
Introduction: CATIA V5 Lightsaber Technical Drawing
The purpose of this instructables is to show you how to make a technical drawing from the CATIA V5 Lightsaber we created in earlier instructables. This will mainly show you how to import and dimension a drawing. This step will be vital if the object is ever to be sent into a machine shop or to be 3D printed, as it gives a user all the information they need to actually build the lightsaber you modeled.
Step 1:
The first step required to turn a CATIA model into a technical drawing is creating a drawing file. To do this, there are a few main options. If you already have a drawing file either provided by a company or from a school, and it is in the CATIA drawing file format, you can use this. If you don’t have one of these don’t worry, because CATIA has the ability to make a drawing file without issue. To do this, click on Start in the top left corner, then move to mechanical design, and finally to drafting, and then hitting ‘okay’ for the standards. This creates a blank technical drawing file.
Step 2: Tiling Your Technical Drawing
You will want to make sure to have the lightsaber file open for the next few steps. If you want, you can create a split screen in CATIA by going to Window, and clicking on Tile Vertically between the lightsaber and the drawing. This will me most useful for the next section of the project, but may be useful for you if you would prefer to look at the lightsaber while creating a technical design.
Step 3: Importing Product
Once the drawing file is created, you need to import the lightsaber into the drawing file. This can be done with any view, but this example will use the side view. First find the “Views” toolbar on your screen and drag it out. This toolbar is required to bring in the lightsaber specifications from the product file. Next click on the front views button.
Step 4: Alternative Importing Product
You can also do this by going to the Menu, Insert, Views, Projection, Front View.
Step 5: Bringing in the Lightsaber
Next you have to select a reference plane, so switch over to the lightsaber part file. You can do this by clicking on the Window button and then selecting the lightsaber save file. You can hover your mouse over various different planes to get different views of the lightsaber. To see what view you’re clicking on, you can look in the bottom right corner to see the Oriented Preview Box. For this tutorial, we will select the view along the YZ plane. Click on the plane to move the selected view to the technical drawing file.
Step 6: Creating the Technical Base Drawing
Once on the technical drawing file, you should get something similar to the first image. Click anywhere to turn the lightsaber into a black and white line drawing. If the lightsaber seems too small, right click on the lightsaber and select properties. From here, go to scale, and enter the scale you would like. This demonstration will use 2:1. For convenience, you can move the entire drawing into the top left corner so it will be easier to add the other views.
Step 7: The Projection View Button
Next you have to create two other views of the lightsaber: the front view and the top view. You can create other views (bottom, back) if you would like, but this is optional and won’t be done with these instructions (although the procedure is practically identical to the other view creation ones).
To create the other views, you can redo the steps before and use different planes to create the view. This method works but is not very efficient, as each piece is treated differently. You can create views off of the pre-existing view on paper, which keeps the views connected so that they’re always the same size, and they move together.
To do this, you need to select the small arrow under the front view button. This opens up the projections toolbar, which you can drag out and into it’s own toolbar. From here, click on the middle button called the “Projection View Button”. Hover over the lightsaber drawing. Moving the mouse upwards should give a top (or bottom view, depending on how you oriented it), and vice versa. Moving it to the left of the lightsaber should give you a front view, and to the right should give you a back view.
Step 8: Creating Other Views
You can create a front view by hovering the mouse over the top of the lightsaber, far enough away that the two lightsabers aren’t touching, and then clicking down. To create the front view, do the same thing for the front of the lightsaber.
Step 9: Intro to Technical Drawing Dimensioning
The next main step of creating a technical drawing requires dimensioning the object, so anyone who receives the technical drawing can figure out how large each part of the object is, and distances between various parts on the object, and radii of circular objects, so that if the object is ever to be made, it can be made to scale.
There are a few important things to not before beginning dimensioning. First, not everything on every view needs to be dimensioned. If something is already dimensioned on one view, it doesn’t need to be done again on another view. For example, the length of the lightsaber will be the same on the front and side view. But it only needs to be shown on one view. That being said, you can dimension it in all views, if you choose to do so or if you think it is necessary. In general, it is better to over dimension than to under dimension in case you miss something. Second, CATIA V5 dimensions in METRIC UNITS. While you can change each dimension individually, it is easiest to change them all at the end, which will be discussed. Finally, most of the dimensioning in this example will be done on the side view. If you would like to dimension the top of front primarily, that is up to your choice and up to personal preference.
First we are going to dimension the total length of the lightsaber on the side view. To do this, locate the Dimensions toolbar, the second image. Click on the “dimensioning” button on this toolbar, the third image. This may open up another toolbar with various types of dimensioning options. If this happens to you, for this step, choose “force horizontal dimension view”. You will have to change this later when vertical views are being done.
Step 10: Basic Dimensioning
Once “dimensioning” is chosen, click on the edge point on the very tip of the lightsaber. Next move your mouse to the farthest point along the lightsaber. A line should follow your cursor as you do this. Click once on the farthest point, and move your mouse upwards (DO NOT click and drag). When the dimension line is far enough away from the lightsaber so it can be read, click down to plant it.
You need to create the other flat dimensions after this. Follow the same procedure as above, but measure various other things (the lightsaber width, the distance on the grip, the length of the fins at the end of the lightsaber, the cap length, etc.), until you believe that the length and width of everything in the drawing is marked. You do not need to do this for any circular objects (covered in the next paragraph). When finished, you should have something similar to the second image above.
It's okay if you can't read all of the numbers. They're exactly the same as the ones from the lightsaber CATIA file, and become clearer when printed (my screenshot isn't great)
Step 11: Dimensioning Radii
Next, you have to dimension the circular parts. To do this, go back to the dimensions toolbar and select the “Radius” option. Once this button is selected, click on one of the side circles on the lightsaber. This should create a radius dimension. Do this for the remaining circular objects. You should have a final image similar to final picture above.
Step 12: Dimensioning Other Views
Repeat these processes for the front and top views, keeping in mind that everything only needs to be dimensioned once to get an image like the ones above. Remember also, it's better to over dimension than to under dimension, so do as much as you are comfortable with.
Step 13: Unit Conversion
The final step required focuses on converting the units into English units. If you don’t use English units or are satisfied so far, at this point you have completed your technical drawing. If you would like to change them, first highlight all of the items on the screen by clicking and dragging to select everything. You’ll know everything is selected if everything is highlighted in orange. Next, go to the upper toolbar and select the Numerical Display Toolbar. Click on the arrow to open up the scrolling menu and select NUM.DINC. This should change all of the dimensions into English units.
Step 14: Final Checks
To check your final technical drawing, compare these measurements to the ones created in the part file. If they are correct, save your project to complete it, and it should look something like the final image above.


