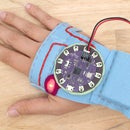
Introduction: CNC Conductive Fabric Circuit
There is a great way to cut conductive fabric using a Silhouette Cameo from an illustrator file, which is useful for prototyping and building projects that call for soft circuitry design or conductive fabric switches. You can get fairly precise cuts and create all kinds of iron-on electronic designs.
Soft circuitry is when you use soft conductive materials (thread, fabric, wool, etc.) to craft circuits using sewing techniques and electronic components.
The Silhouette Cameo is an electronic cutting tool that can trace an imported image, plus much more. It can cut materials such as card stock, sticker paper, fabrics ++. I have used it during the construction of wearable electronic prototypes, both professional and personal. It's great for cutting thin plastic and backed adhesives, such as Heat 'N' Bond too. It also affordable!
If you can't tell already, it is currently my favorite tool and every soft goods lab should have one :)
Step 1: Plan and Design Circuit
Get your circuit on to paper, this is before the illustrator step and captures the general layout and geometry, leaving the refinement to later.
You may be purely CAD and want to go straight to illustrator or use another software to lay your circuit design out. Of course, this is great too. The goal is to get an accurate layout of the circuits traces, where all your components will either be sewn or soldered to.
Step 2: Build Circuit Using CAD
Using Illustrator or something similar, trace and build the paths that will be the traces of the circuit. What ever the final image be will be taken into the Silhouette software, traced, then cut out.
Start by using the pen tool or line tool to draw all the traces.
Put the original drawing on a separate layer as your tracing. Toggling in between the vector illustration and the original helps to be aware of component placement as you go.
You can add larger pads where components will be soldered or sewn too.
Bump up the stroke of your traces without them getting too close to each other. I ended up going up to 4 pt.
Export your final as a .jpg or .png.
Step 3: Open in Silhouette Software
Install the software on your computer using the CD your silhouette came with. You can also download the software form the website.
Open File
- Go to File > Open and select file. Once it opens, it's either going to be way too big or way too small. I'm not sure why this is. I looked around for some answers, but quickly went for a work around. Measure the length or width of the original in Illustrator and scale in Silhouette.
- To scale, click to select file, go to Object > Scale and type in your dimensions. This isn't ideal, especially if you are doing fine work that needs to line up with small components. Please leave a comment if you know how to import files and keep the saved dimensions!
- Position the image on the cutting mat where you want it to be.
Tracing
- Open the Trace Window, you can find a shortcut to it in the upper right corner.
- Click Select Tracing Area
- Draw a box around your image
- Click Trace Outer Edge
A red outline will appear around the outer edges of the image. This is the cut line!
Step 4: Prep Fabric and Cut
Test Cut From Paper
It's always a good idea to do a test cut to see if your components will fit, it cuts in the right size and so on.
Paper is perfect to do this with. When it all looks good, you are ready to move on to the final material! You will need to put the cut settings on the appropriate paper setting before you cut.
Prep Fabric
The conductive fabric I use to cut my circuit out of is Cobaltex from Lessemf.com with Heat 'n' Bond ironed onto the back. Shieldit Super iron-on conductive fabric works very well too. I prefer this fabric over needing to add Heat 'n' Bond to the back of Cobaltex.
- Take the Heat 'N' Bond, cut it to the size of your fabric or a little smaller.
- Iron to one side of the fabric. Lower the iron to a synthetic setting, when the setting is too hot, it's possible that the adhesive will permeate through the fabric to the other side.
- Prep a small piece to test cut settings.
Cut
- There are presets for different materials in the Silhouette software. I found that White Sticker Paper works well for Cobaltex that has Heat 'N' Bond adhered to the back with the paper backing peeled off.
Cut Settings
Blade : 2
Speed : 8
Thickness : 14
- Lay the test piece of conductive fabric on the cutting mat without the paper backing on it, load it in and select the White Paper
- Click Test Cut. If everything comes off the backing cleanly, put the circuit-sized piece on the cutting mat.
- Load the cutting mat and click send to silhouette. Lift up the lid to see the circuit will be cut right before your eyes! (and to keep an eye on things).
Step 5: Iron to Fabric
Printing Guide
You know have a cut and iron-on conductive fabric circuit. To help with placing the circuit on the final fabric it will live on, you can print the circuit design on the fabric it will live on as a guide.
To learn more about how to print onto fabric using a home printer check out my How to Print Fabric at Home 'ible.
In short:
Get some 8.5" x 11" packing labels, stick them to the back of some fabric and cut cleanly around the edges. This leaves you with a paper-backed piece of fabric at letter size.
Load it into you printer without any other sheets in the tray. Connect to your printer and print the image onto the fabric sheet. Use at your own risk, this may jam or damage printers, I have one dedicated to fabric printing.
You don't absolutely need a guide, but it helps a lot with alignment.
Iron
Once you have printed the guide, you can lay out your cut pieces and iron them down. If you can't print a guide, you can eyeball it or print it out on paper and making a stencil.
Step 6: Prep Components and Attach
Gather your components and prep them.
Prep Components
Depending on what you are using, you can choose from several ways to help the mating of them to your fabric circuit.
shown are:
- Bending pins to make flat
- Clipping and curling ends to make sewable tabs or more surface to solder to.
Attach
You can sew the components that you curled the ends of to the fabric traces. Or you can solder them, soldering is more fragile because it can not move with the fabric base. If you solder your components I recommend reinforcing the connections. I will go over that in the next step.
Here I have soldered everything, just to illustrate it.
Some tips for soldering to fabric:
- lower your soldering iron, the fabric will burn up and the adhesive will come undone. Find the sweet spot, the temp I worked with was 550 ºF.
- drop solder down on to the contact points, place pin of component on top and apply heat with the soldering iron.
- work quickly and be aware of how long you are holding the soldering iron to the fabric.
Step 7: Reinforcement and Insulation
There are a few ways to ensure that your conductive traces will not touch each other and to help reinforce the connections you have made. Some of the options use molding techniques, such as silicone or polyurethane, listed below are two readily available options that don't require much of a learning curve to use.
1) Plasti Dip
This product is an air-cure rubber that comes in a couple different forms, spray-on or paint-on are the ones I have used. I recommend both, depending on what you are trying to achieve. The spray-on can create a nice, thin layer of rubber. The paint-on is actually made for dipping items into, such as the handles of tools to provide a better grip. This can be layered on as thick as you need for insulated and protecting connections. It also comes in clear, which is nice if you want your circuit to be shown for aesthetic purposes. Make sure to use this in a well ventilated area.
2) Iron-on Interfacing AKA Fusible Interfacing
These can be found at the local fabric store in different weights, depending on your base fabric. Fusible interfacing can be woven, knit or non-woven, I prefer woven or knit due to it's strength in comparison to the non-woven. Fusible interfacing is iron-on due to one side of the material being coated with hot-melt adhesive that will fuse to other fabrics once laid down, adhesive side down, on to another fabric and pressed with an iron. Use a knit for a knit substrate, so it can stretch with it and a woven for a woven fabric.


